Player Customization
Templates in Kinescope let you flexibly adapt the player’s appearance and functionality for different projects and tasks. Each template has a unique name and can be applied to individual videos or to an entire project. For example, you can create one template with visible controls for educational videos and another with a minimalist design and hidden progress bar for promo clips.
Who this article is for
- Designers — need to configure the player’s appearance to match the brand
- Content managers — need to create different templates for different content types
- Developers — need to configure player behavior programmatically
Creating a new player template
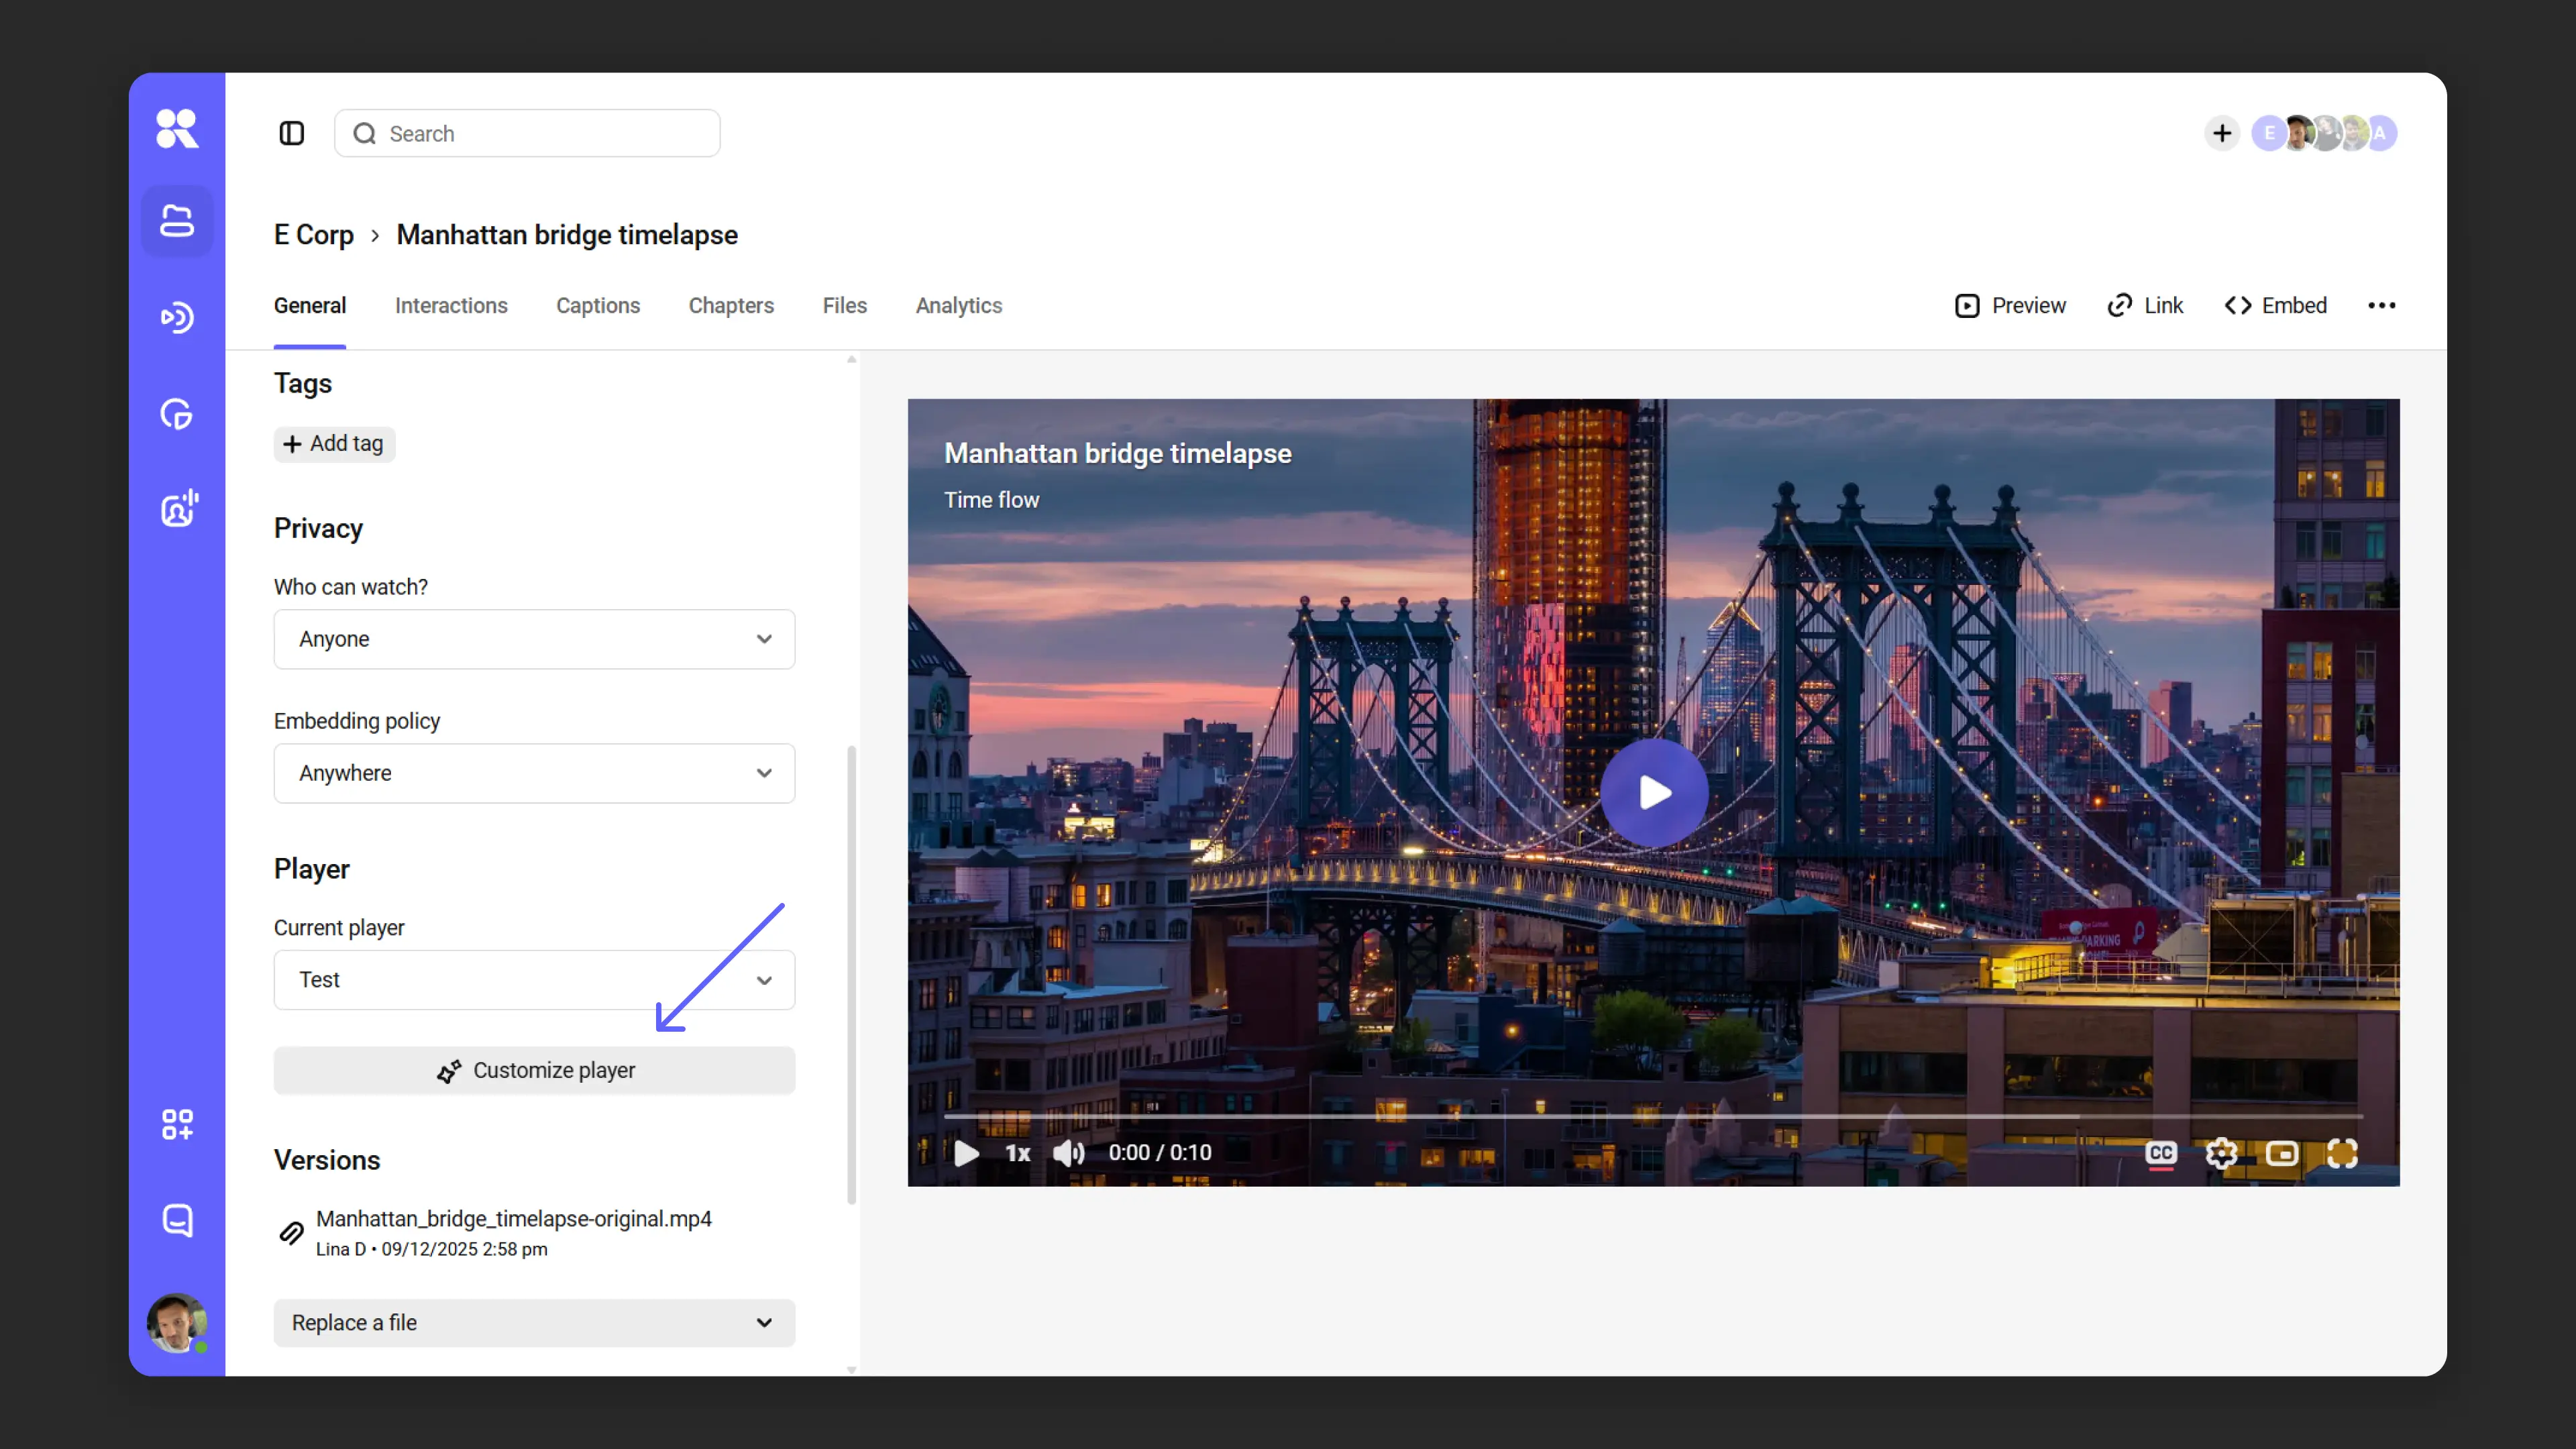
From video settings
- In the Catalog, open the video settings by double-clicking on its name.
- Go to the “Basic” tab, in the “Player” section click “Configure” or select “Create new player”.
- Set a template name, change at least one setting, and click “Save”.
- The player will be applied to this video and will also become available in the settings of other clips and in the Template Manager in workspace settings.
Via the template manager
- Go to the Template Manager via “Settings → Players”.
- Click “New player”, set a name, and open it for editing.
Editing templates
From video settings
- In the catalog, double-click the video name.
- Go to the “Basic” tab → “Player” section. Select the desired template and click “Configure”.
- Make changes and save them.
Via the template manager
- In the “Settings → Players” section, find the desired template.
- Click on the template name to edit.
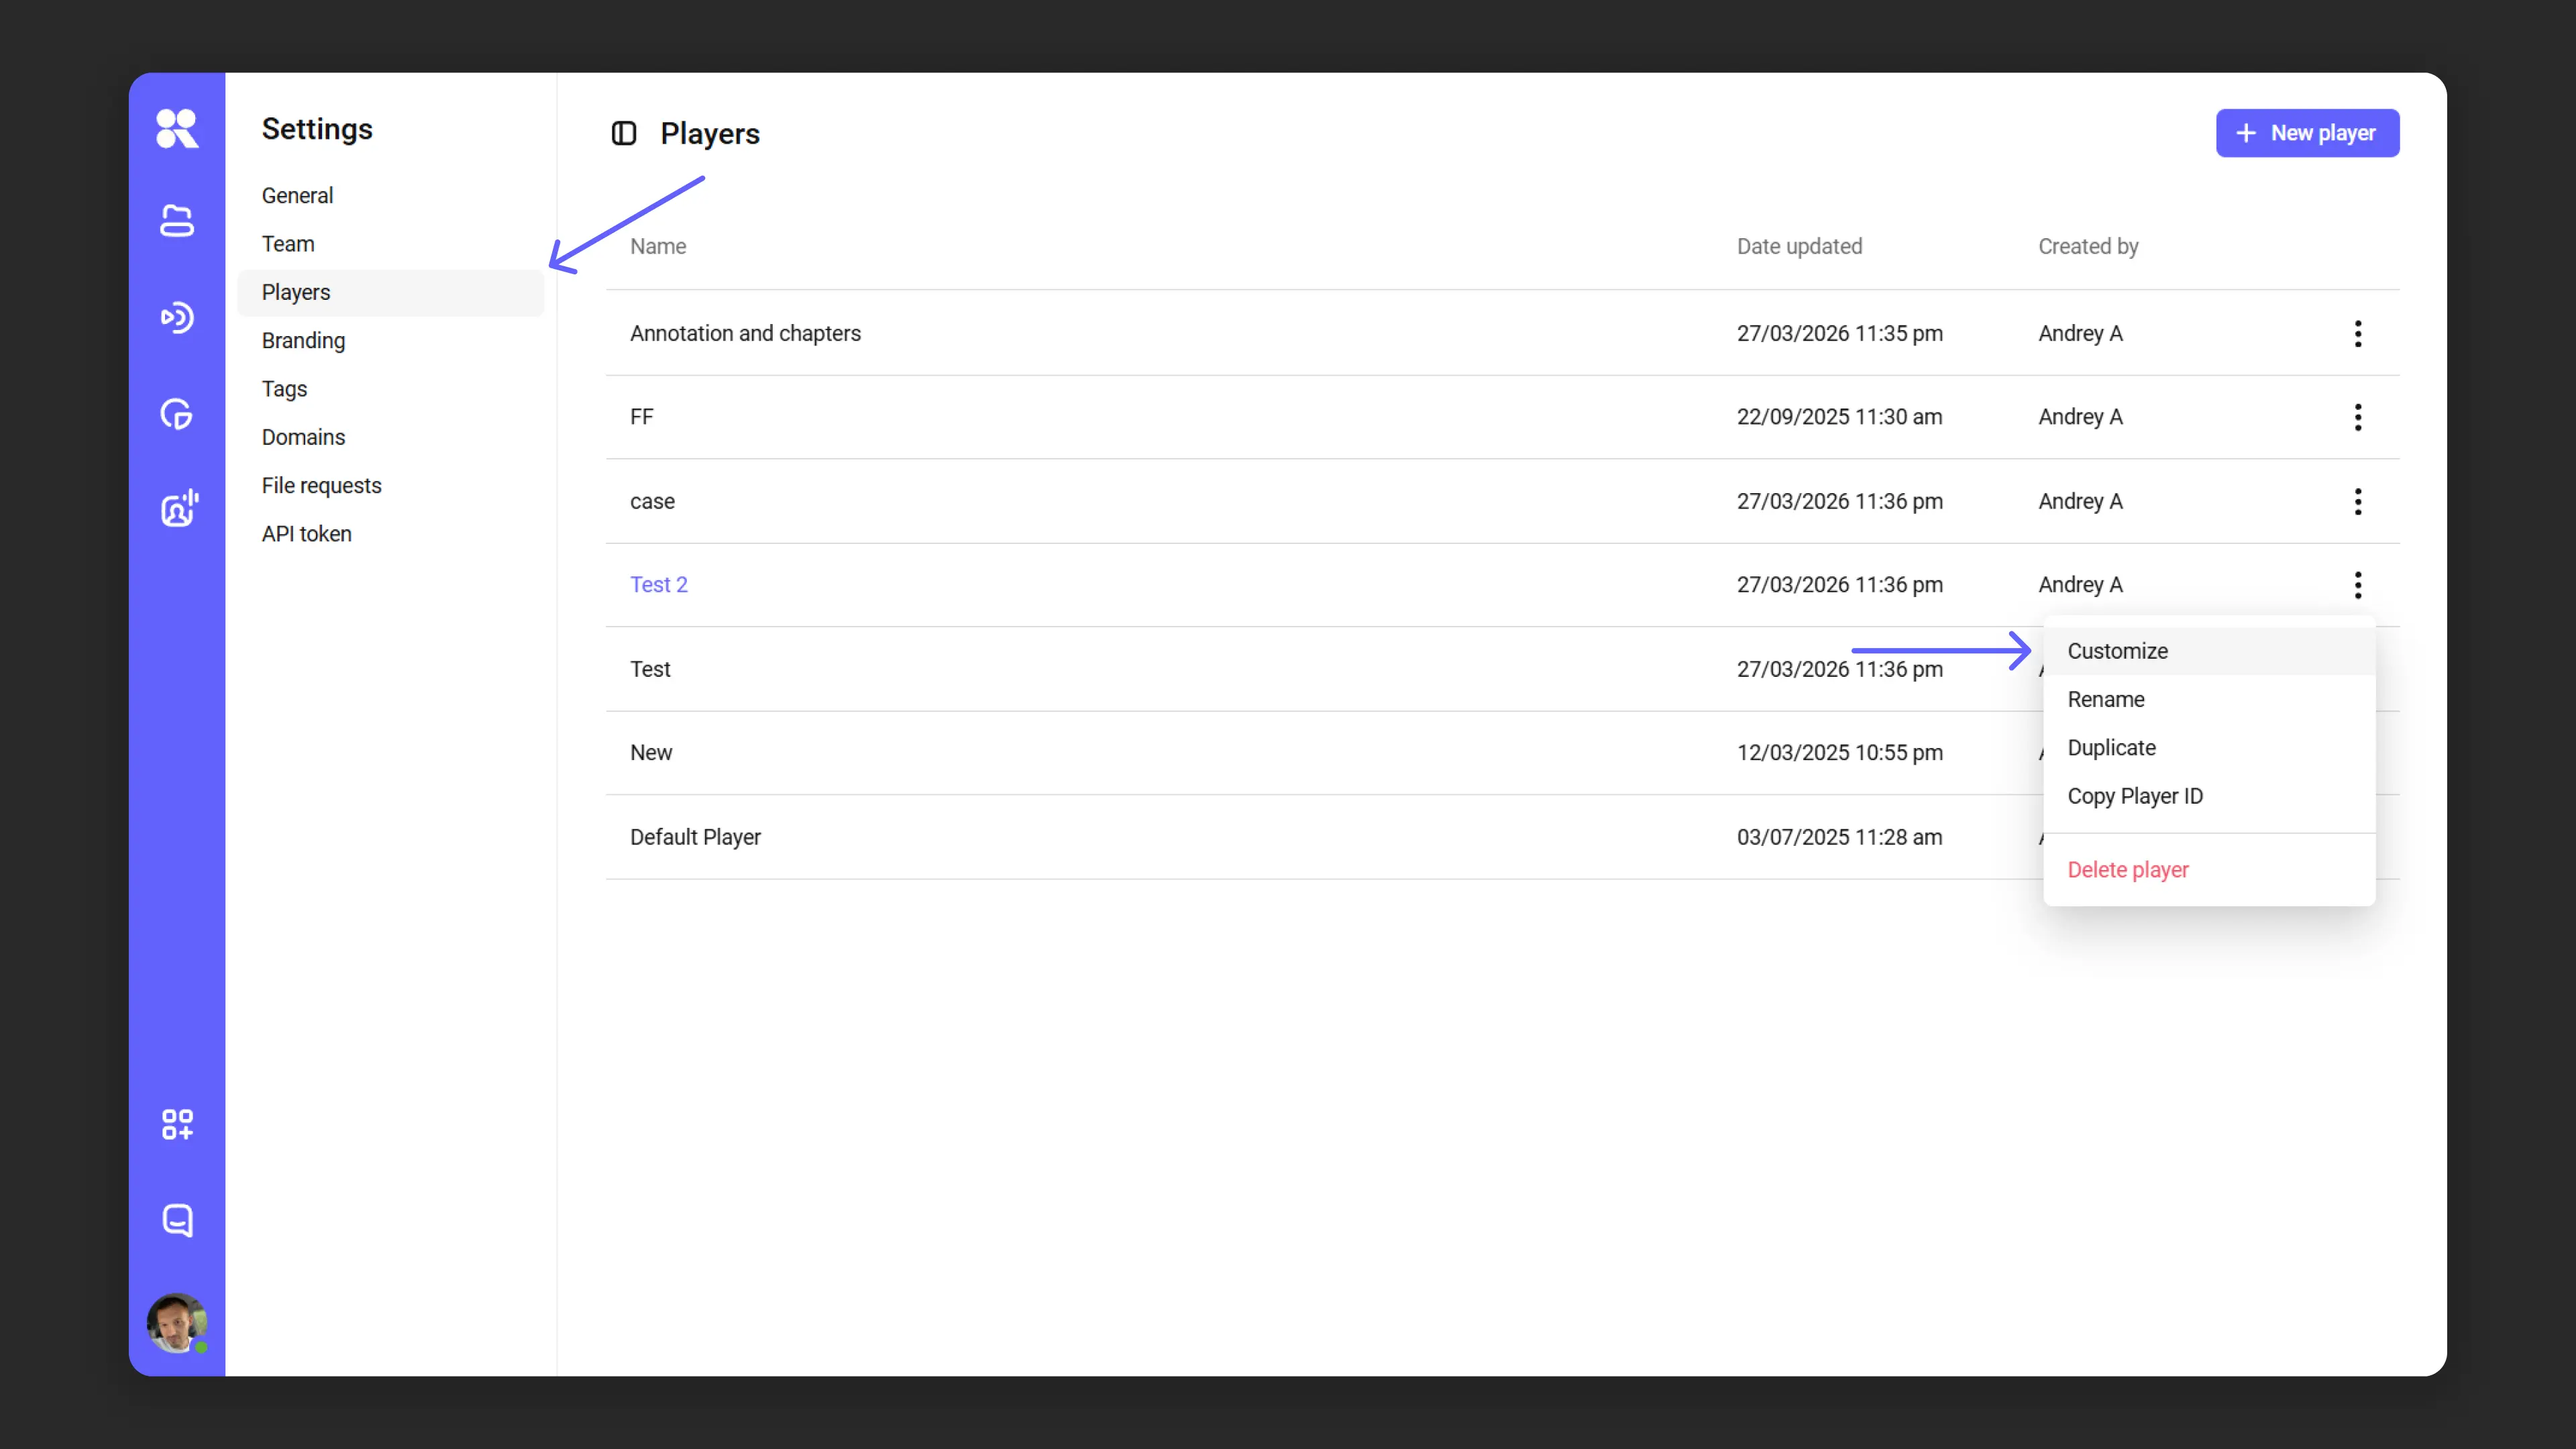
The template manager shows the names of all player templates available in the workspace, as well as: the update date, author, and the number of files to which each template is applied. Clicking on that count shows all files in the catalog filtered by the selected player template.
To rename, duplicate, or delete a template, go to the menu (three dots next to the template).
Player behavior and appearance settings
The Kinescope player can be adapted for any task and project thanks to its wide range of settings. They are divided into two main categories:
- Basic: basic parameters, including settings before launching and during playback.
- Advanced: additional settings for player behavior, casting to devices, control element customization, and other functions.
Changes in settings are displayed in the preview area in real time. If you select the Monitor or Phone display mode, you can see how the finished template will look. It is very important not to forget to save settings, otherwise they will not be applied.
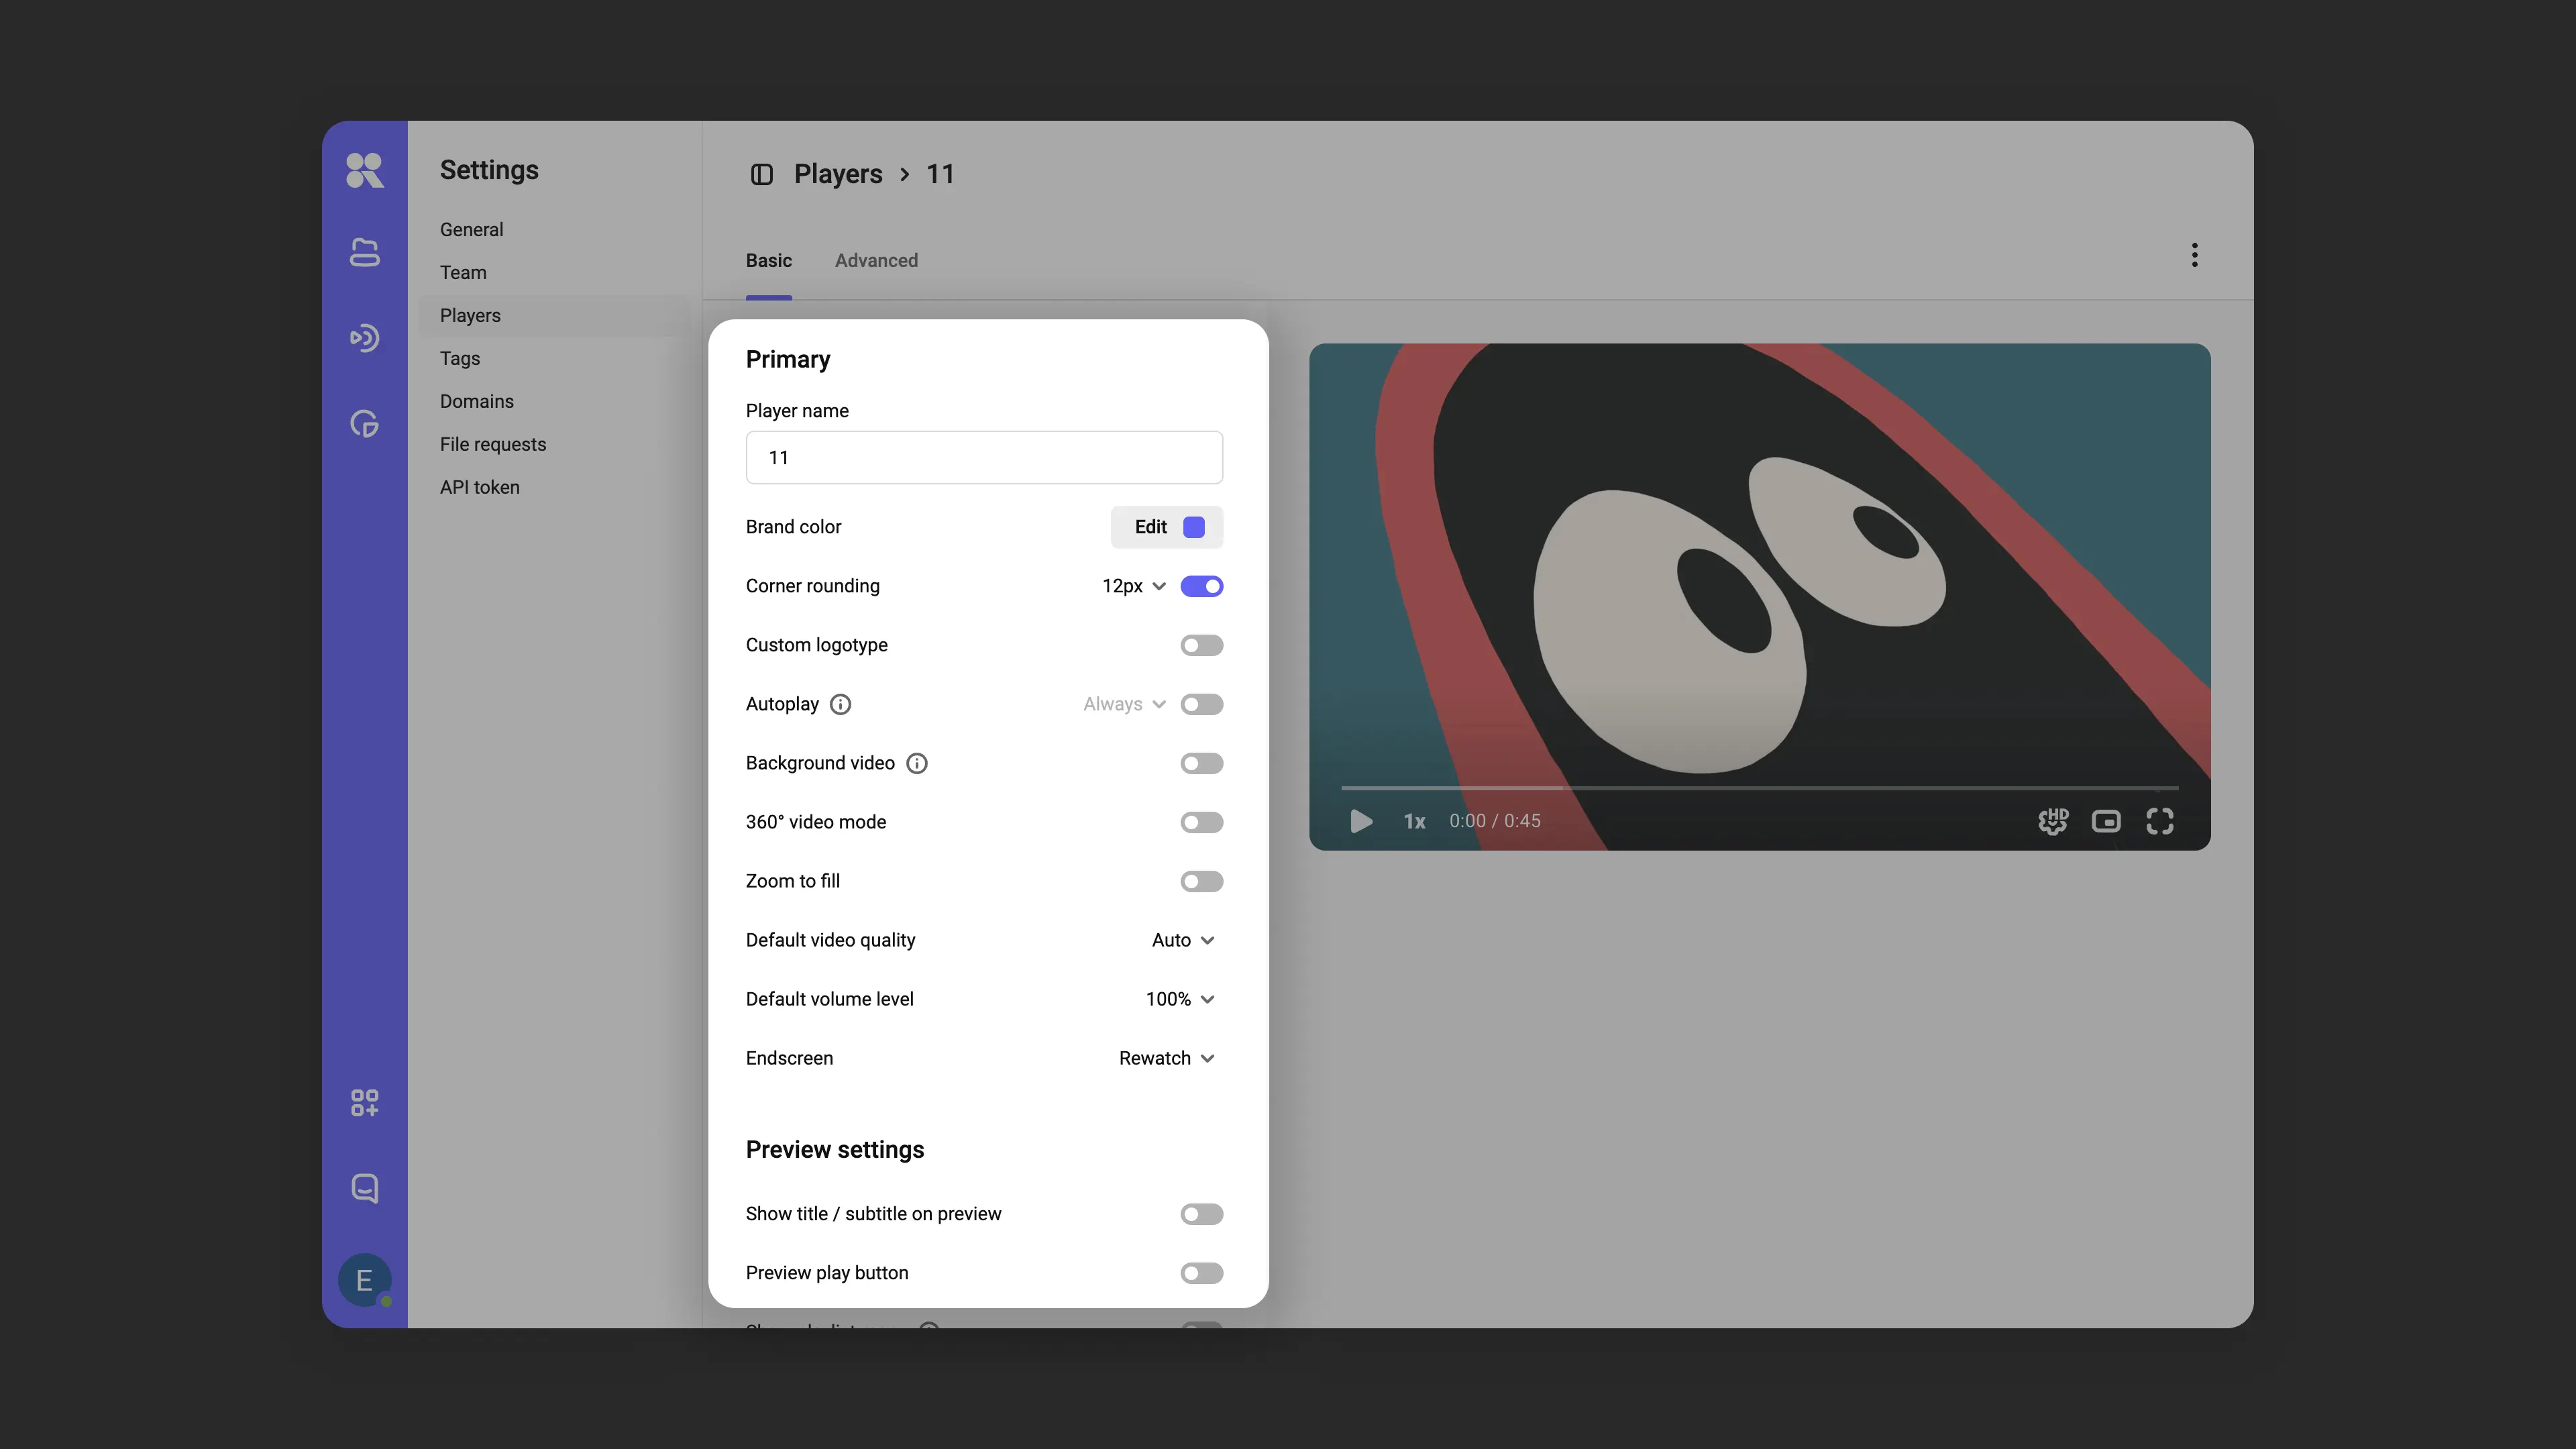
Basic behavior and appearance settings
Basic settings
Player basic settings interface:
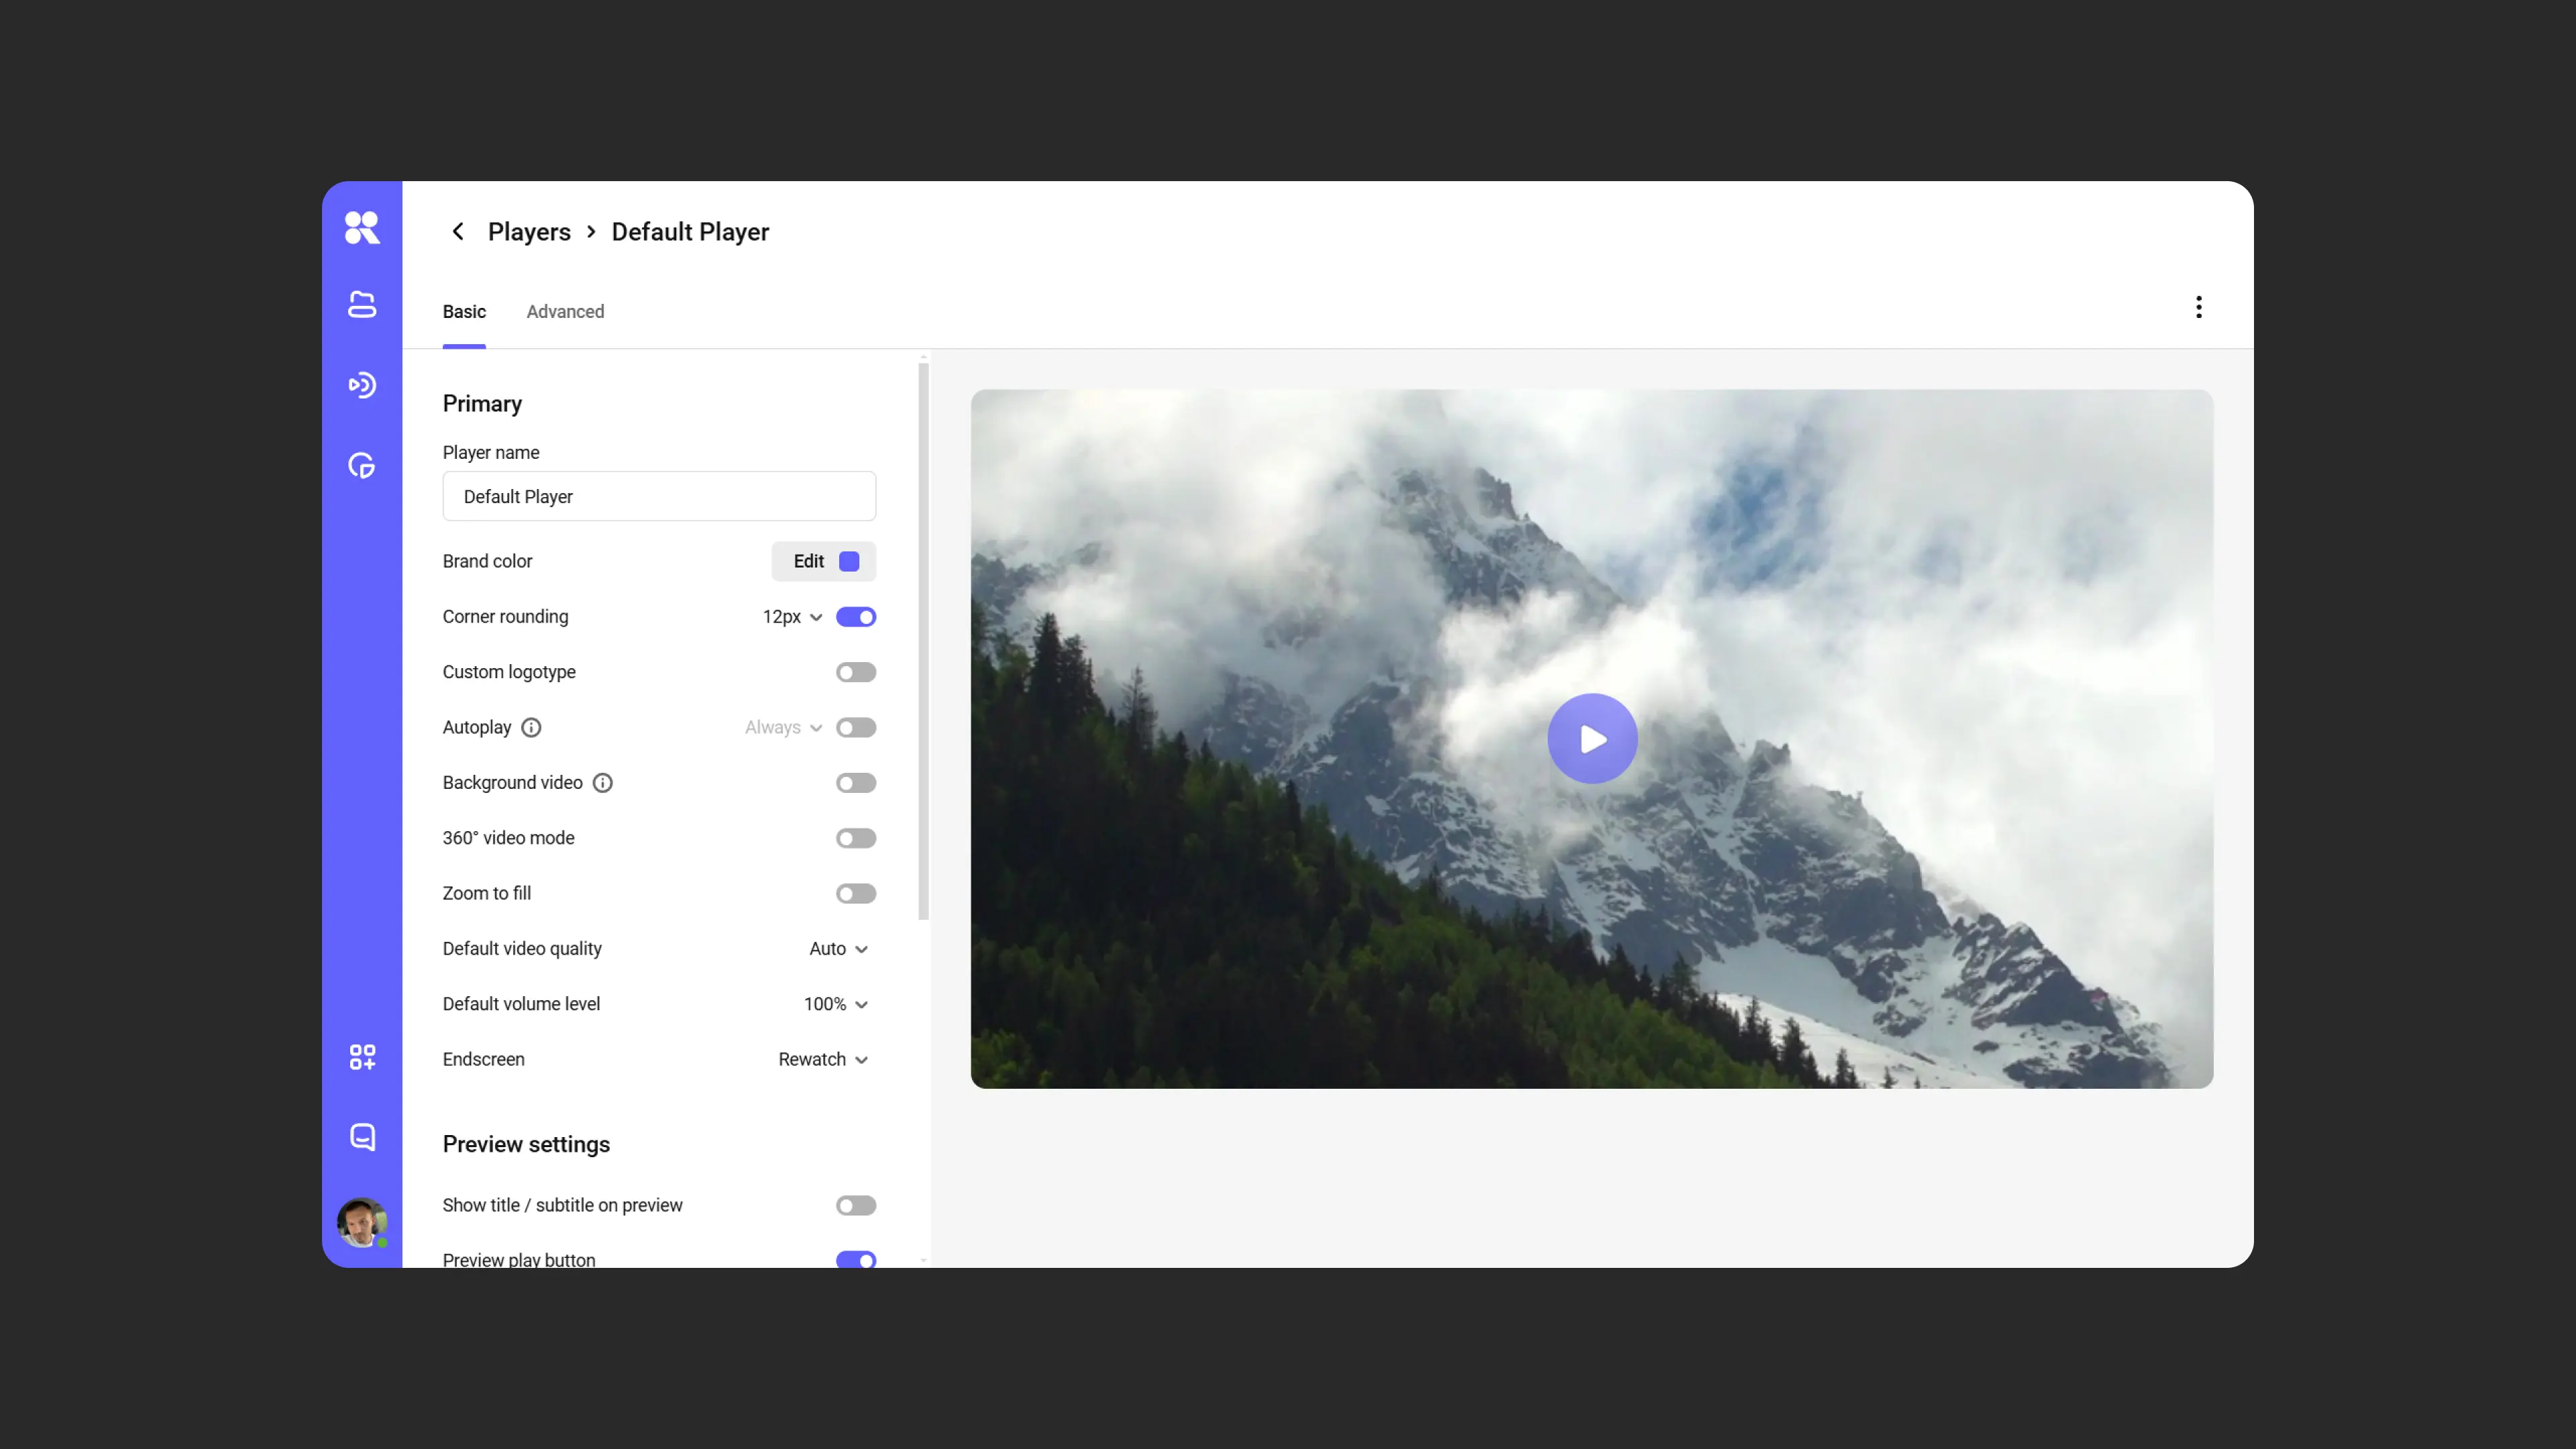
Player template name
Set a unique name for the template to make it easier to find, use for other videos, or edit via the template manager in the workspace.
Player color
Your brand’s corporate color can influence conversion. The color changes the large Play/Pause button, the progress bar, and the player control panel. The shade can be selected via a palette or by entering RGB or HEX code.
Corner rounding
Integrate the player into your site’s general style: in template settings you can round the player window corners from 0 to 24px.
Logo
Add a logo that will be displayed in the lower right corner of the player. Usually a 150×150 px image in PNG format is sufficient. You can also add a hover tooltip or a link that opens on click.
Example player with clickable logo:
Autoplay
Allows video to play automatically when the page loads.
Example player with autoplay:
Background video
Player settings for background playback:
- Player controls become invisible;
- Sound and autopause are disabled;
- Video plays automatically and repeats.
360° mode
Mode for viewing panoramic, spherical video.
Remove black bars
This setting stretches the video to the player’s borders to remove black bars at the edges. Especially useful for non-standard video resolutions.
Default volume
Set the volume level when starting video from 0% to 100%, so the sound level is immediately comfortable for viewers.
Default video quality
Select the video stream quality that will be used when starting video. Available options:
- Auto (default): The player determines quality based on connection speed.
- Set quality: e.g., 720p or 1080p.
Default playback speed
Set the playback speed at which video starts for all viewers. Available range: 0.25× to 2×. By default, speed is normal — 1×.

If Playback speed is enabled in the player’s advanced settings, the viewer can change speed while watching.
Behavior at video end
Choose what happens after the video ends. Four scenarios are available:
- Replay button: allows viewers to restart the video by clicking.
- Return to poster: the video returns to the original screen with the poster.
- Loop: automatic repeated video playback.
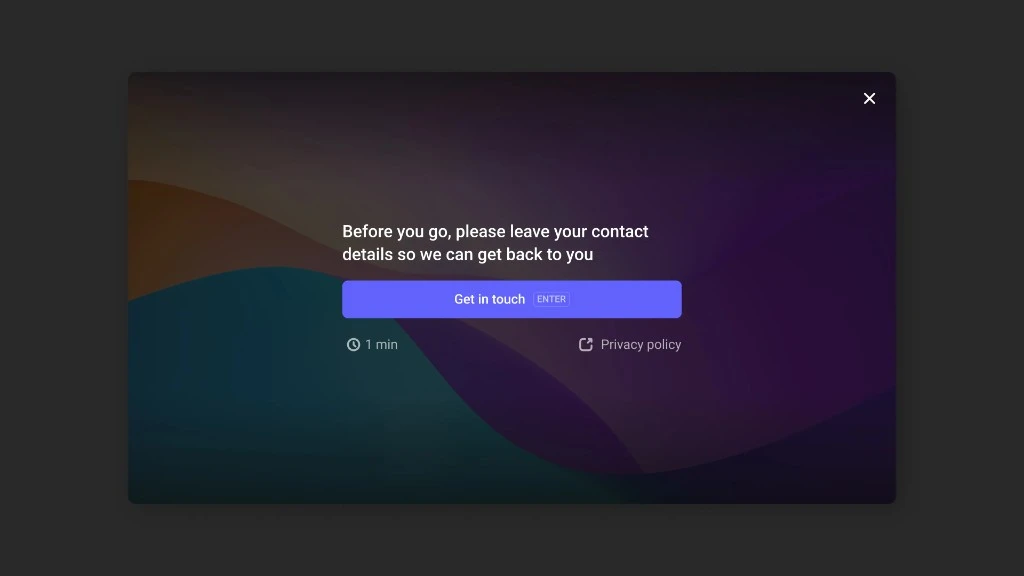
- Call to Action (CTA): at the end of a video or playlist, you can add a button with a link. Specify a title, description, and direct the viewer to the next step: site, course, registration, or purchase. The call to action will look like this:
Download video
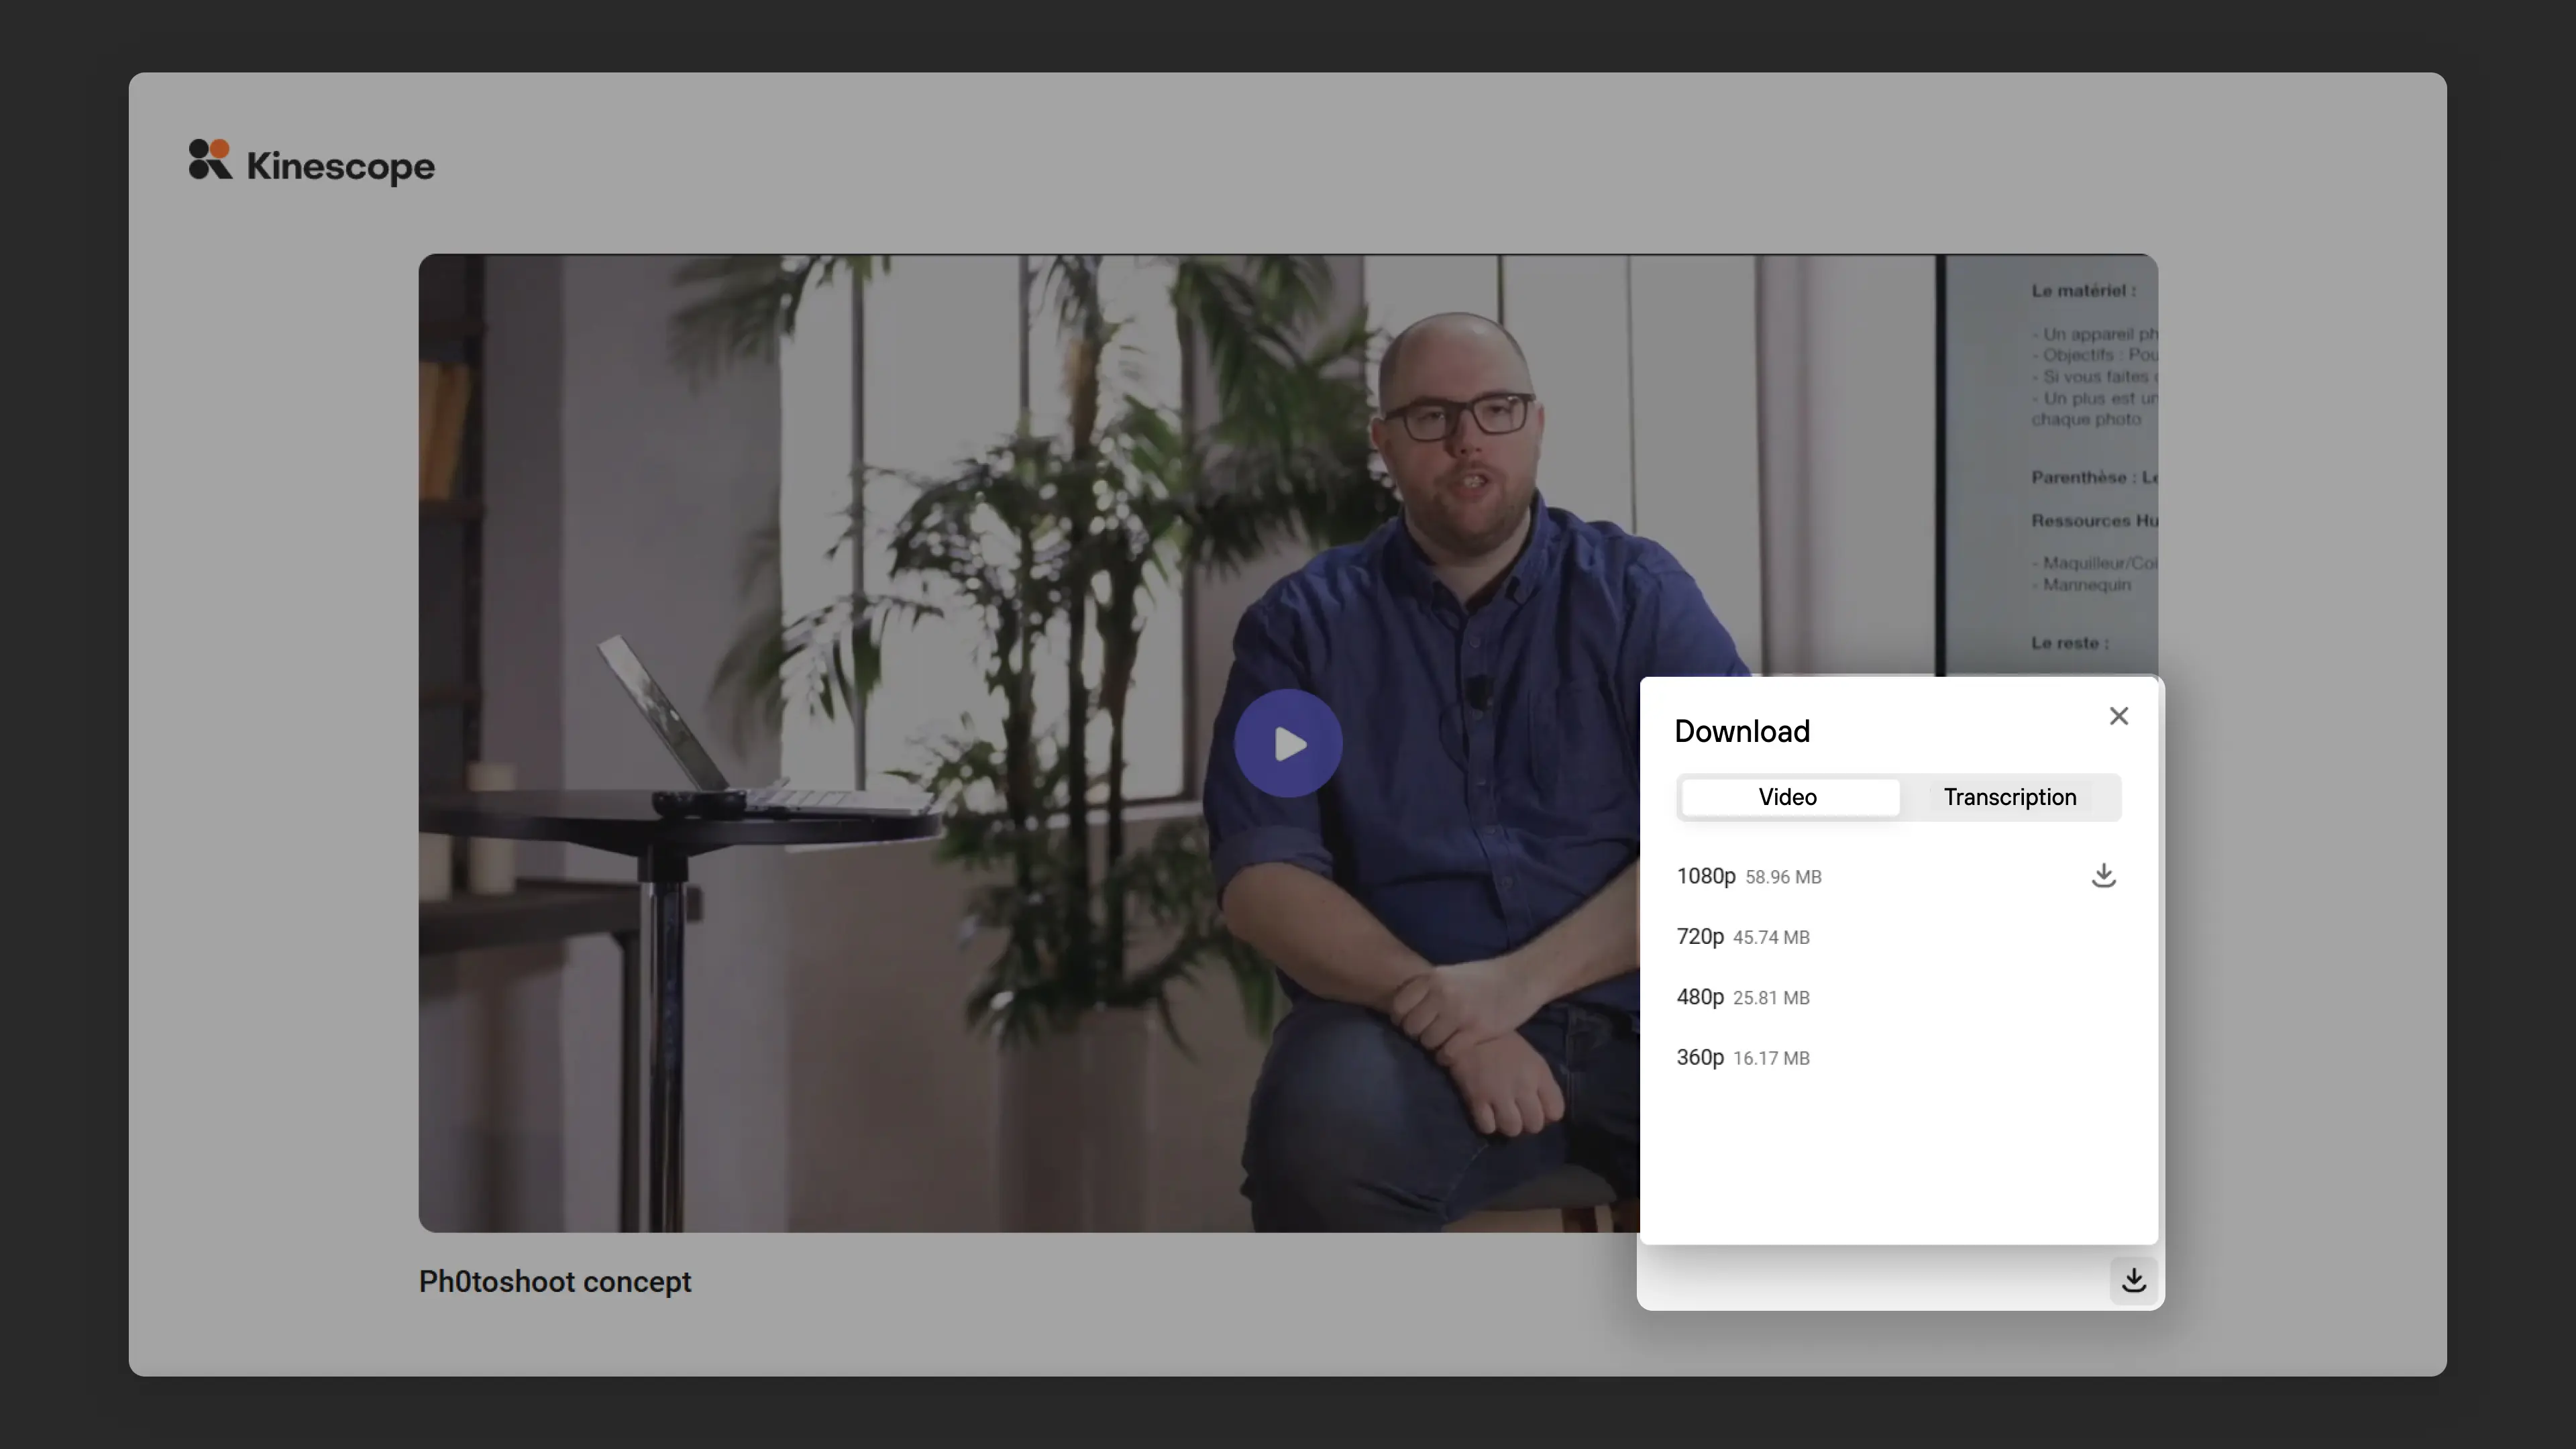
Allows viewers to download the video. Downloading is disabled by default. When enabled, a download button appears in the player: inside the player window for the embedded player, and as a separate button below the player when watching via a direct link. The button opens a window with two tabs:
- Video — a list of available resolutions with file size (360p, 480p, 720p, 1080p). The viewer picks one and downloads the file.
- Transcription — tracks with a text transcript. The tab appears if at least one track has been added to the video.
Before launch
Player element display settings before playback starts:
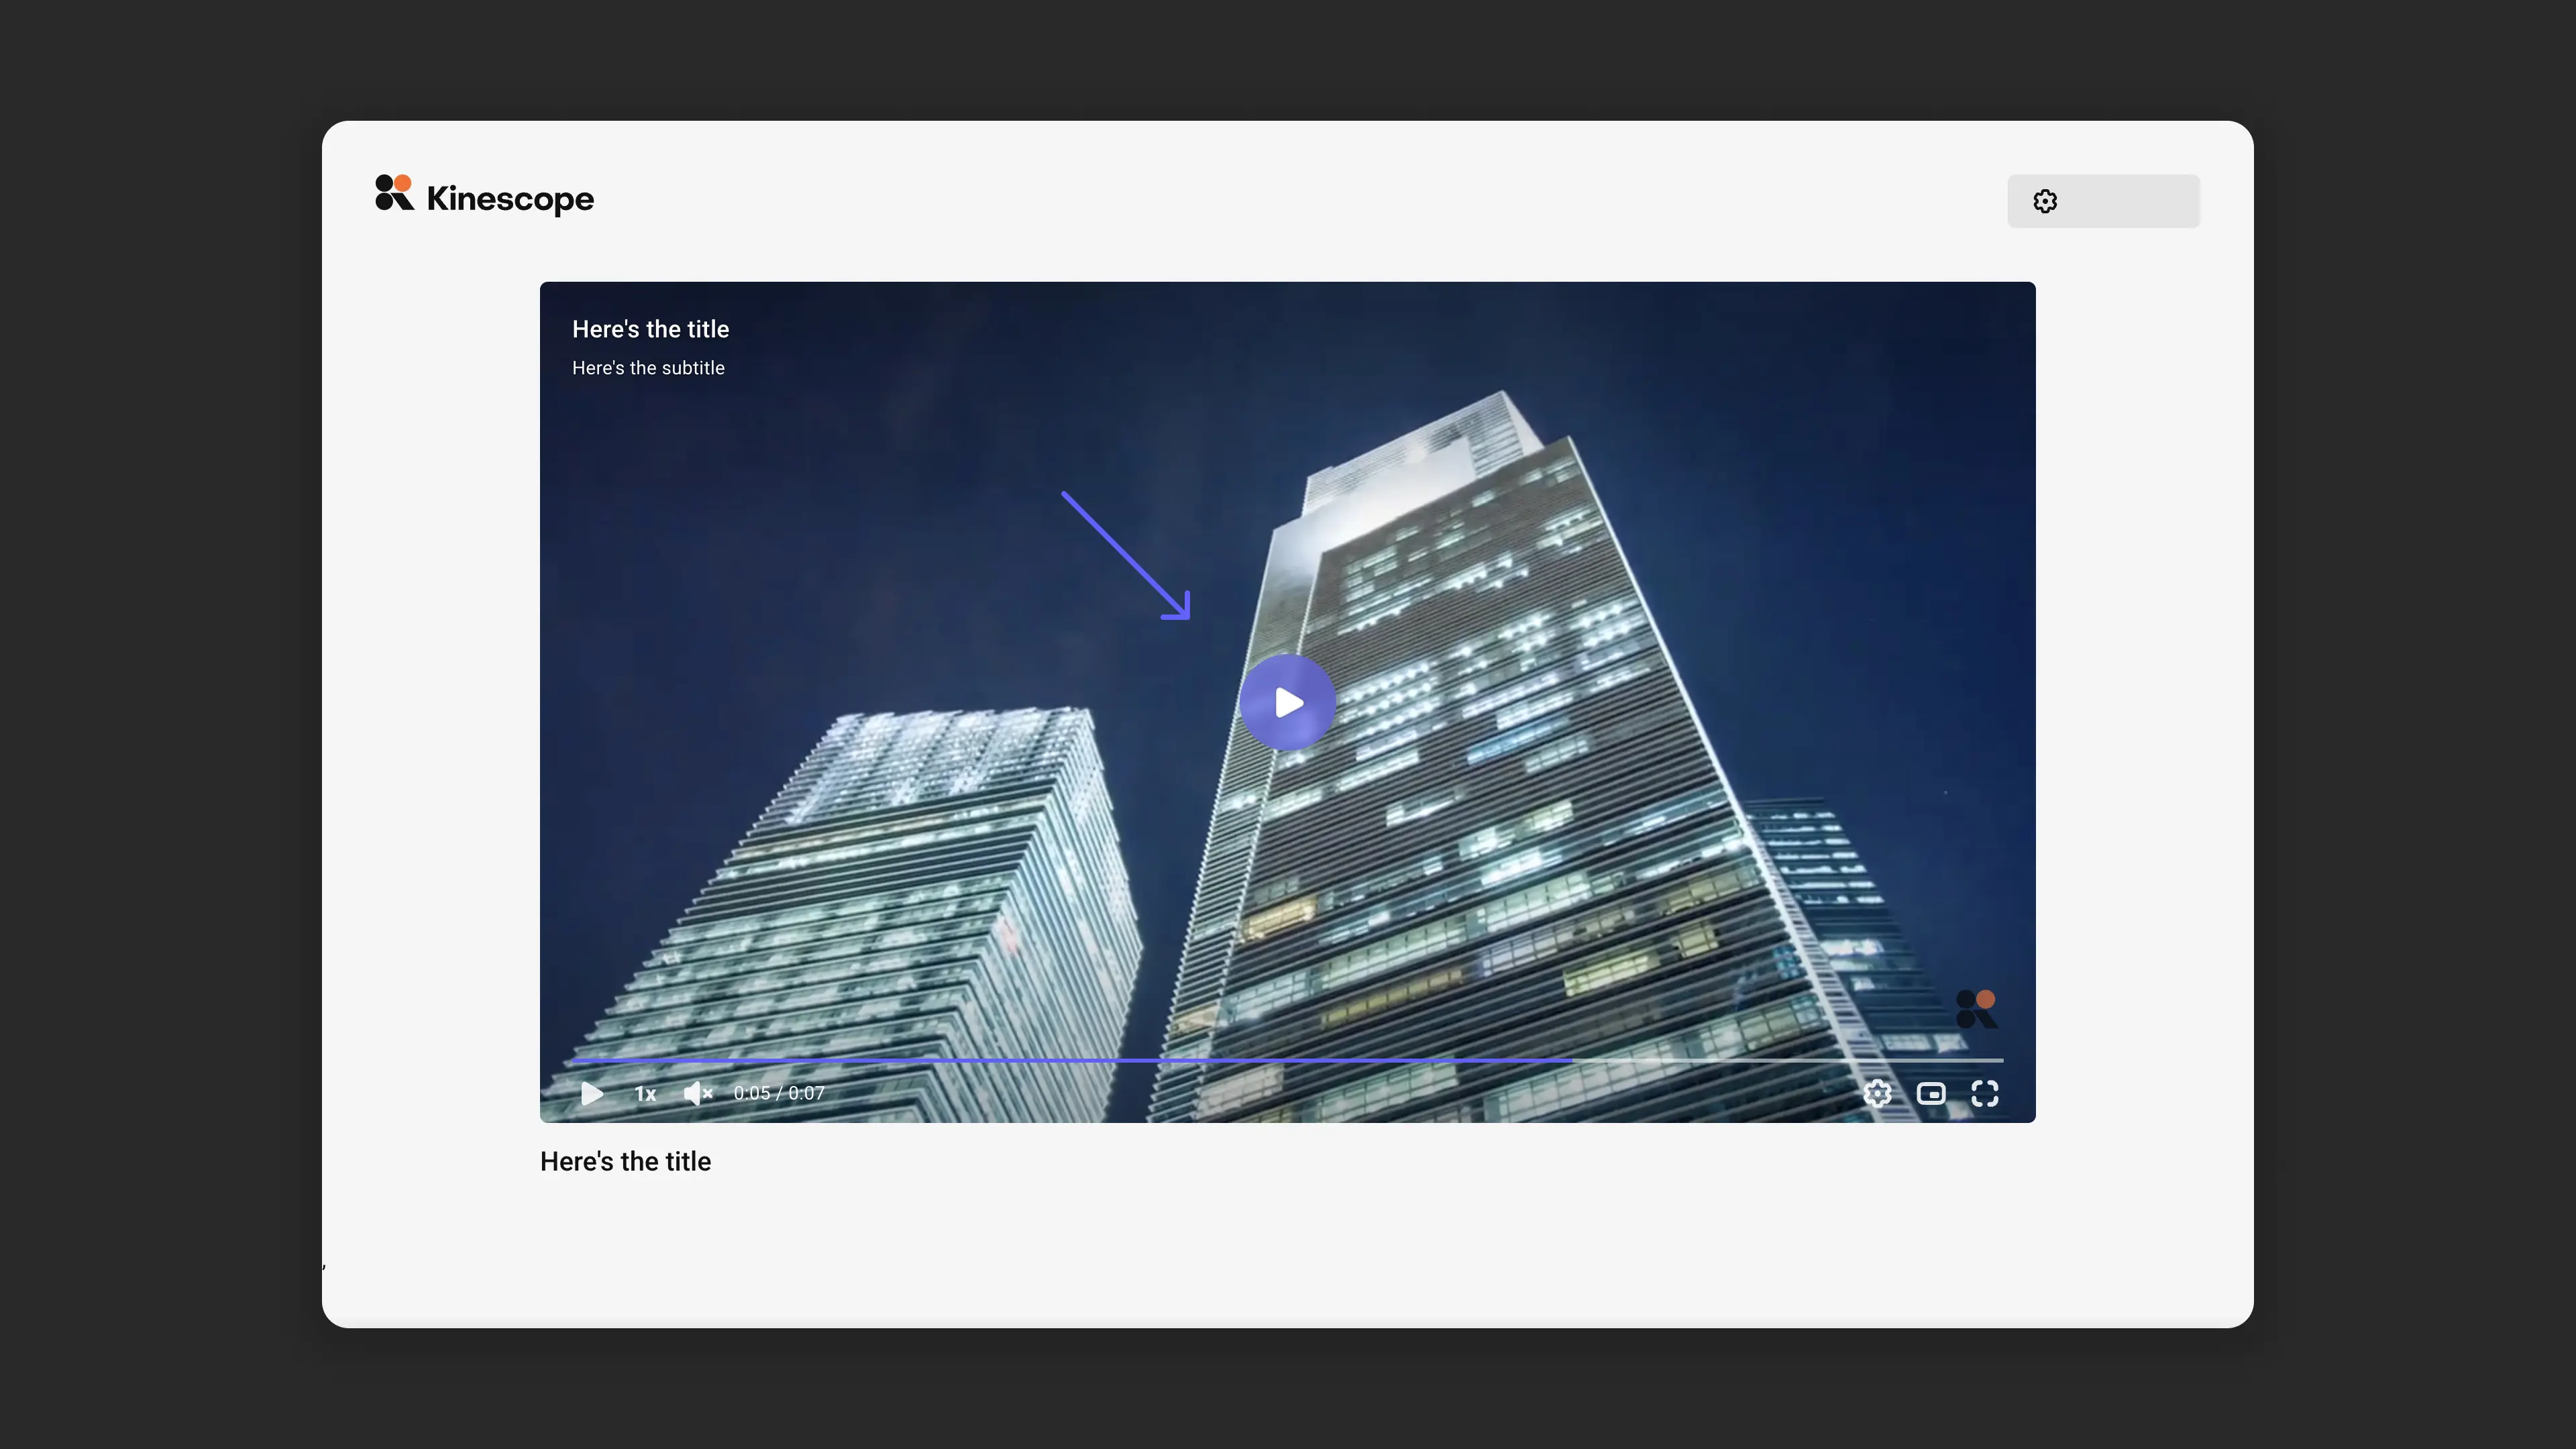
Title and subtitle
The video title and subtitle will be displayed in the upper left corner of the player before launch if they are specified in the video settings on the Basic tab. These elements are hidden by default.
Example title and subtitle display in the player:

Play button
By default the Play/Pause button is displayed in the center of the player before playback starts, but it can be hidden with this setting.
Example player with play button:
Control panel
By default it is hidden, making the player design minimalist. If preloading is enabled in the player’s advanced settings , the player control panel will be displayed before the clip starts.
Example control panel display before launch:

During playback
Player element display settings during playback:
Player playback settings allow customizing the display of titles, progress bar, and control panel.
Progress bar
This option allows hiding the progress bar during video playback. This can be useful for promo videos where it’s important to hold the user’s attention from start to finish. The progress bar is enabled by default.
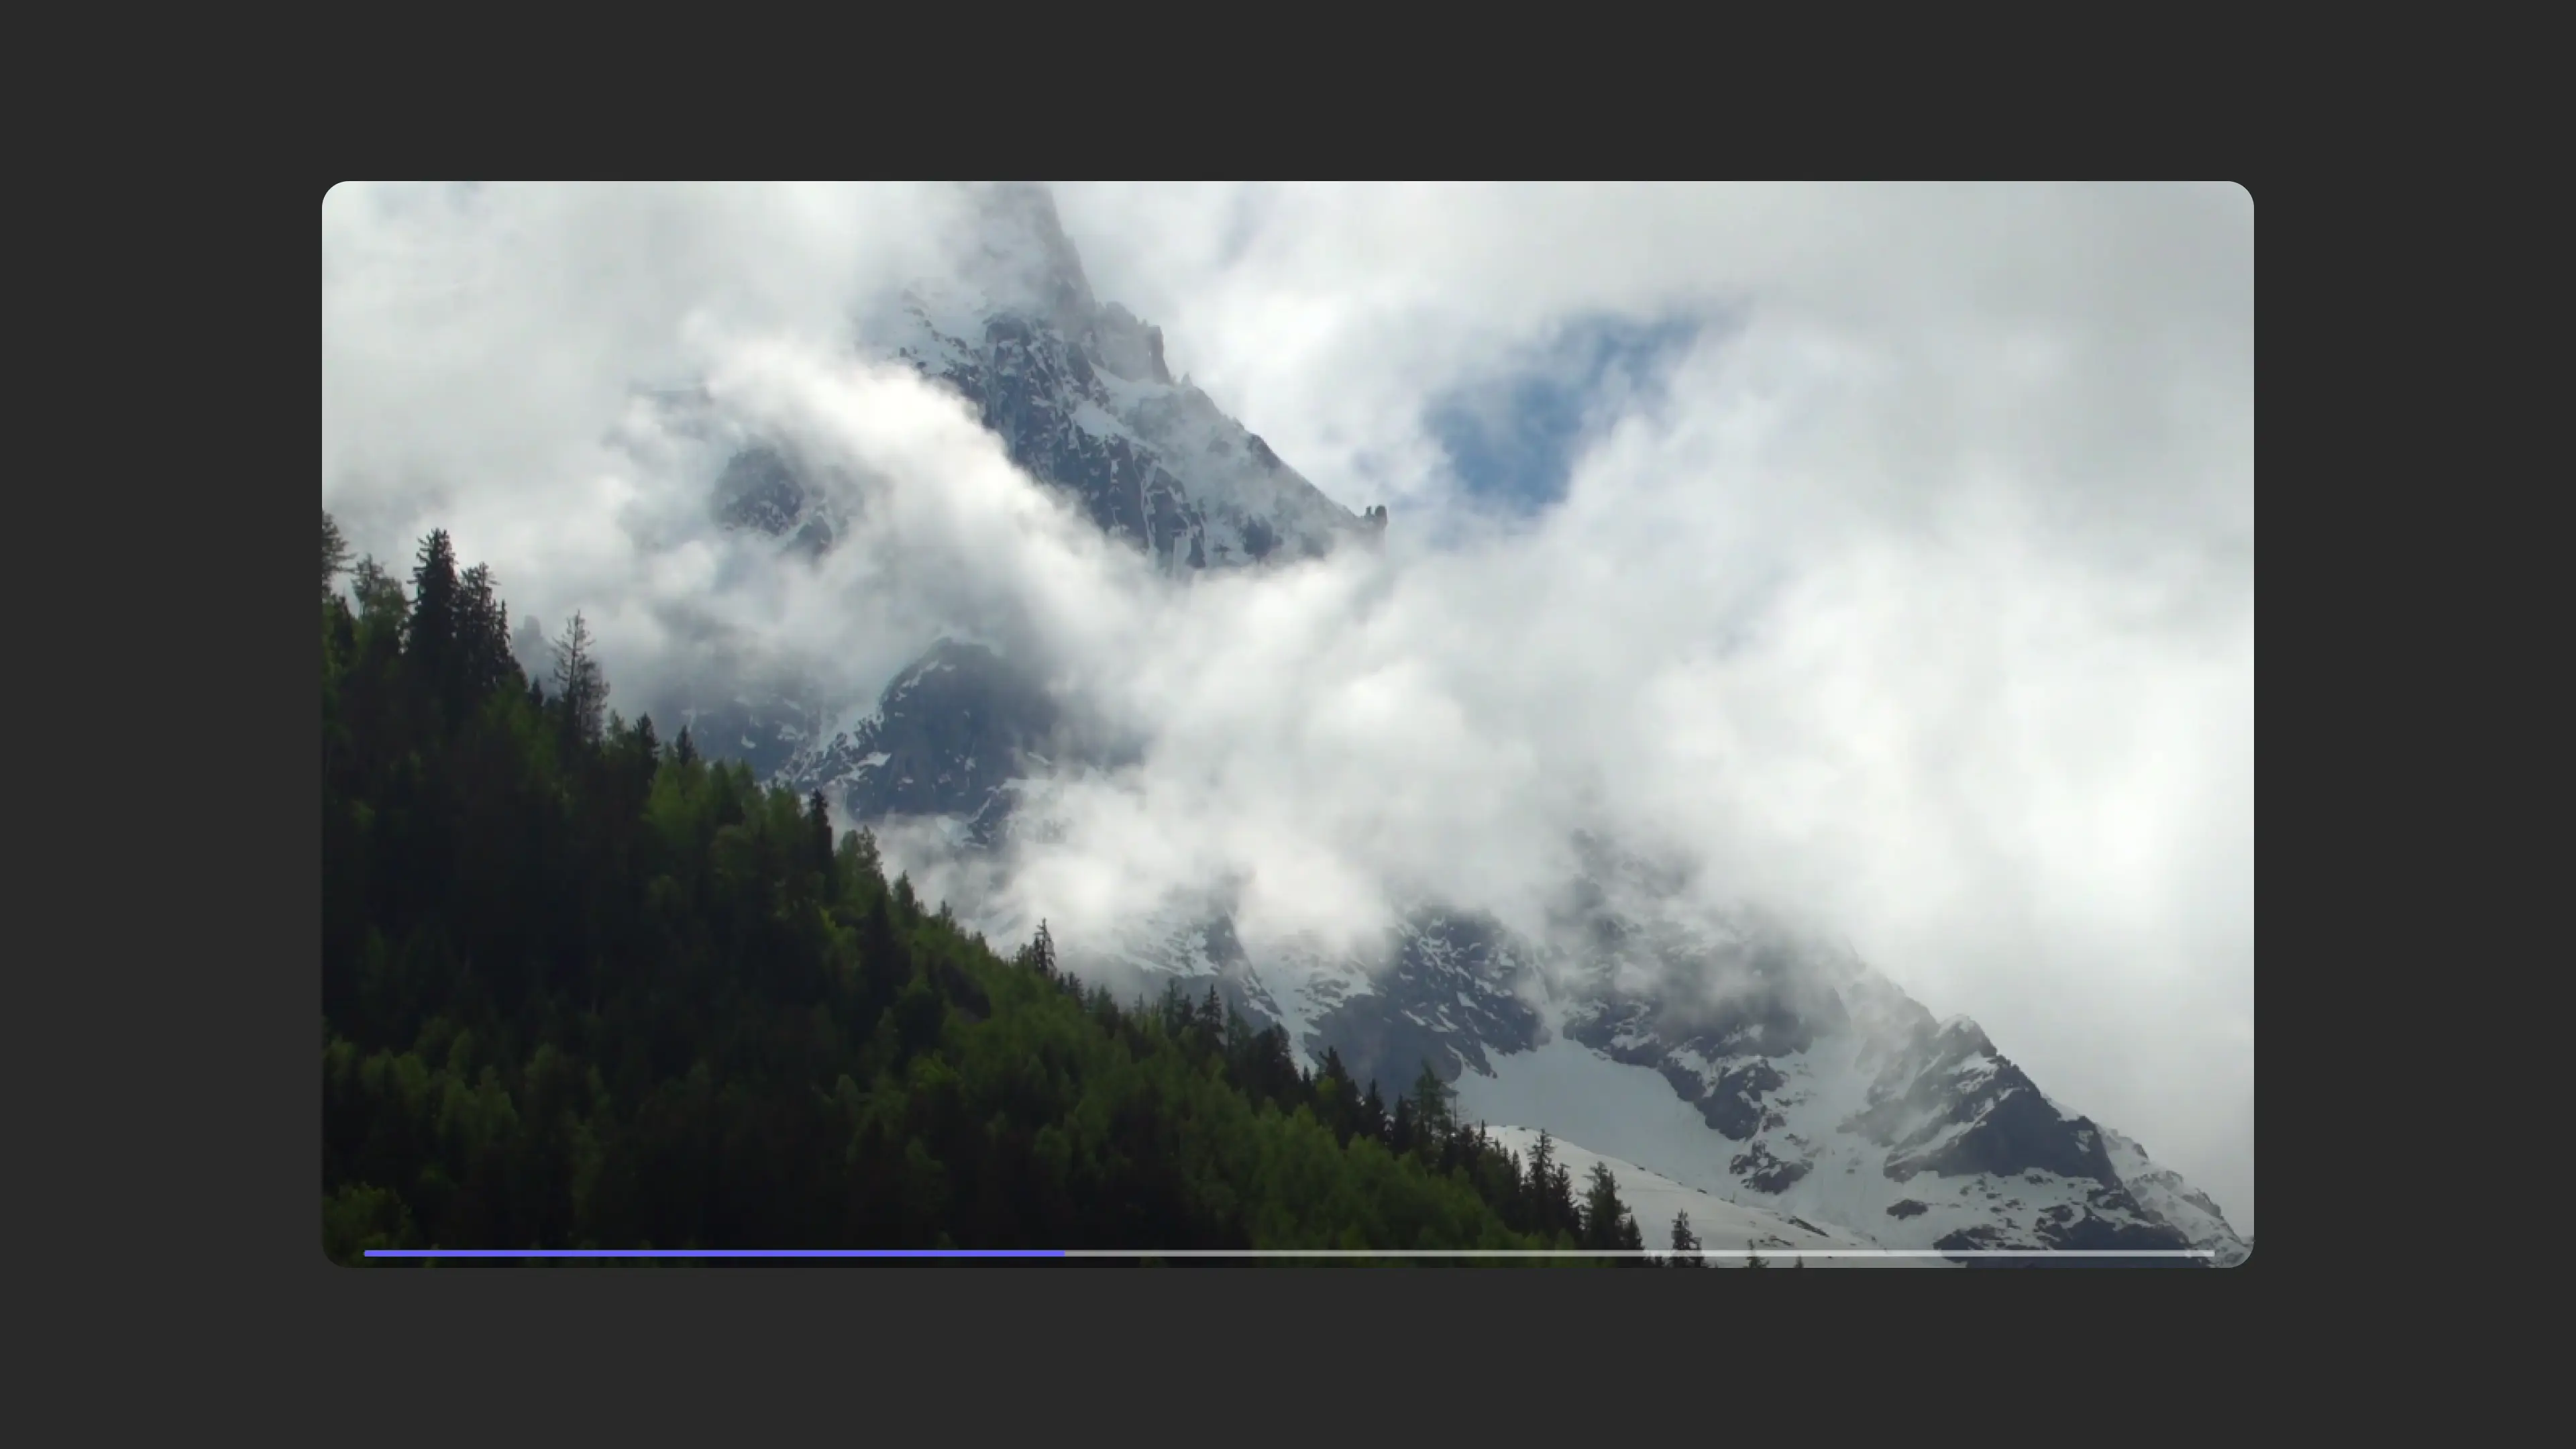
Example player without progress bar:

Control panel
You can completely hide the control panel during playback, leaving only the progress bar if it’s not disabled. The control panel is shown by default.
Example player without controls (video only):
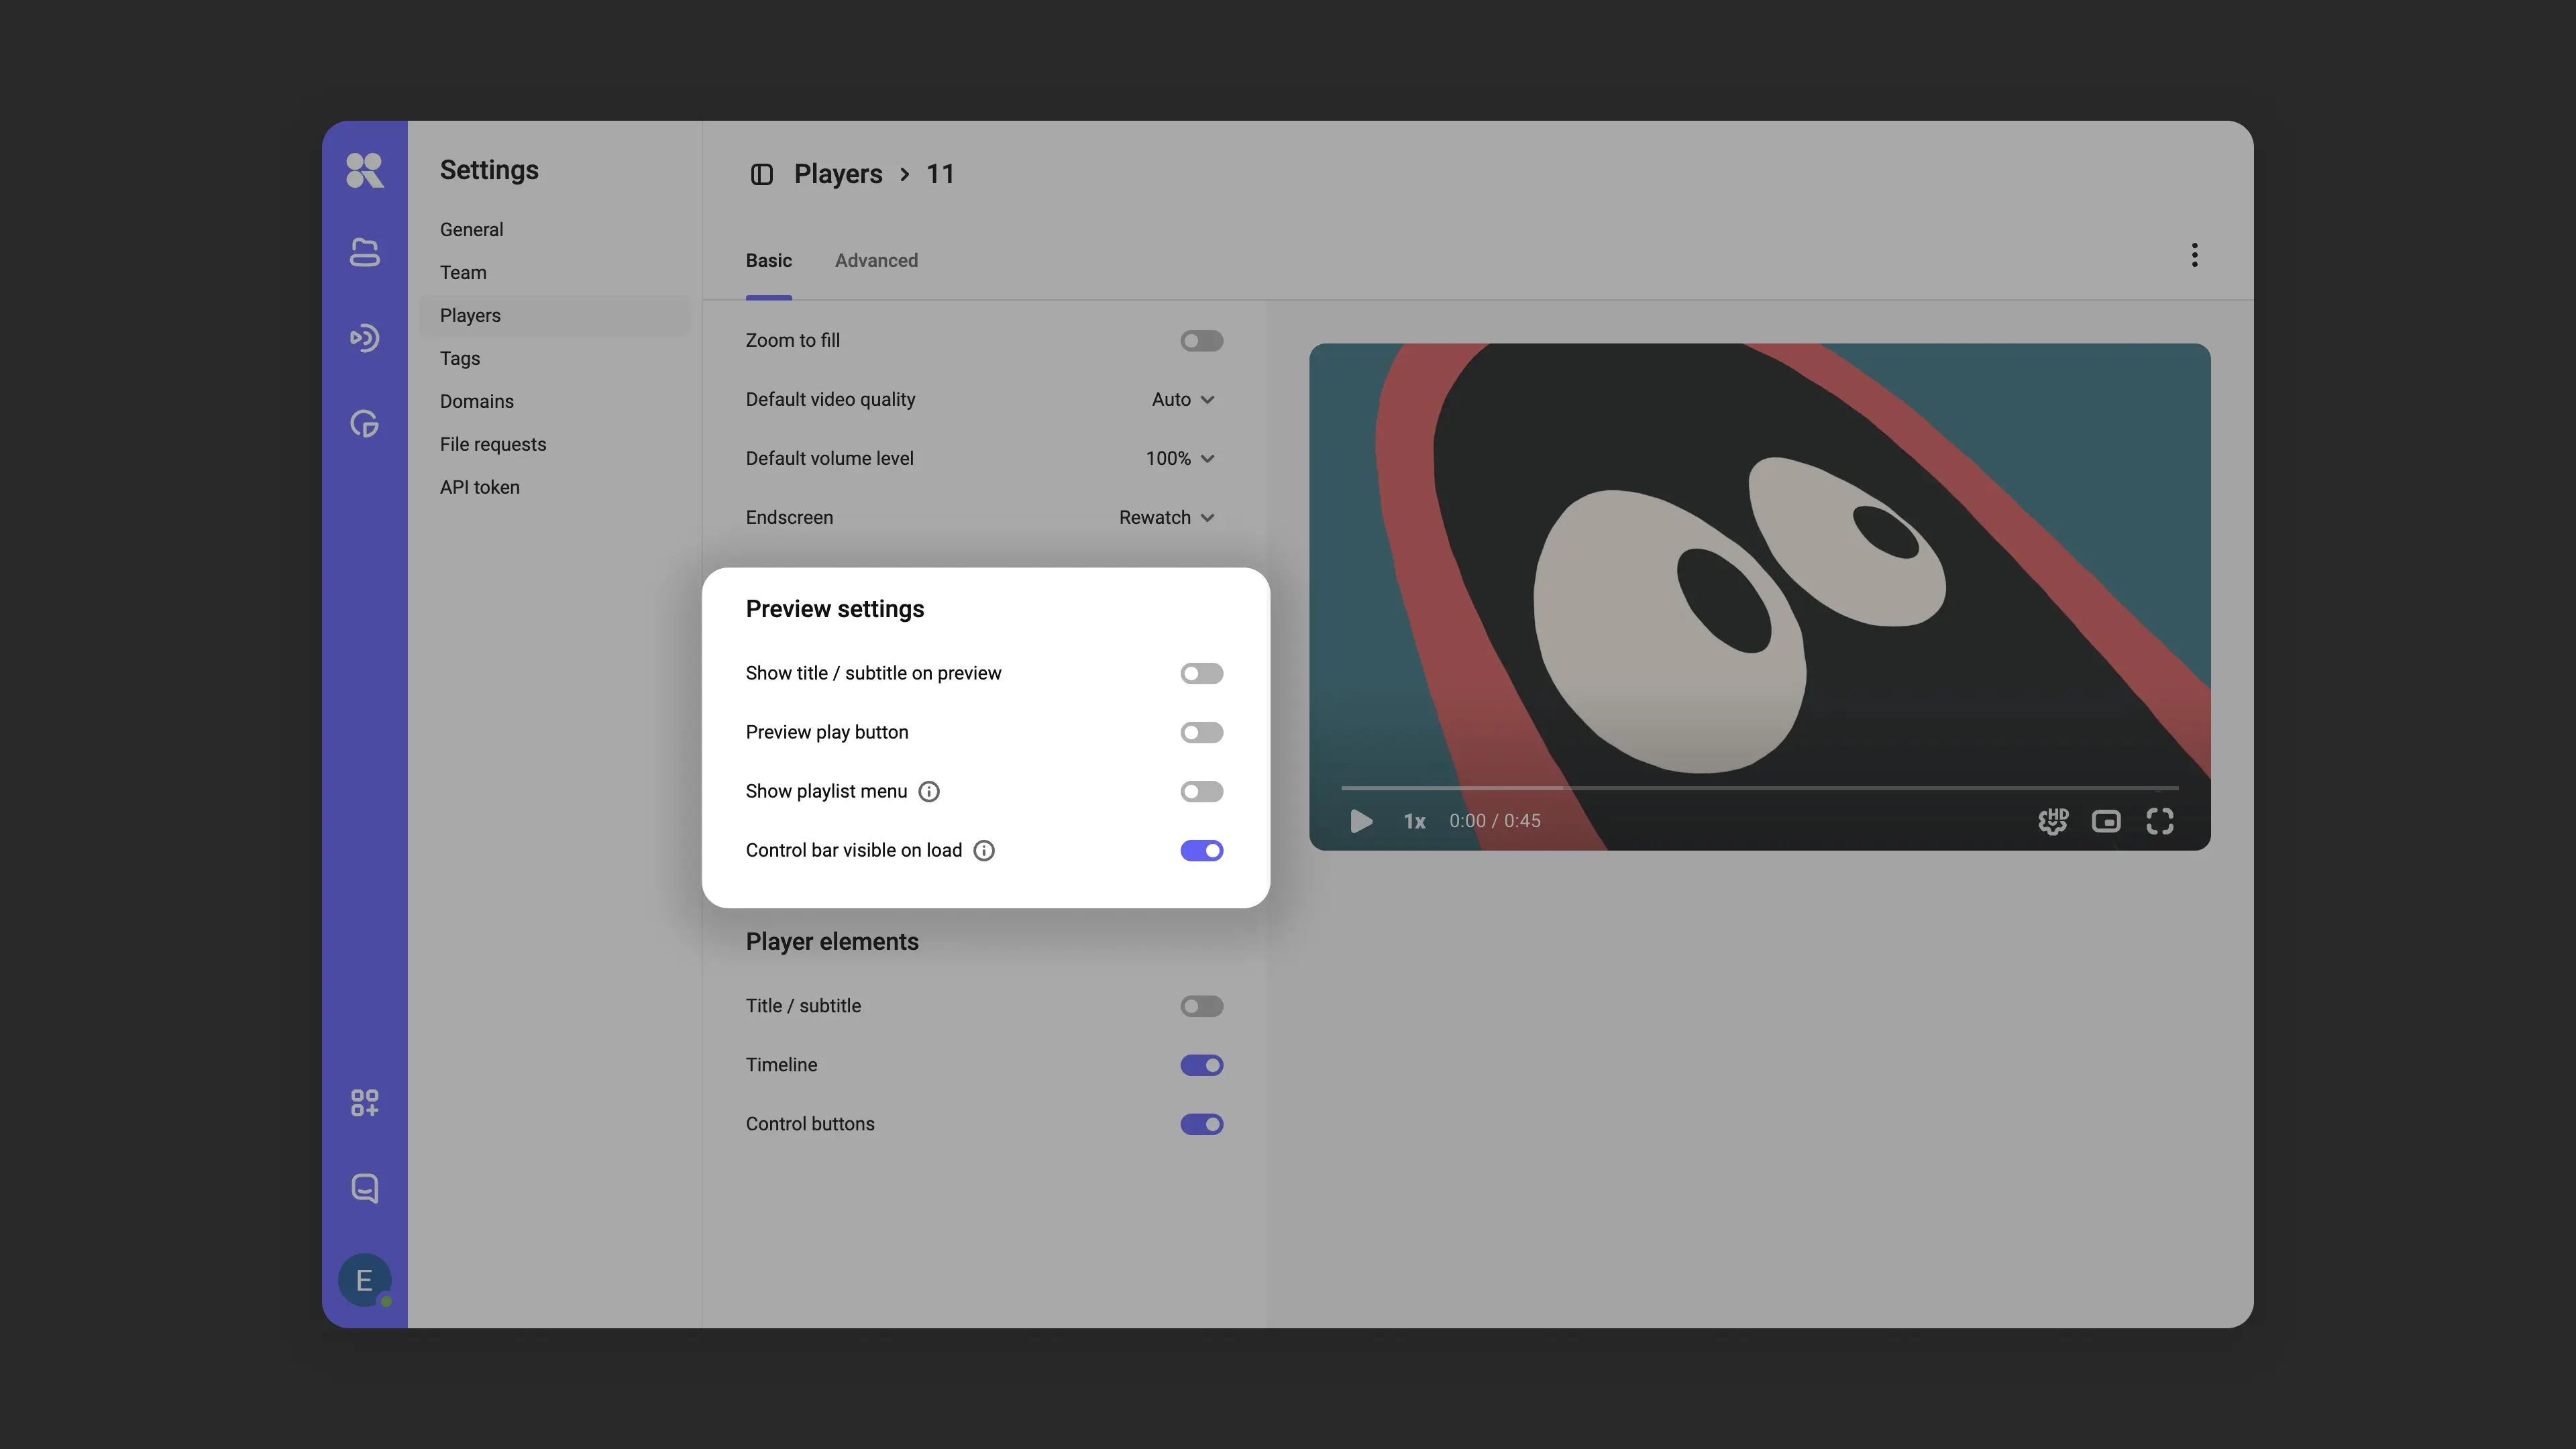
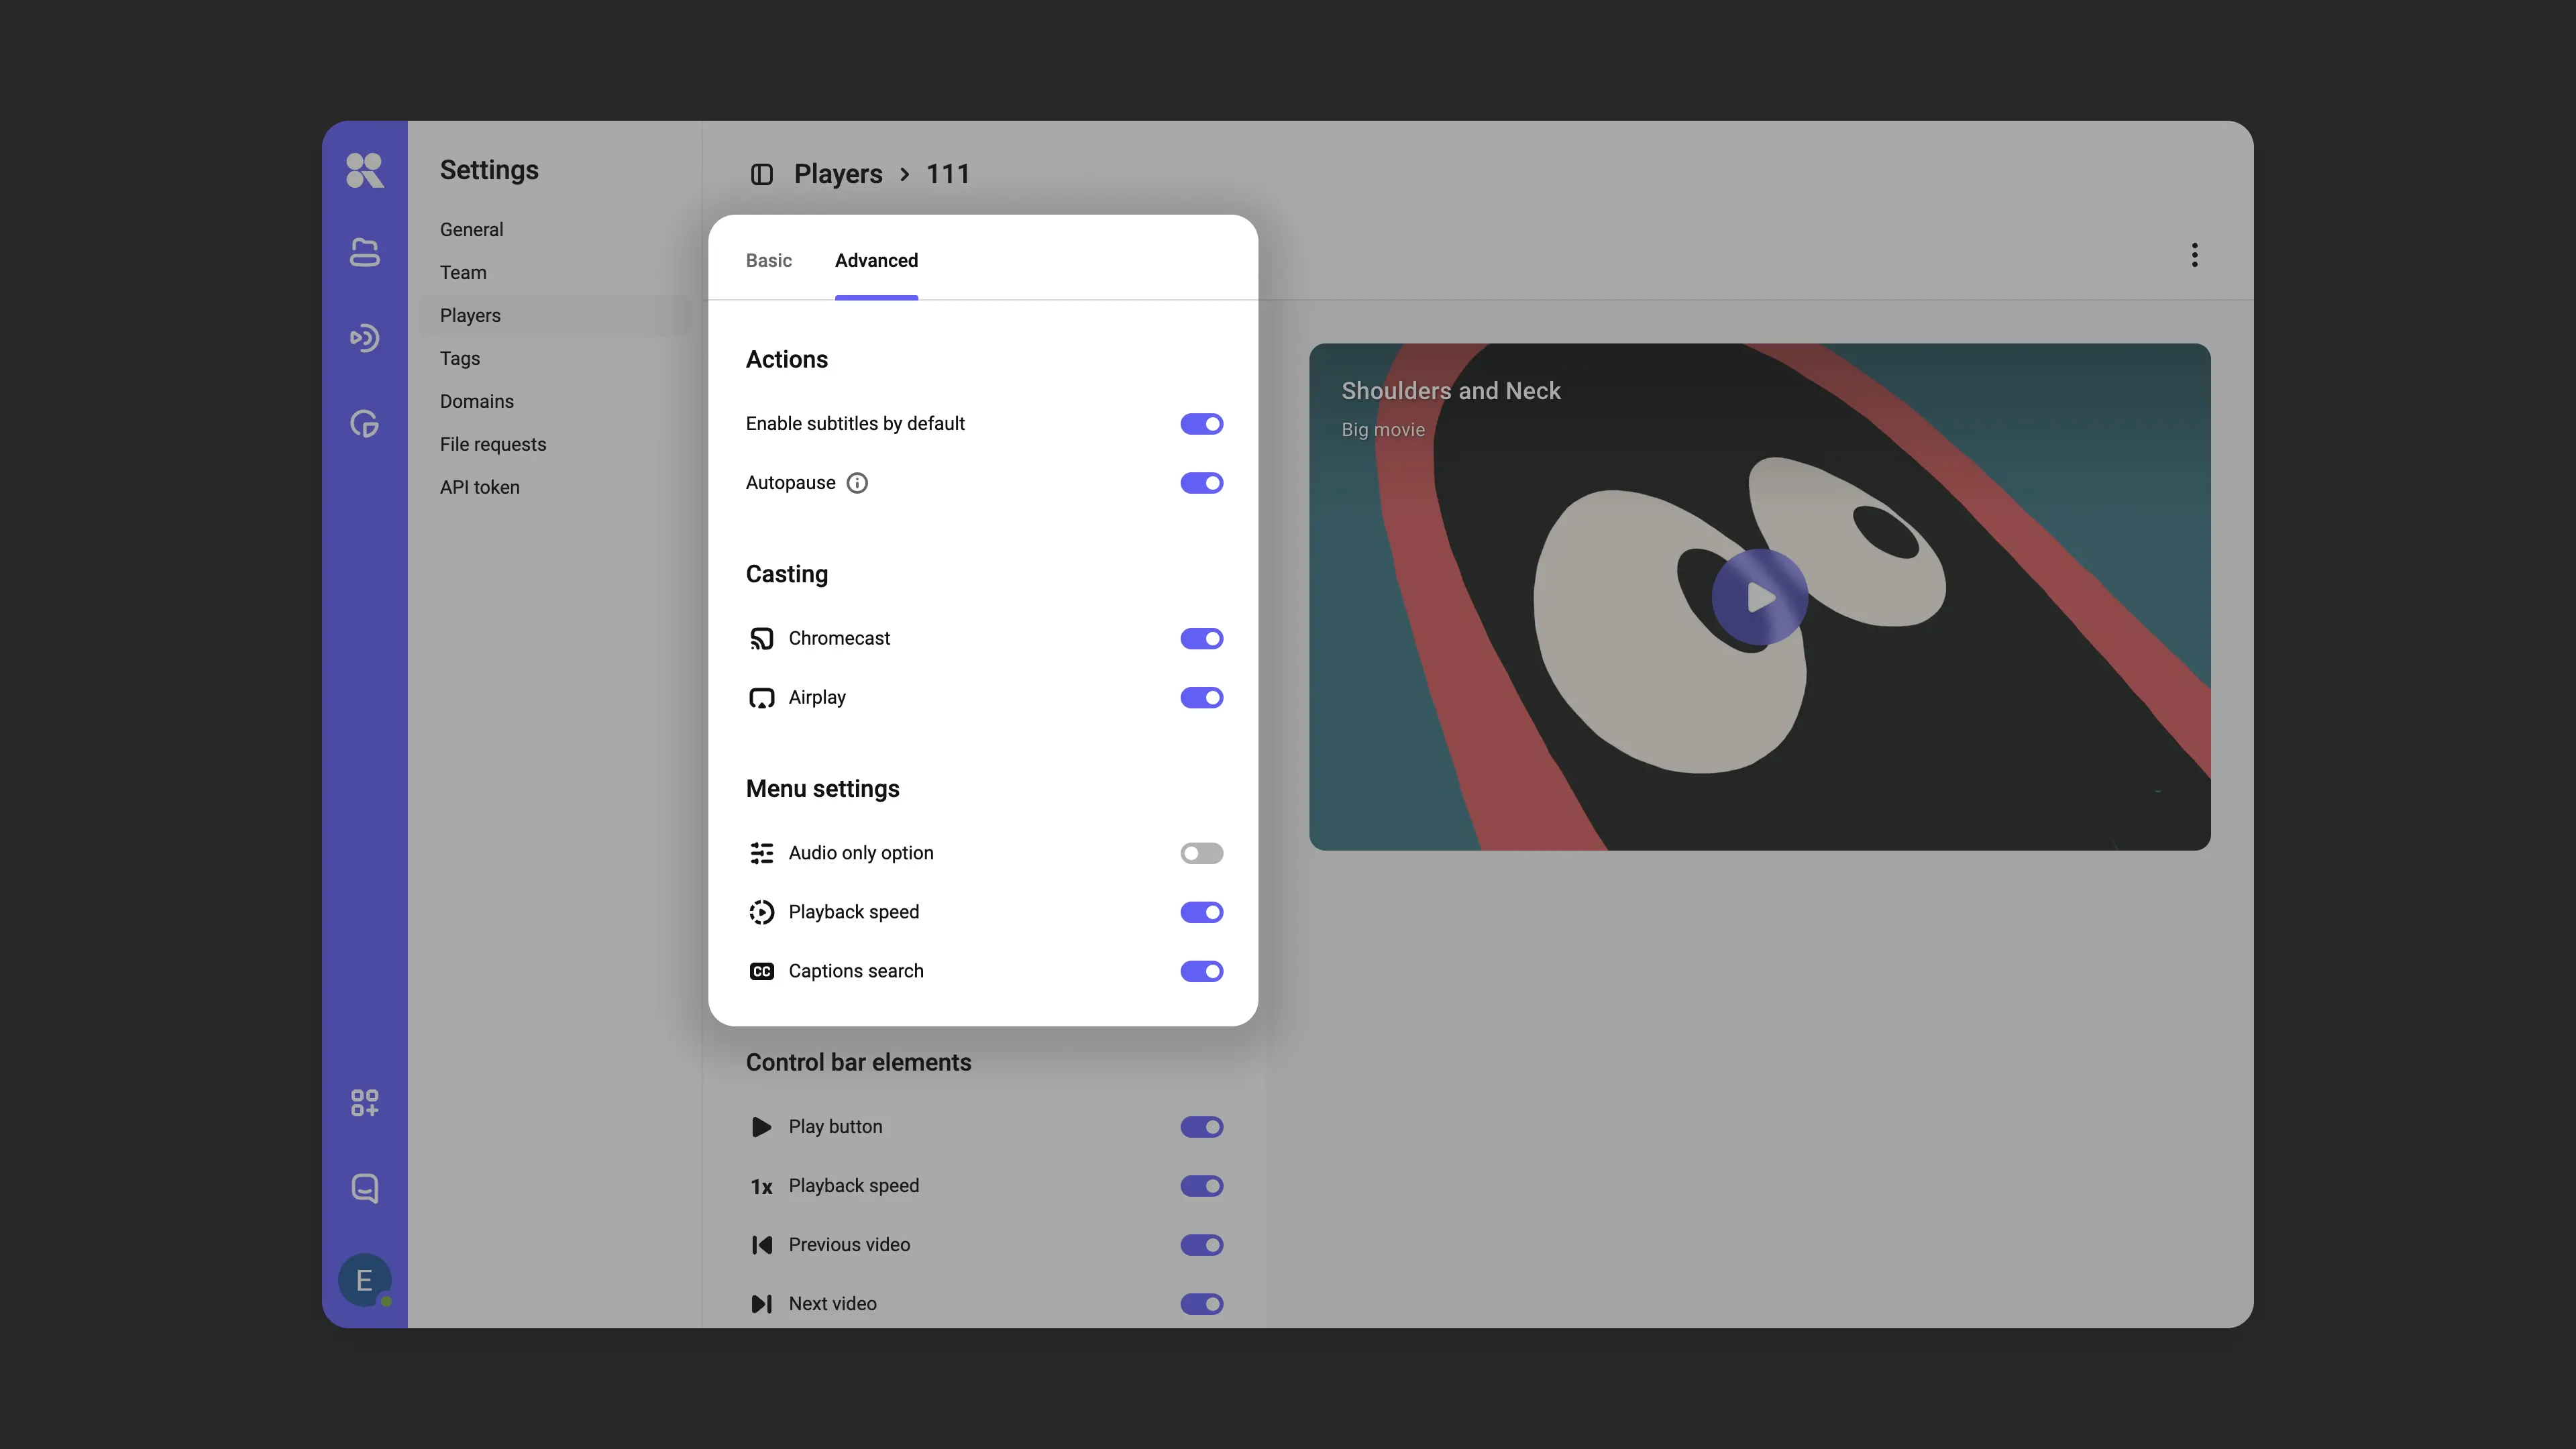
Advanced settings
Player advanced settings interface:
Launch video with subtitles
If subtitles are loaded for the video, they will be displayed automatically on launch. If the video has multiple subtitle tracks, the order of selection is determined by:
- The language set in the player;
- The viewer’s browser language;
- The order of subtitles in the list.
Subtitles are disabled by default.
Autopause
If multiple players are placed on the page, this can affect performance. Autopause solves this problem: it automatically pauses the player when playback starts in another player on the same page.
Casting to devices
This option controls the ability to cast the video stream to external monitors via Chromecast and Airplay protocols, as well as the display of corresponding buttons in the player. Casting support is enabled by default.
Settings menu
The settings menu (gear icon), through which the viewer can change speed, video quality, and other settings. Allows adding or removing items from the menu:
- Audio-only quality: Designed for cases with a slow internet connection. Enables only the audio track without the video.
- Playback speed: Duplicated in the control panel, making it accessible from multiple places.
- Subtitle search: adds a search field in the subtitles menu. The viewer enters a word or phrase and jumps to the matching segment.
- Scale: when enabled, the settings menu shows the current scale value. The viewer adjusts it in 3% steps or resets to 100%. On mobile devices, scaling uses pinch-to-zoom gestures.

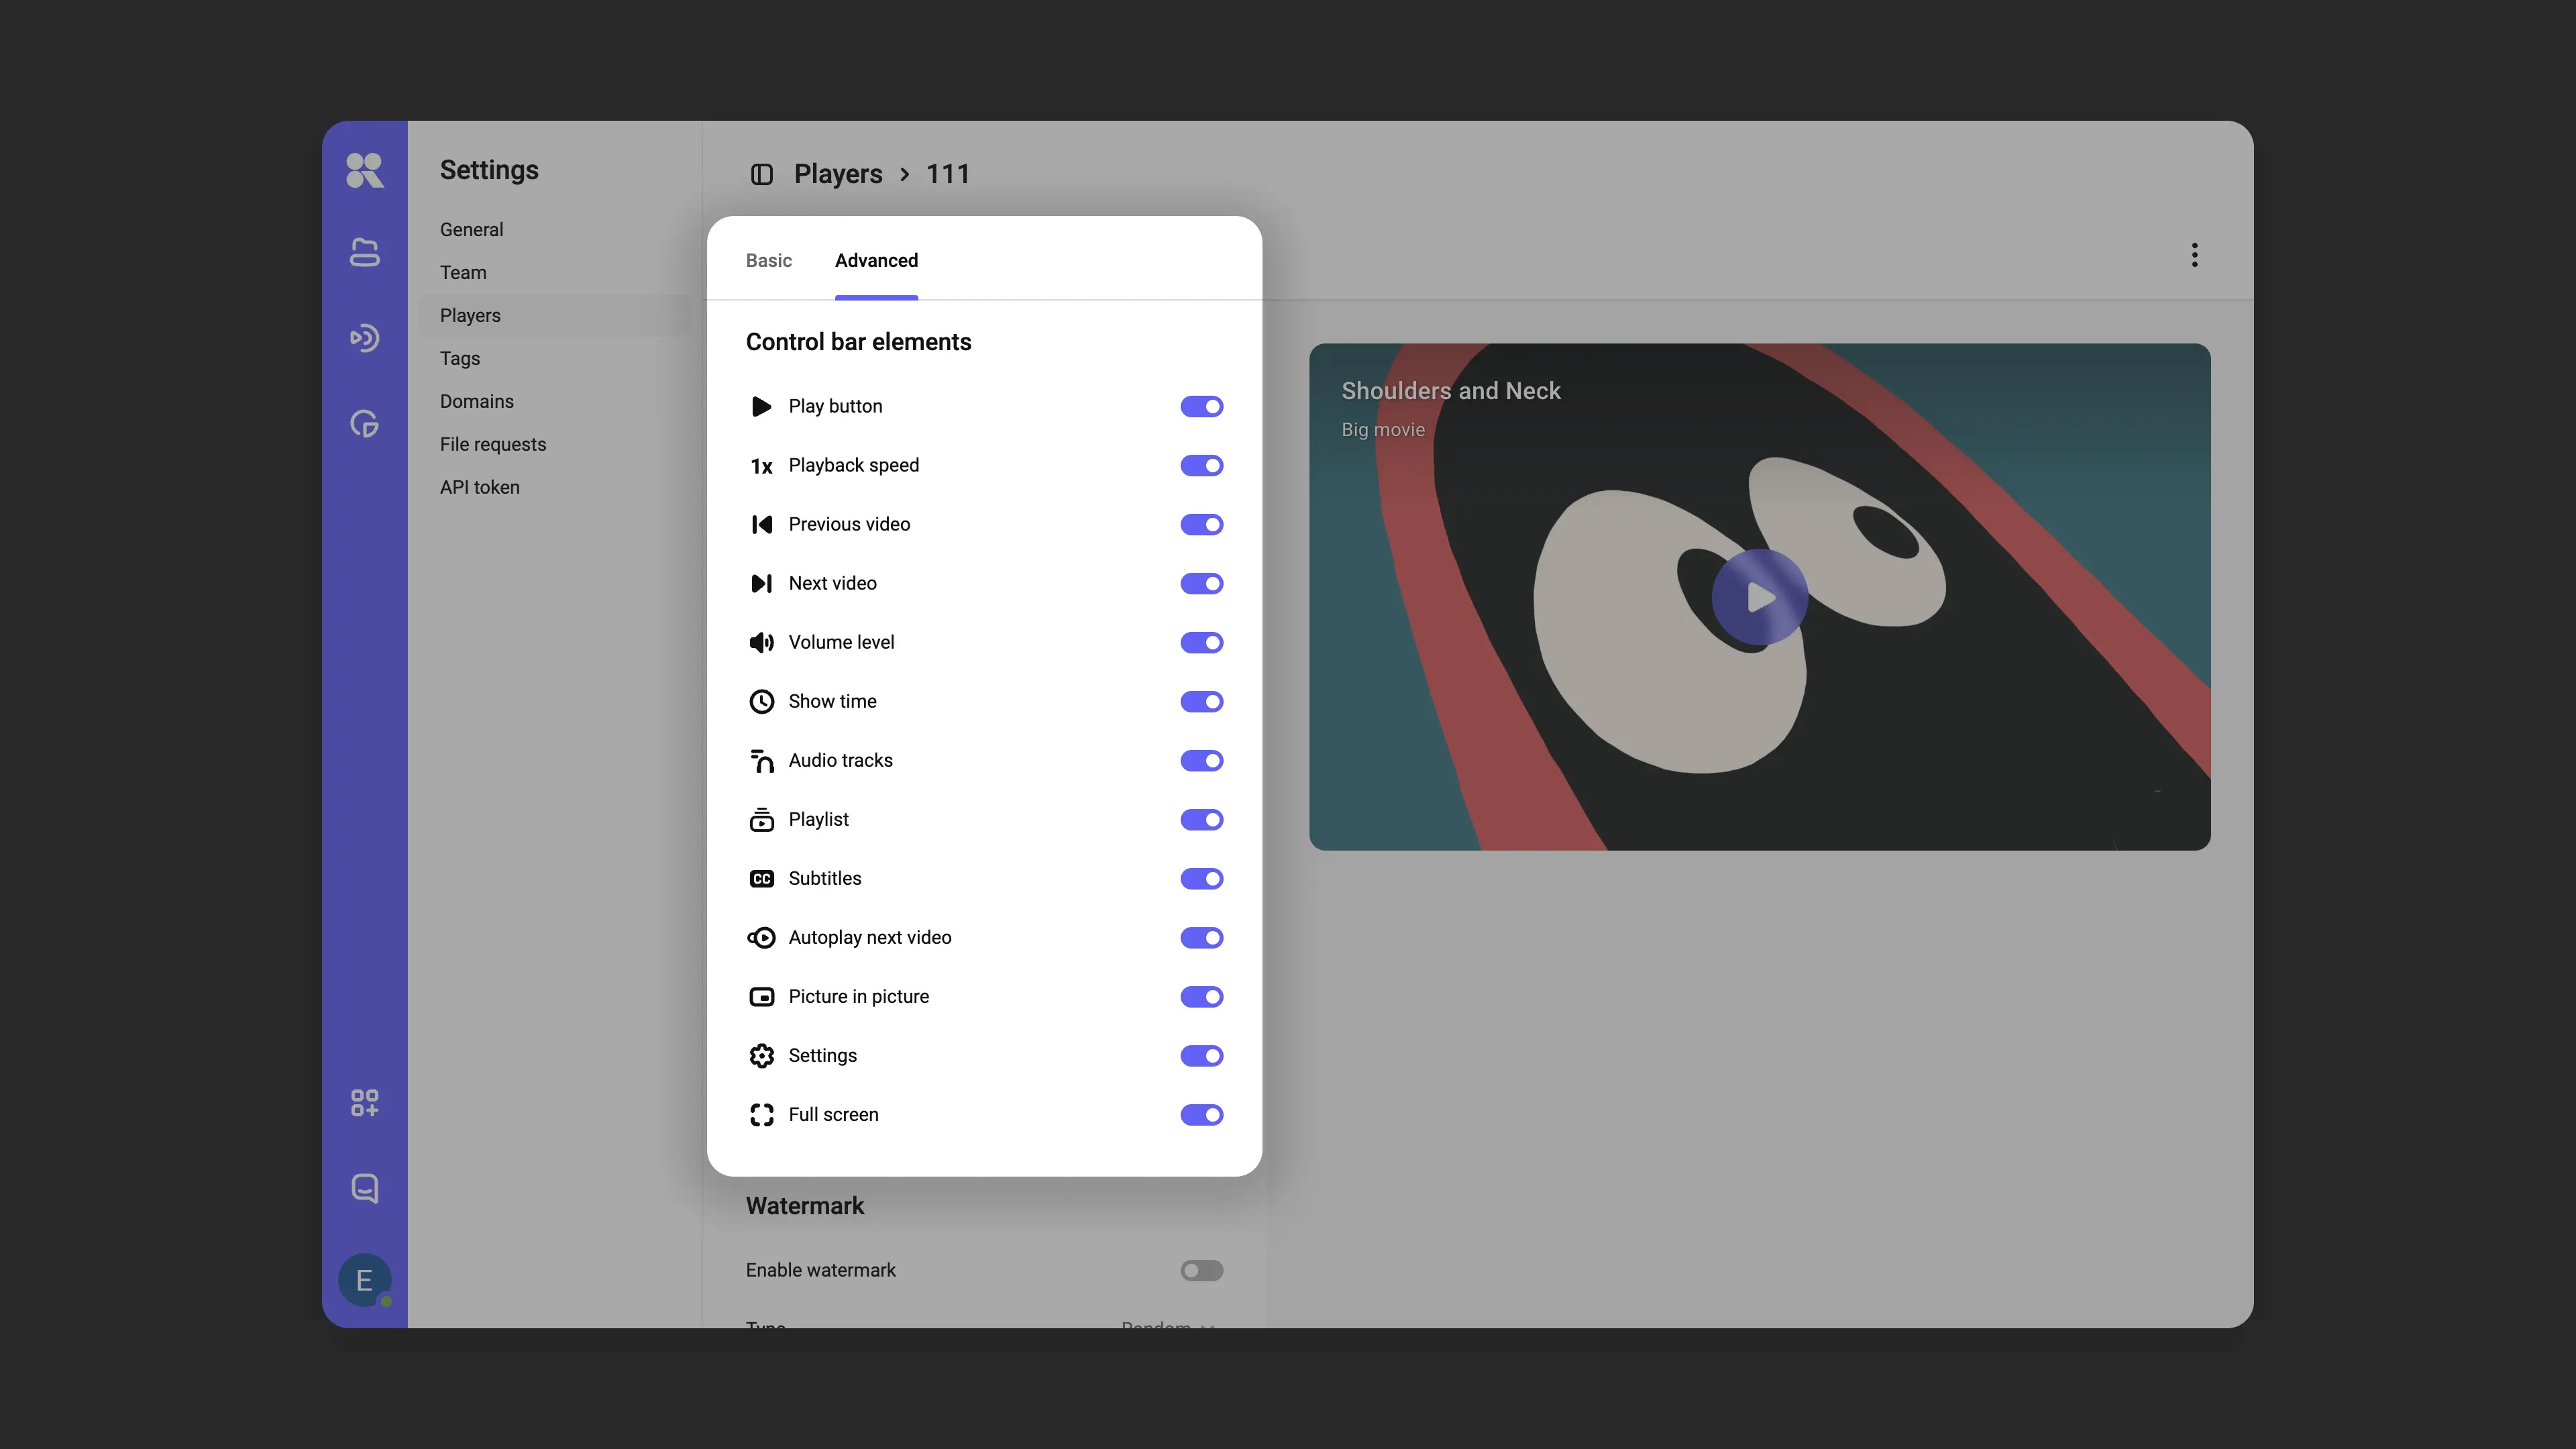
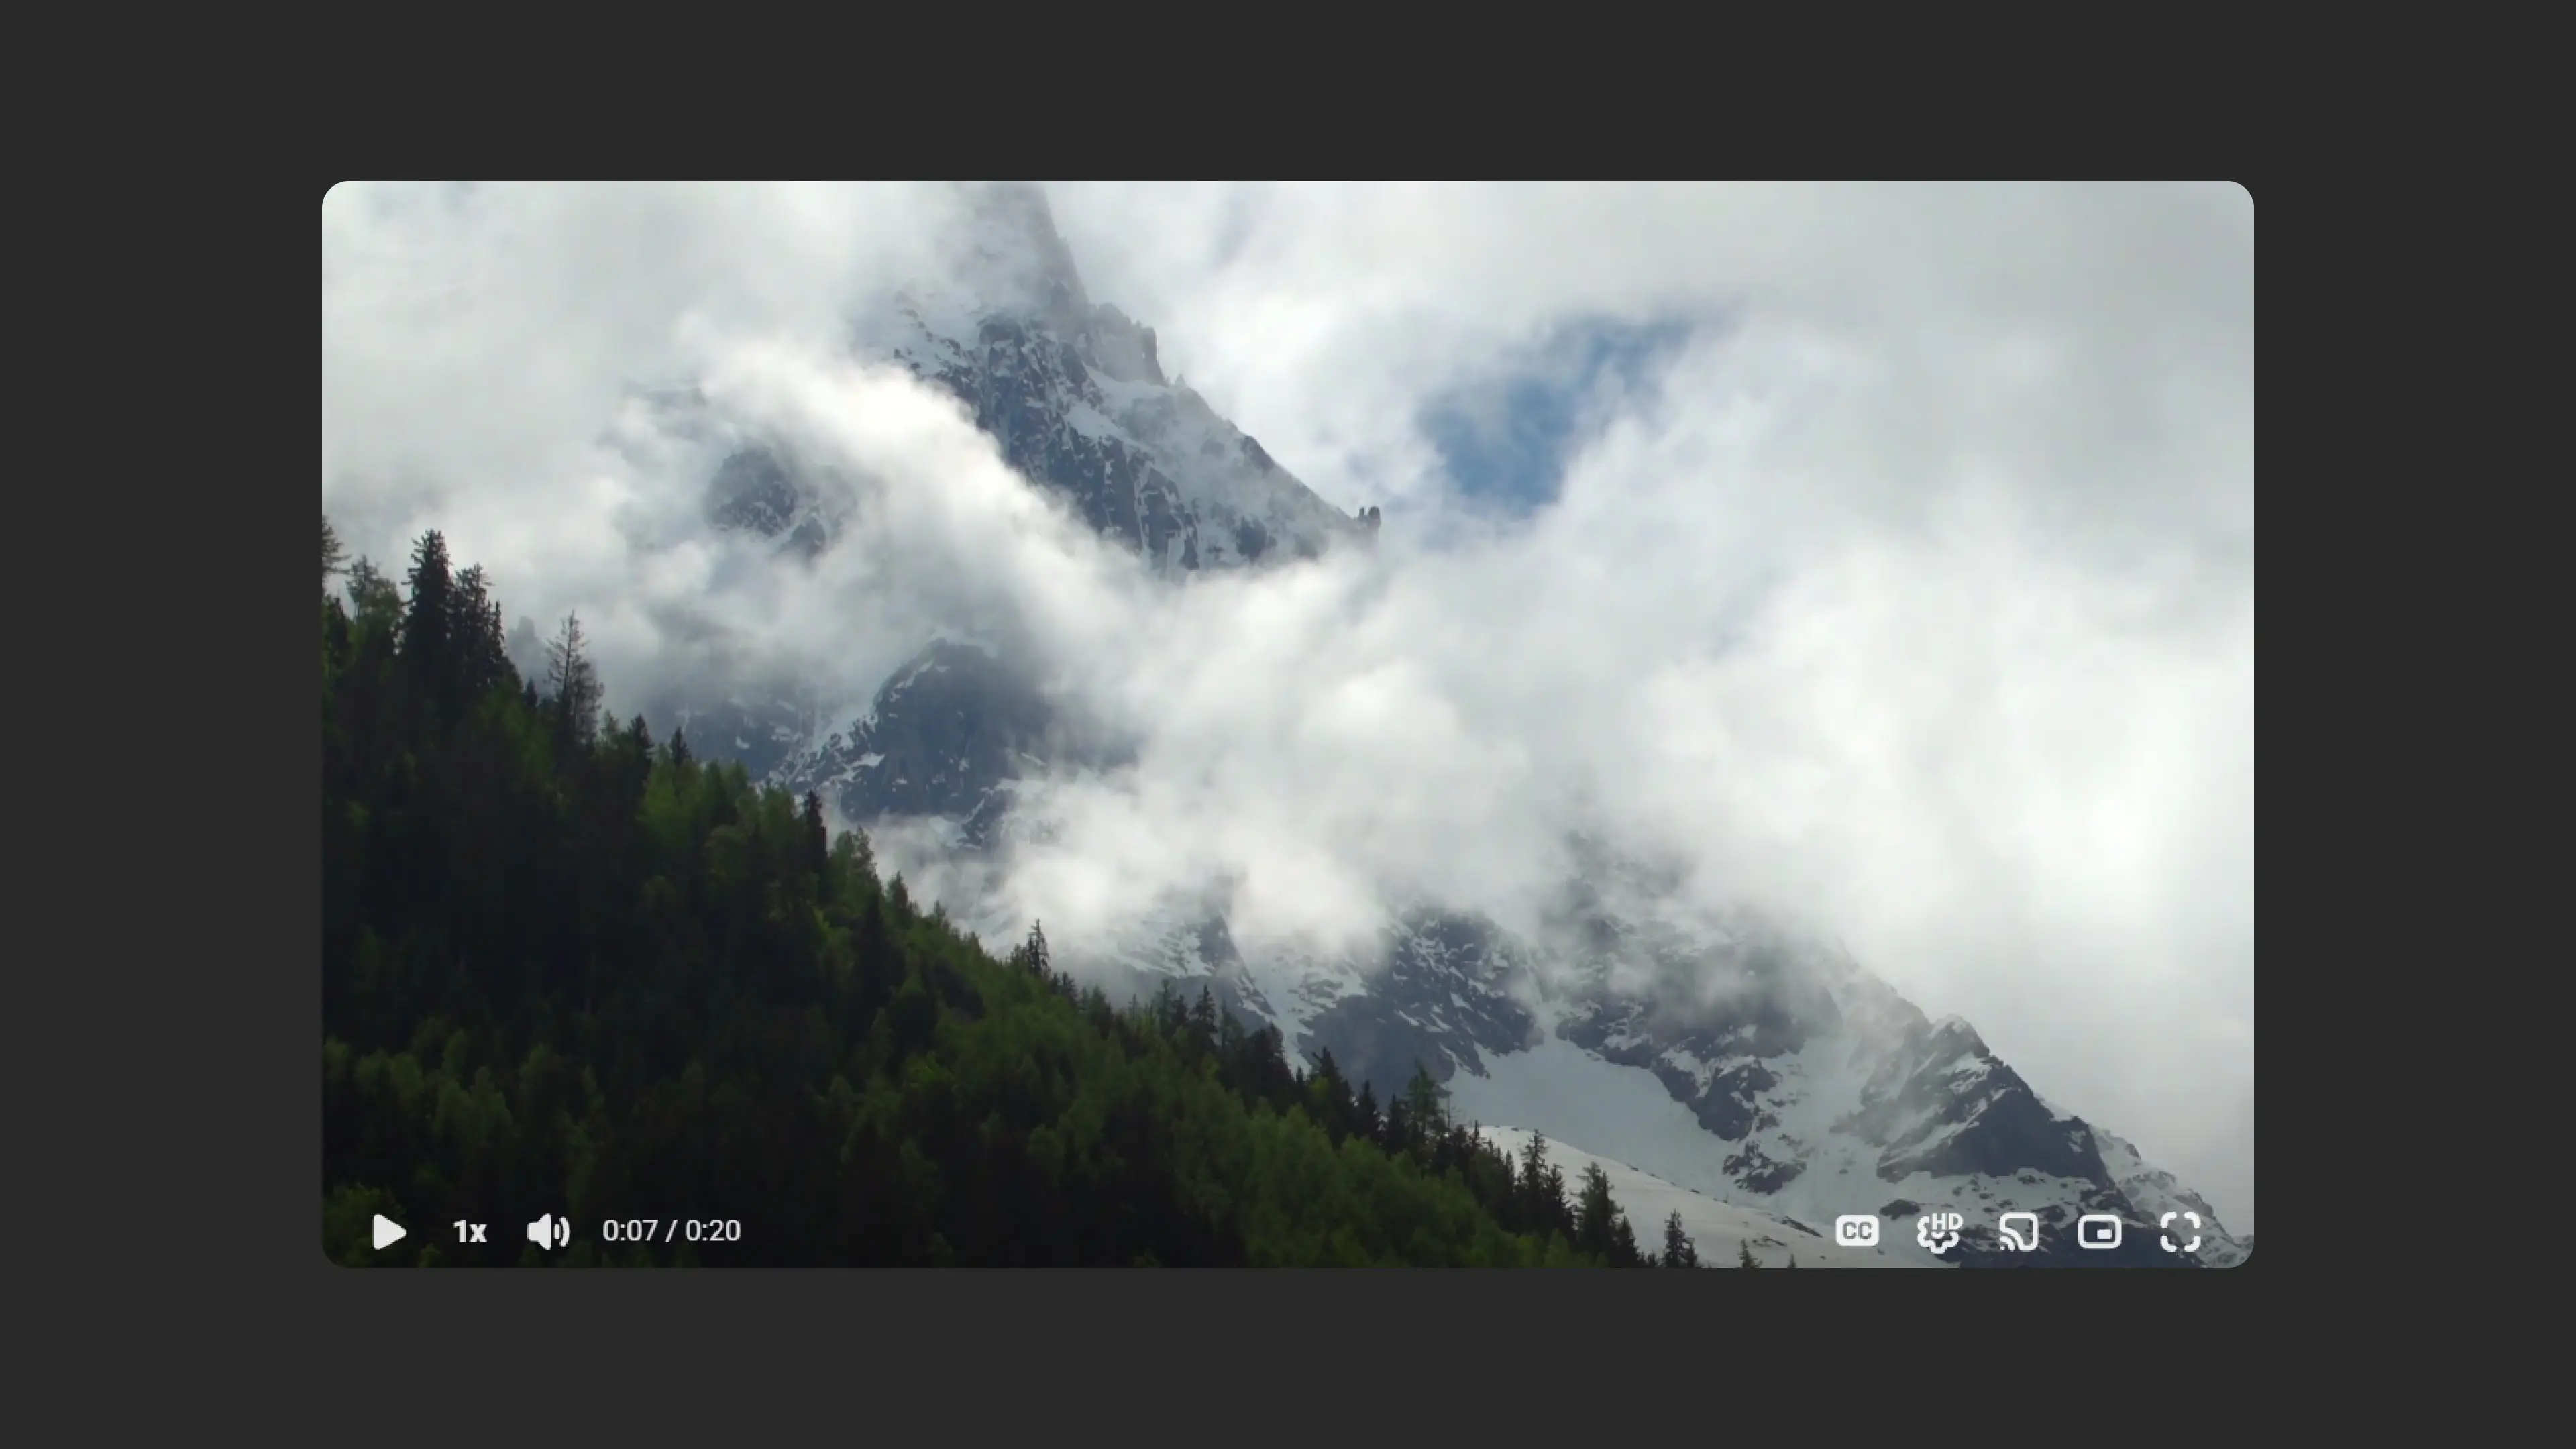
Control panel elements
This set of settings allows selectively hiding or showing individual elements of the player control panel. All are shown by default.
Example control panel element settings:
Watermarks
A static watermark is text or a logo that is permanently displayed on screen during video playback to designate authorship or indicate rights. Suitable for public videos, commercials, and widely distributed content.
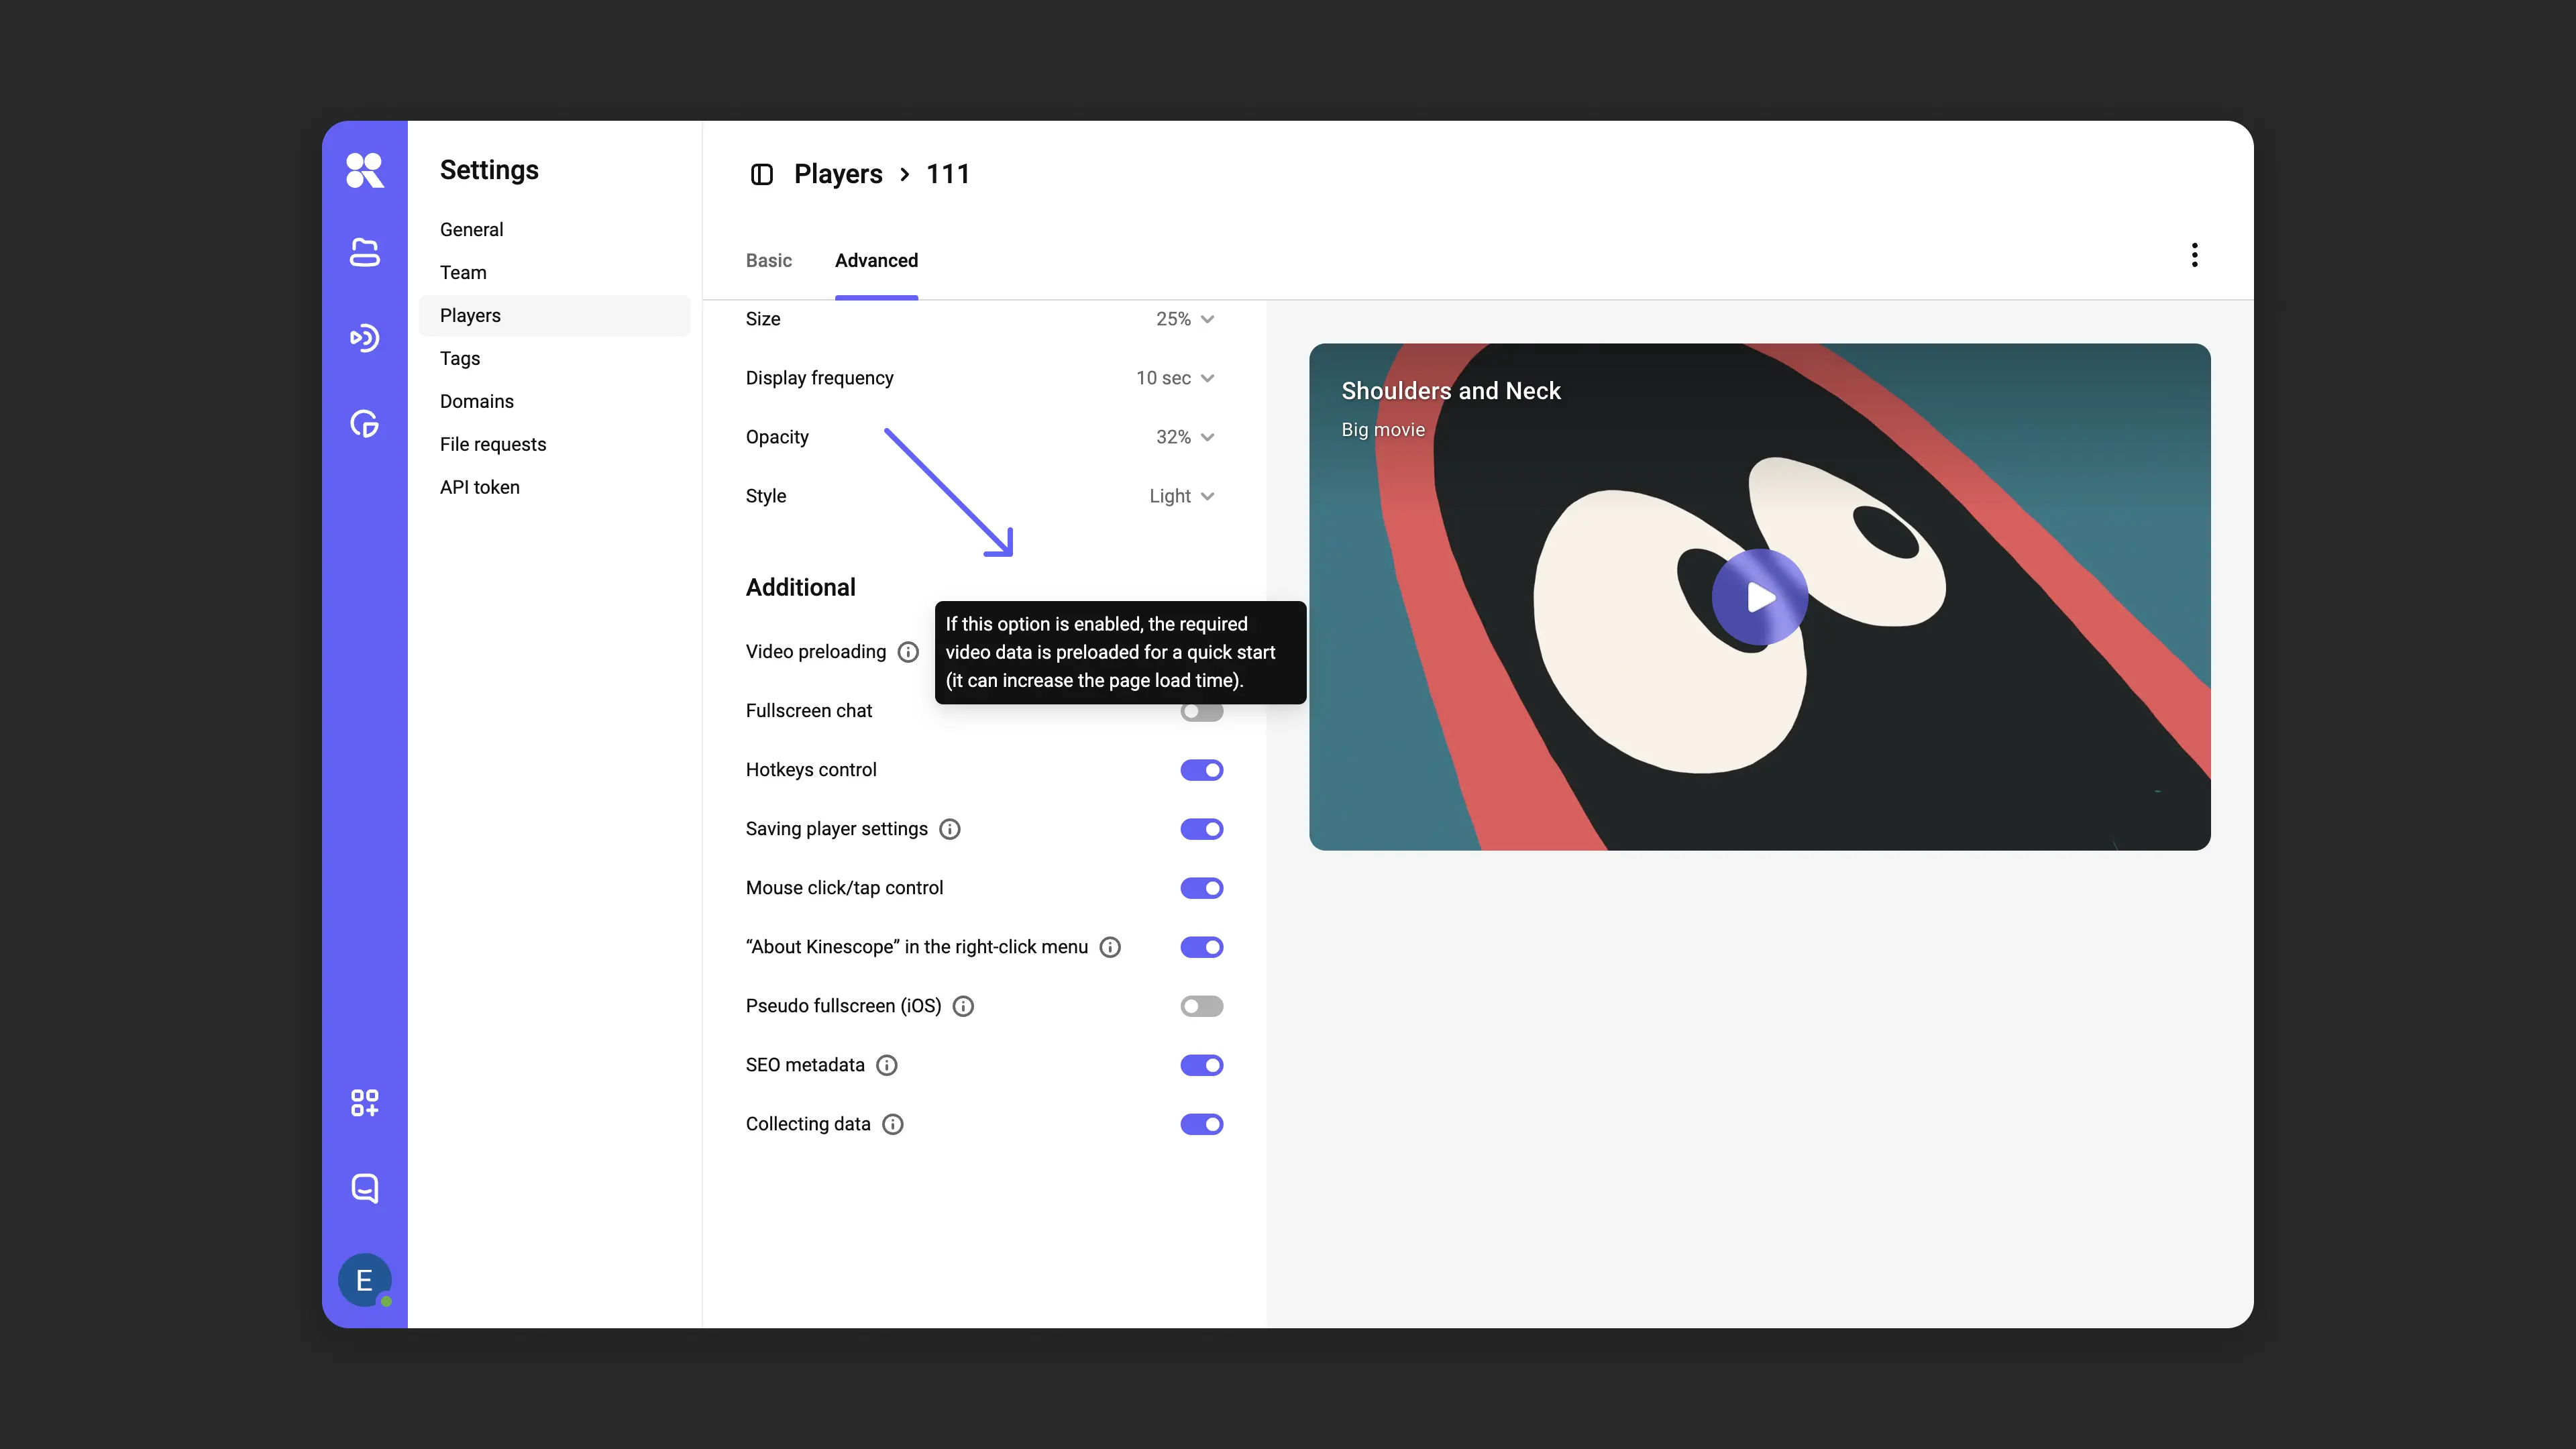
Additional settings
If video preloading is enabled, the overall page load time may increase. The option is disabled by default.
Preloading and additional function settings:
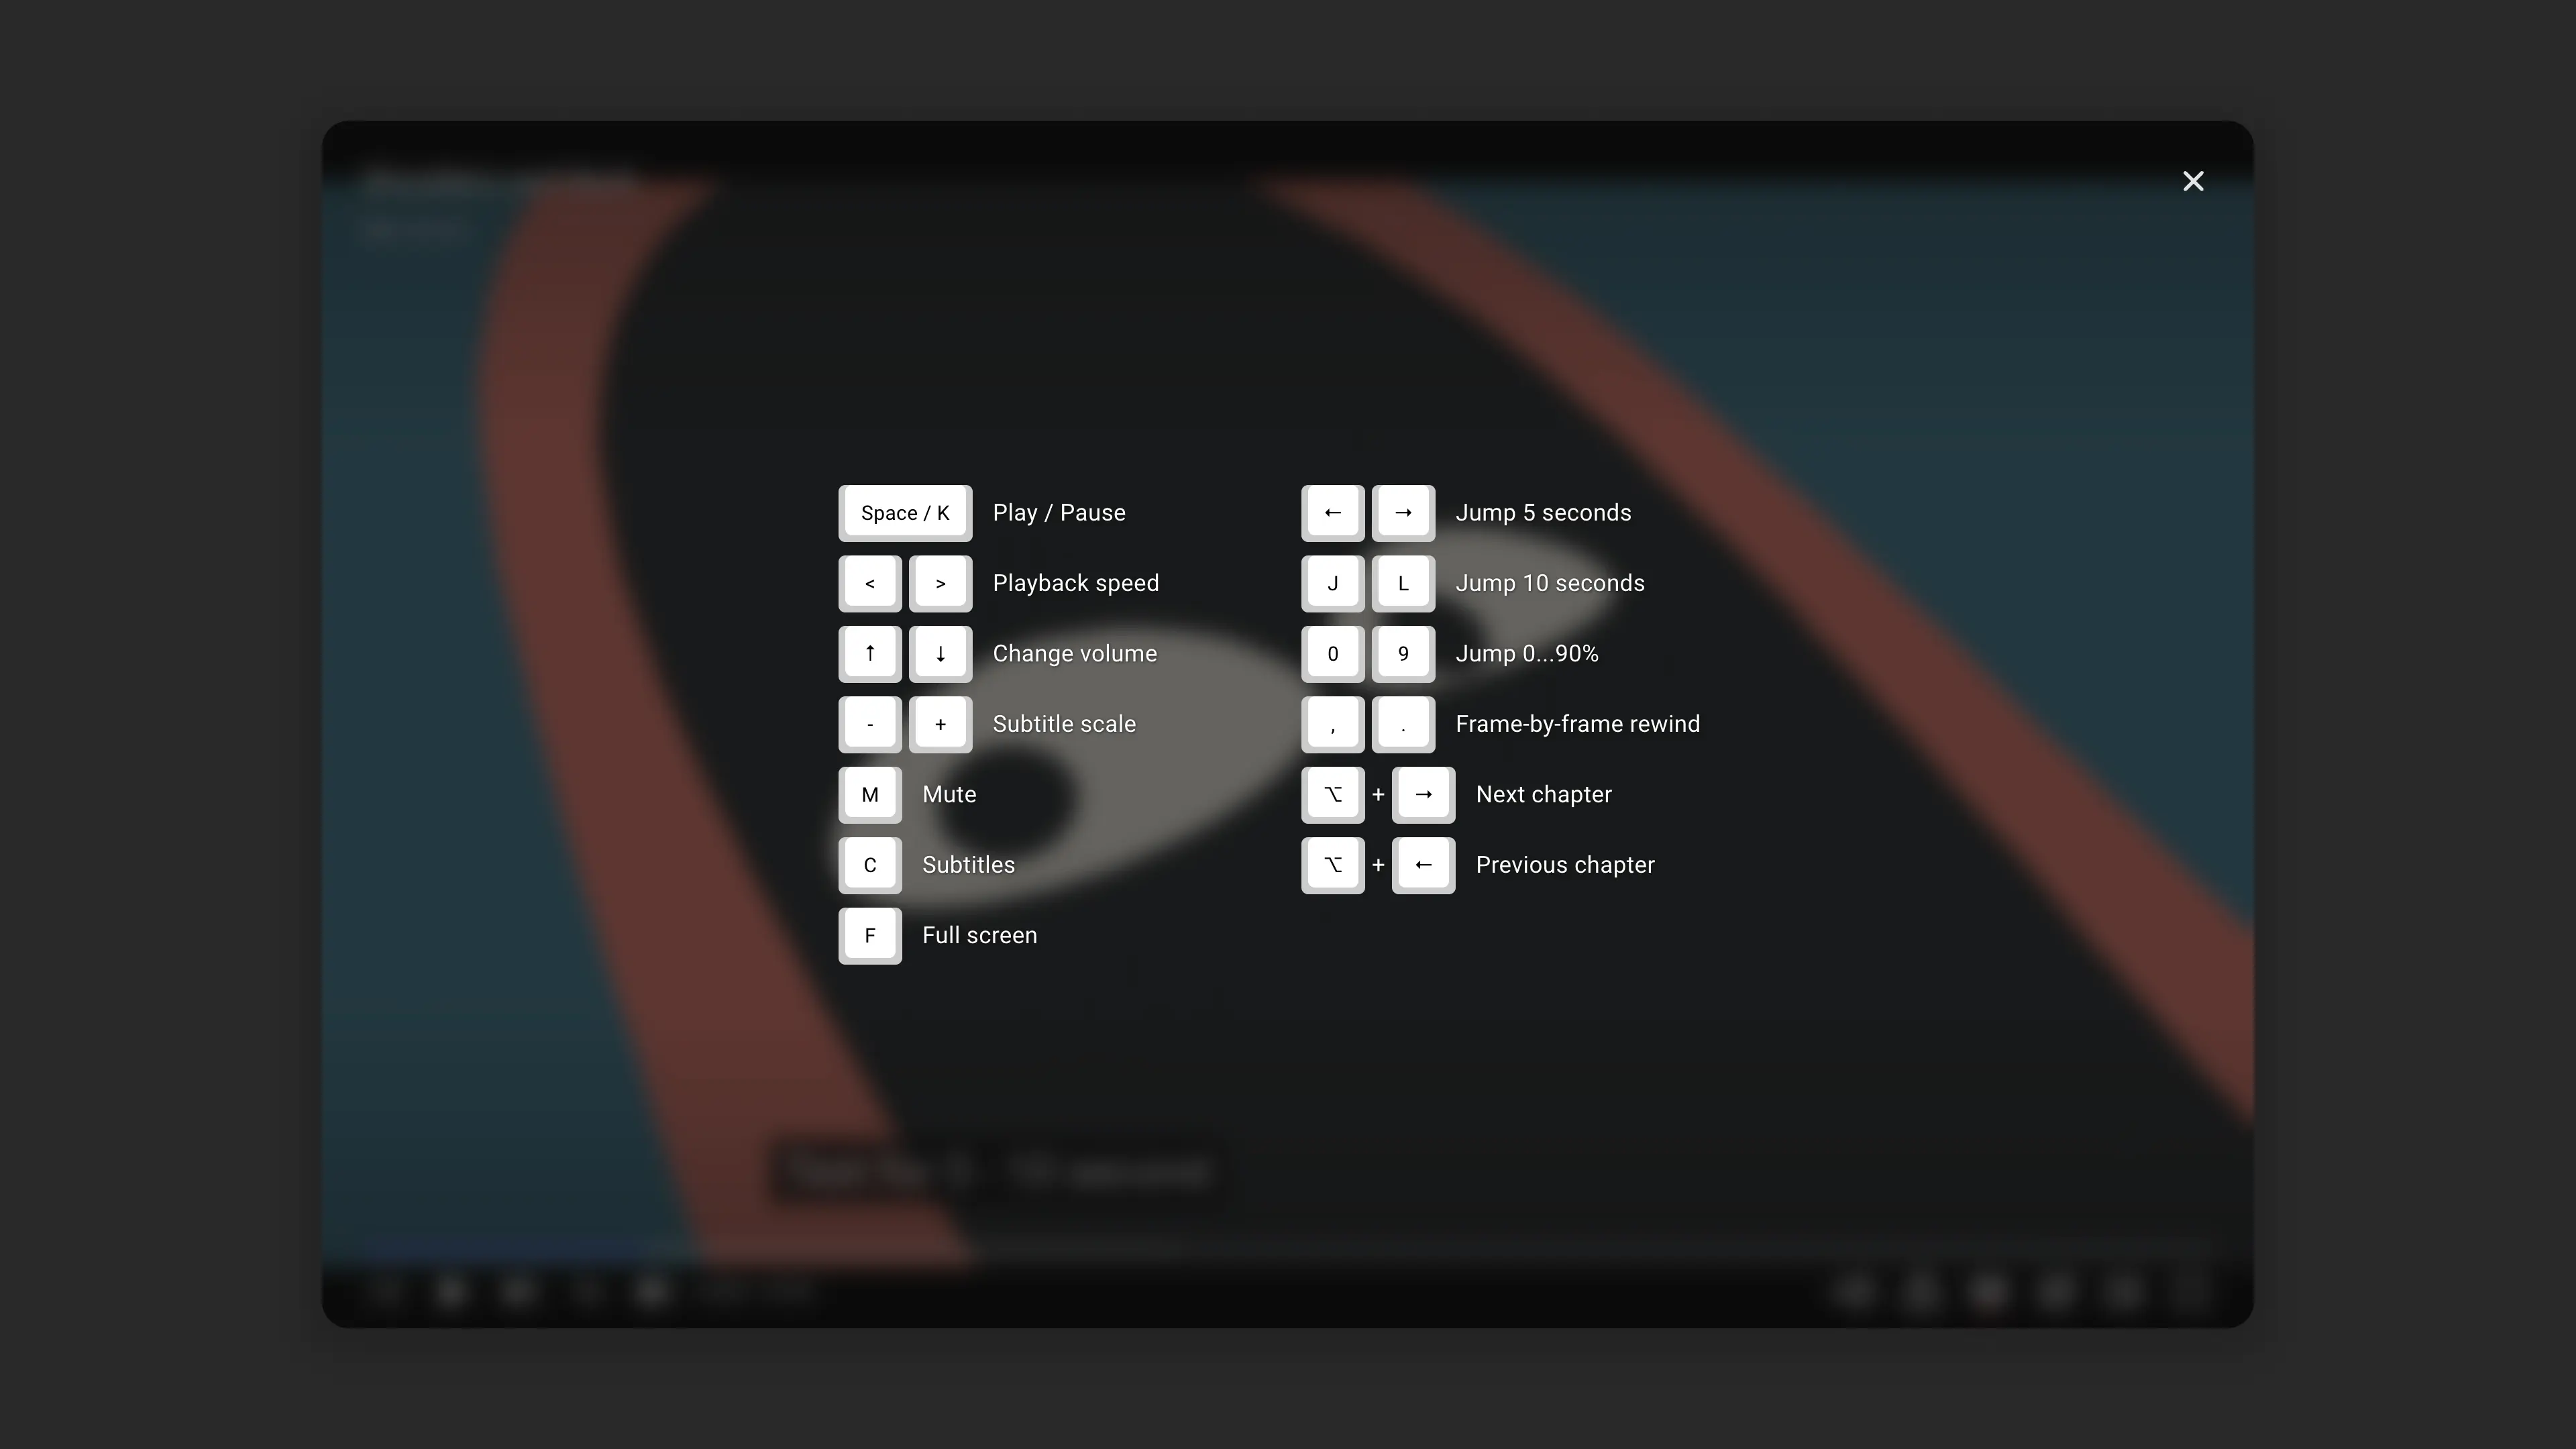
The Kinescope player supports keyboard shortcuts by default; the full list is available in the right-click menu on the player.
Example menu with keyboard shortcuts:
The Kinescope player can remember player settings for each viewer (playback speed, video quality, and other preferences).
Viewer preference memory settings:

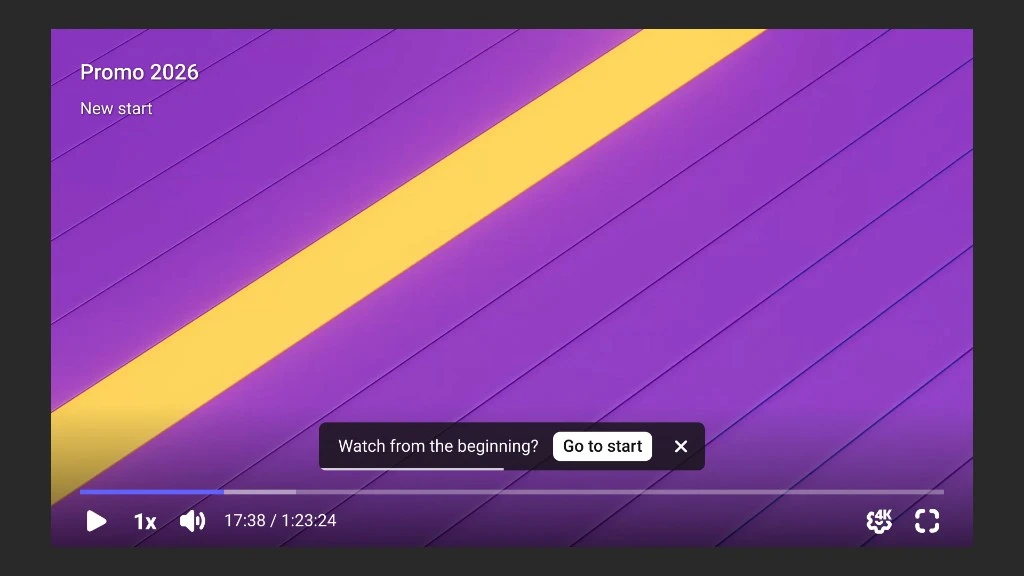
The Watch from the beginning option works together with remembering the playback position. If a viewer has already opened the video and comes back to it, the player resumes from where they left off. When this setting is enabled, the player shows a Watch from the beginning? prompt with a Go to start button — clicking it rewinds the video to the start. To continue from the current position, the viewer dismisses the prompt with the close icon.
The mouse click/tap control option is available in settings. When enabled, you can control playback not only via interface elements but also by clicking directly on the video. When disabled, the video can only be controlled via the control panel.
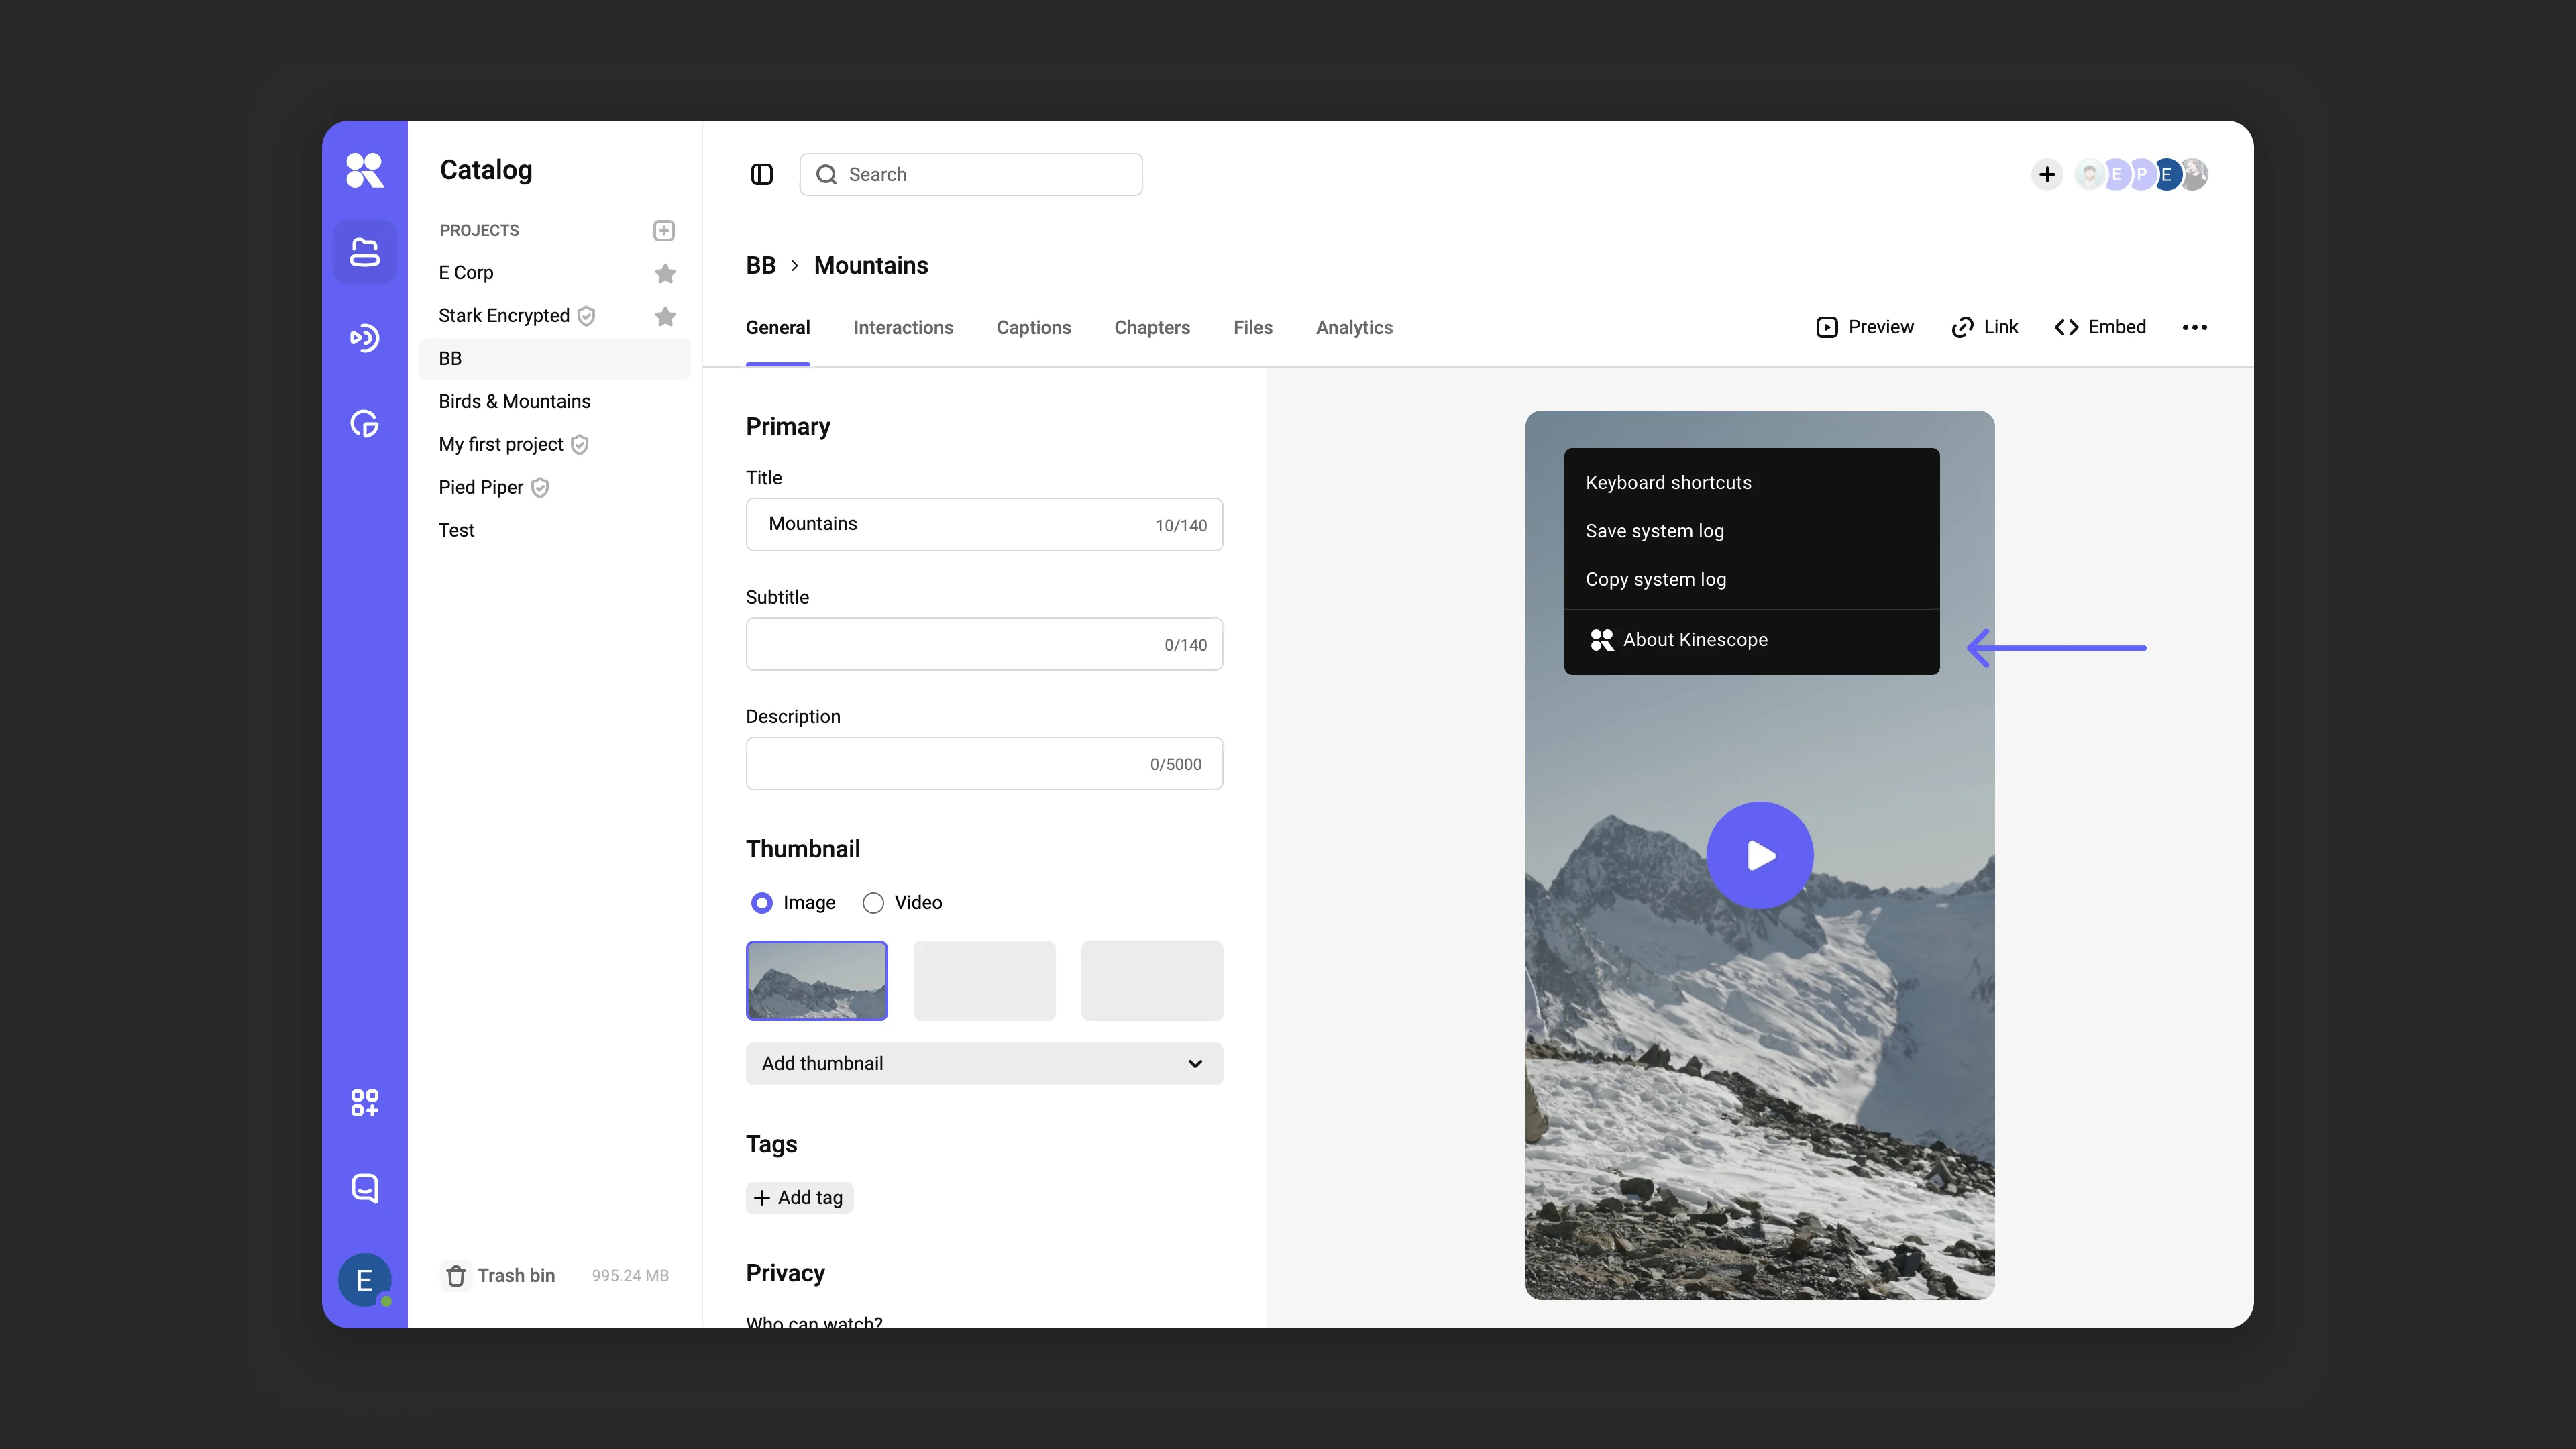
Right-clicking on video in the context menu shows the About Kinescope item, which redirects to the platform’s official site.
Example context menu and pseudo-fullscreen mode settings:
Pseudo-fullscreen mode for iOS preserves the original Kinescope player controls when entering fullscreen mode. If you use dynamic watermarks, enable this option. See more in the Pseudo-Fullscreen Mode on iOS article.
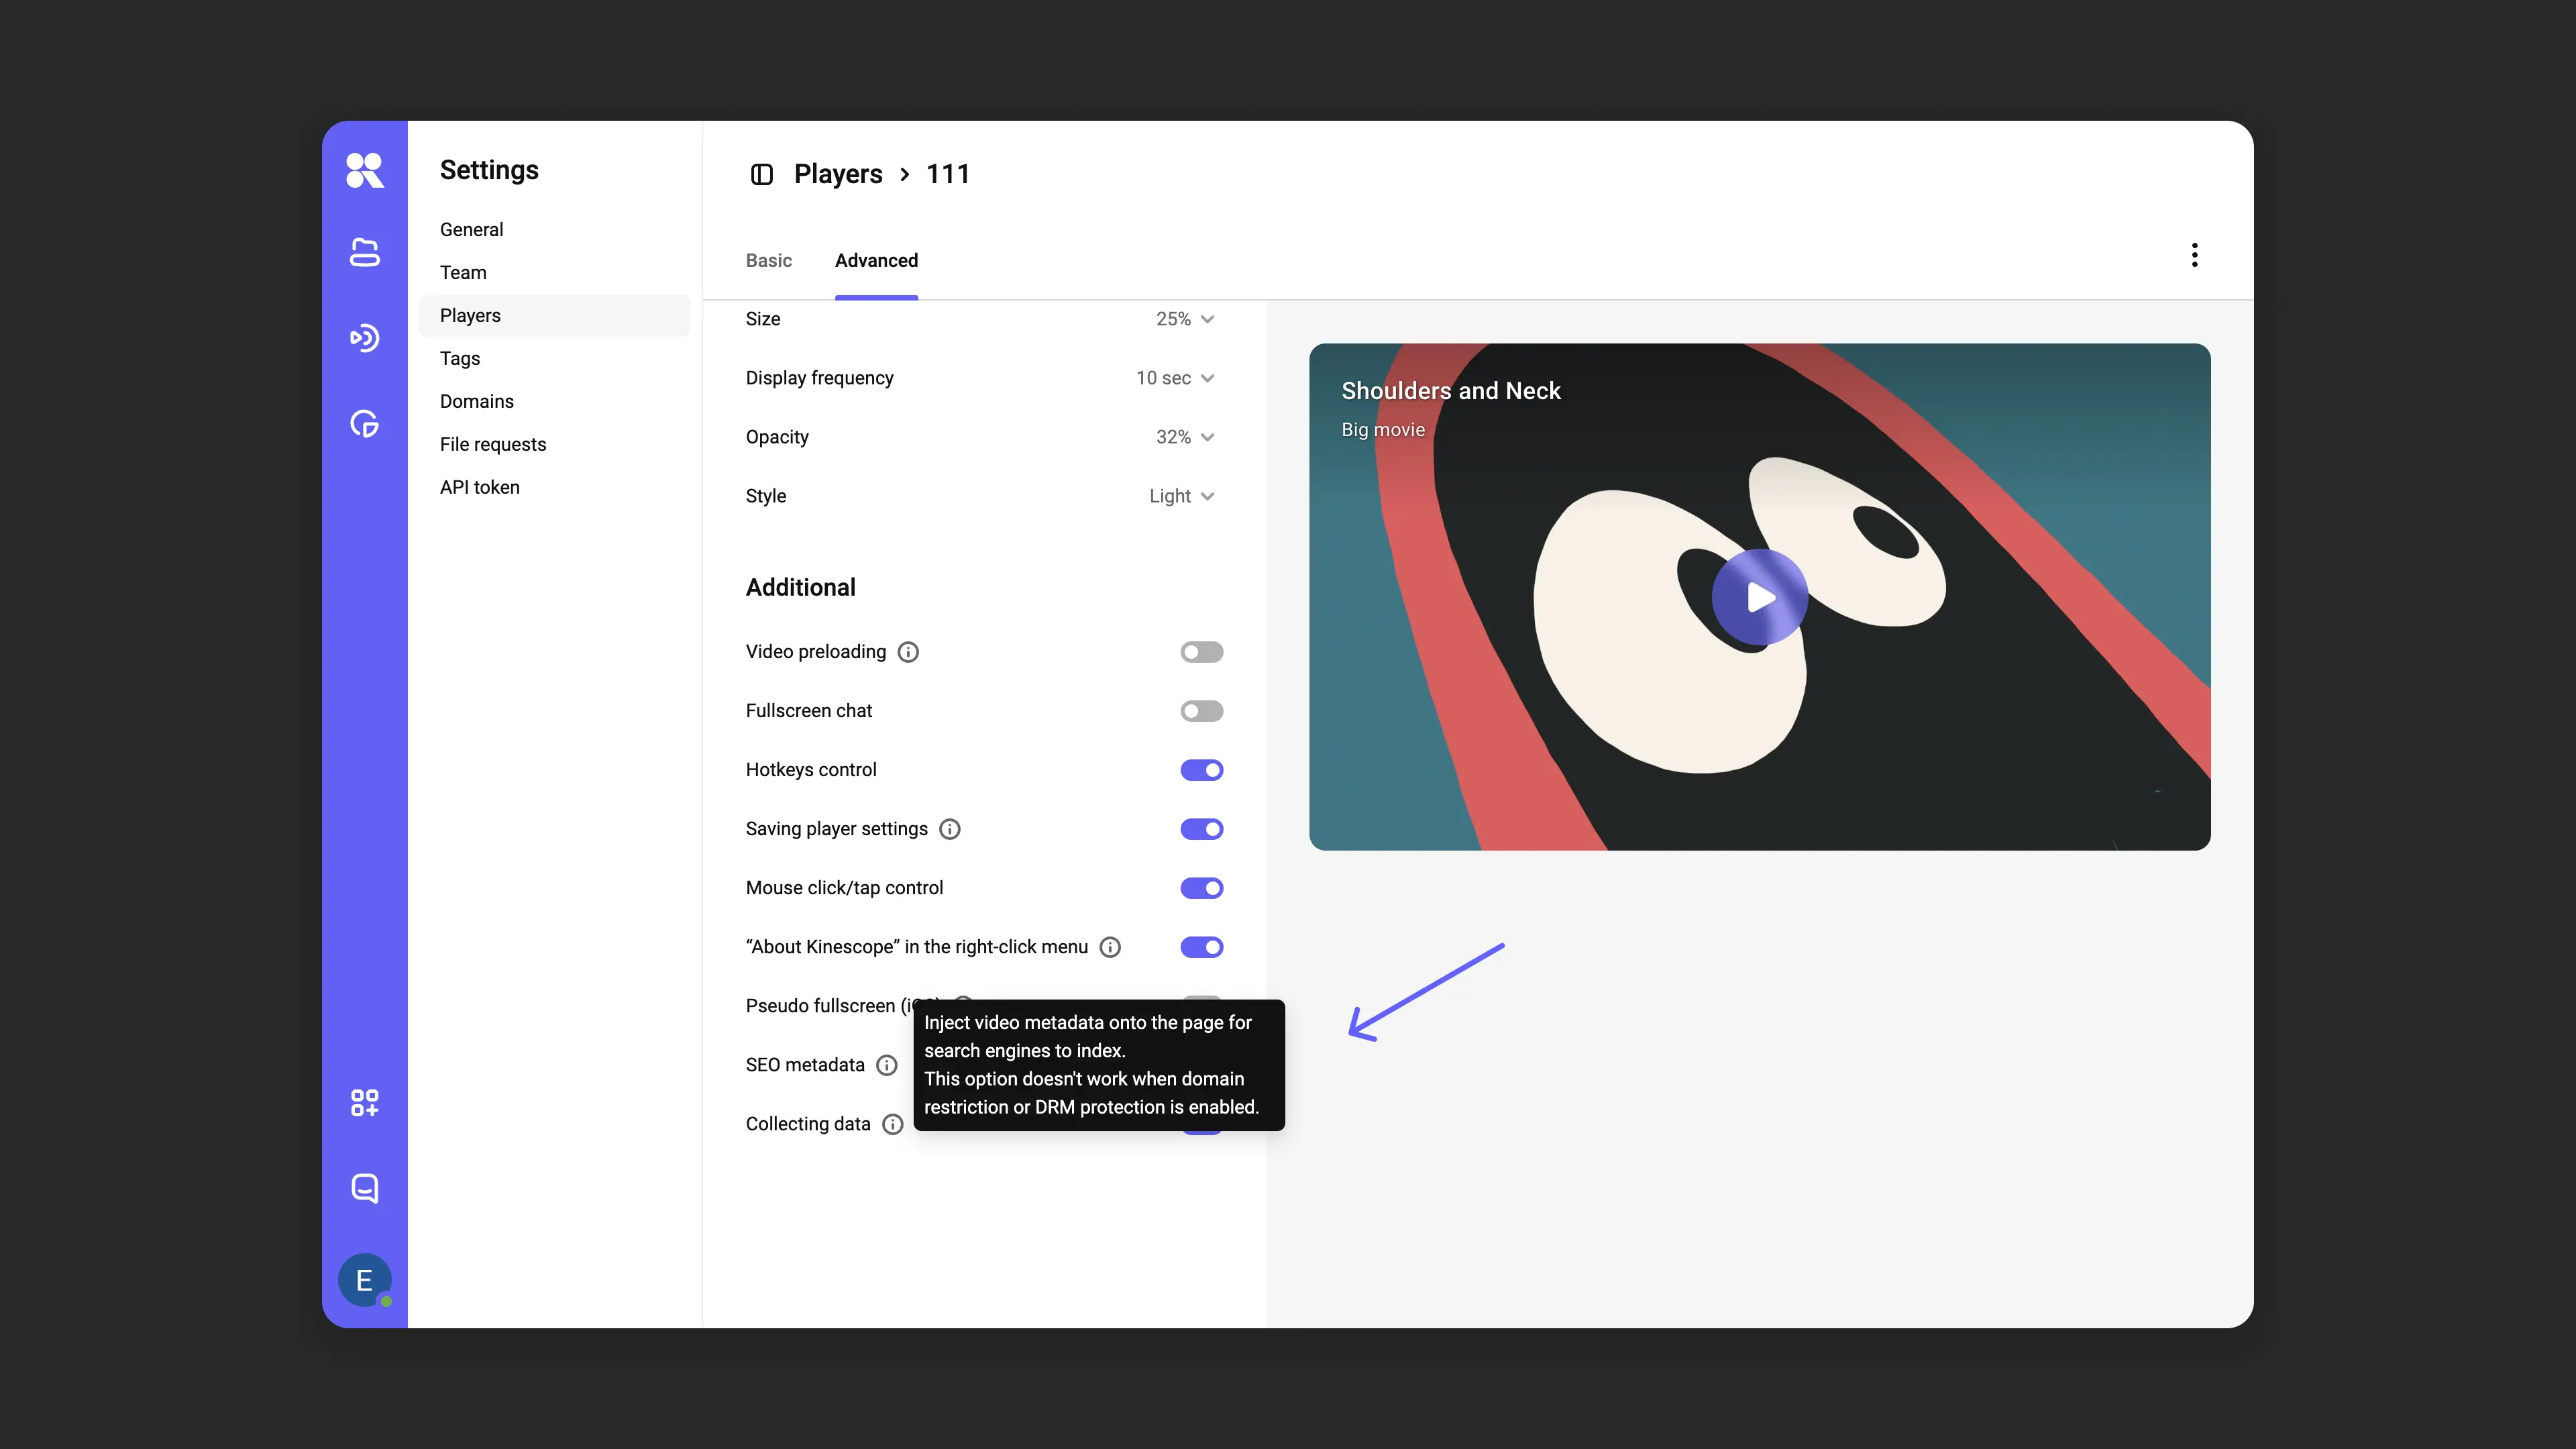
SEO optimization adds metadata to the player code (title, description, poster, and others) that is indexed by search engines. The schema.org markup structure is used to improve the positions of public videos in search engine results.
SEO optimization does not work in the following cases:
- Domain-based video access restrictions are enabled
- DRM download protection is enabled
- Video is not available for public viewing
In these cases, metadata is not added to the player code to protect content privacy.
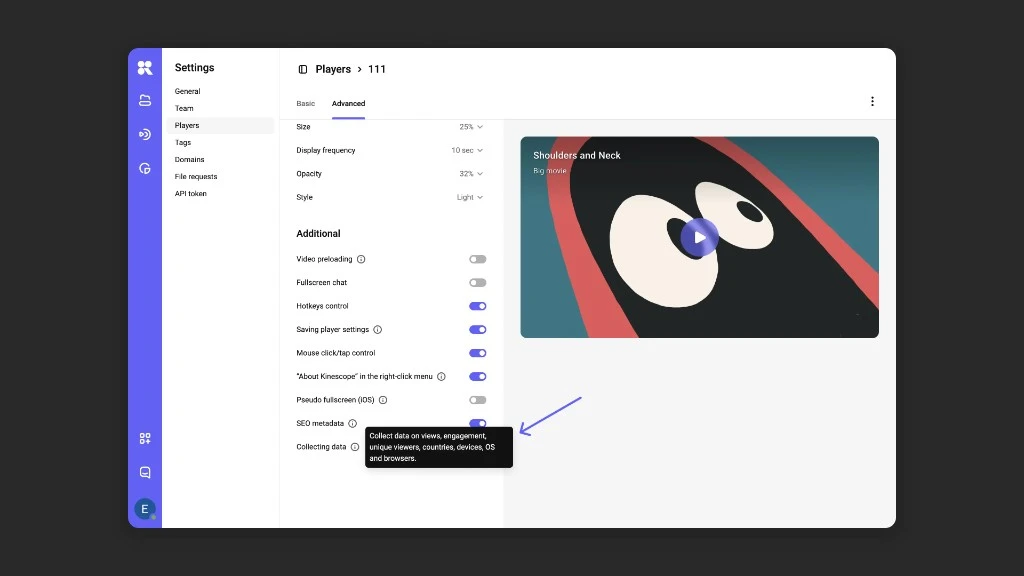
Enable data collection so the player can populate the analytics section with user behavior data.
Analytics and SEO optimization settings:
What’s next?
- Embedding — learn how to embed the customized player on your site
- IFrame Player API — programmatic player control via JavaScript
- Analytics — track the effectiveness of customized players
If you still have questions, write to the support chat within the Kinescope interface — specialists will help!