Stream Setup Instructions
This section contains step-by-step instructions for setting up popular programs to launch streams and webinars through Kinescope. You will learn how to configure OBS Studio and Zoom for stable, high-quality broadcasting.
Who this article is for
- Stream organizers — need to set up OBS Studio or Zoom for broadcasting via Kinescope
- Webinar hosts — need step-by-step program configuration instructions
- Platform administrators — need to set up streams for a team
Setting up OBS Studio for streams via Kinescope
OBS Studio is a popular video capture program whose reliable streaming can be trusted to Kinescope. A video with basic scenario setup via OBS Studio is available in the Live Stream Guide . Below is a step-by-step guide to properly configuring OBS Studio for use with Kinescope.
Step 1: Install OBS Studio
Download OBS Studio from the official website and install it on your computer.
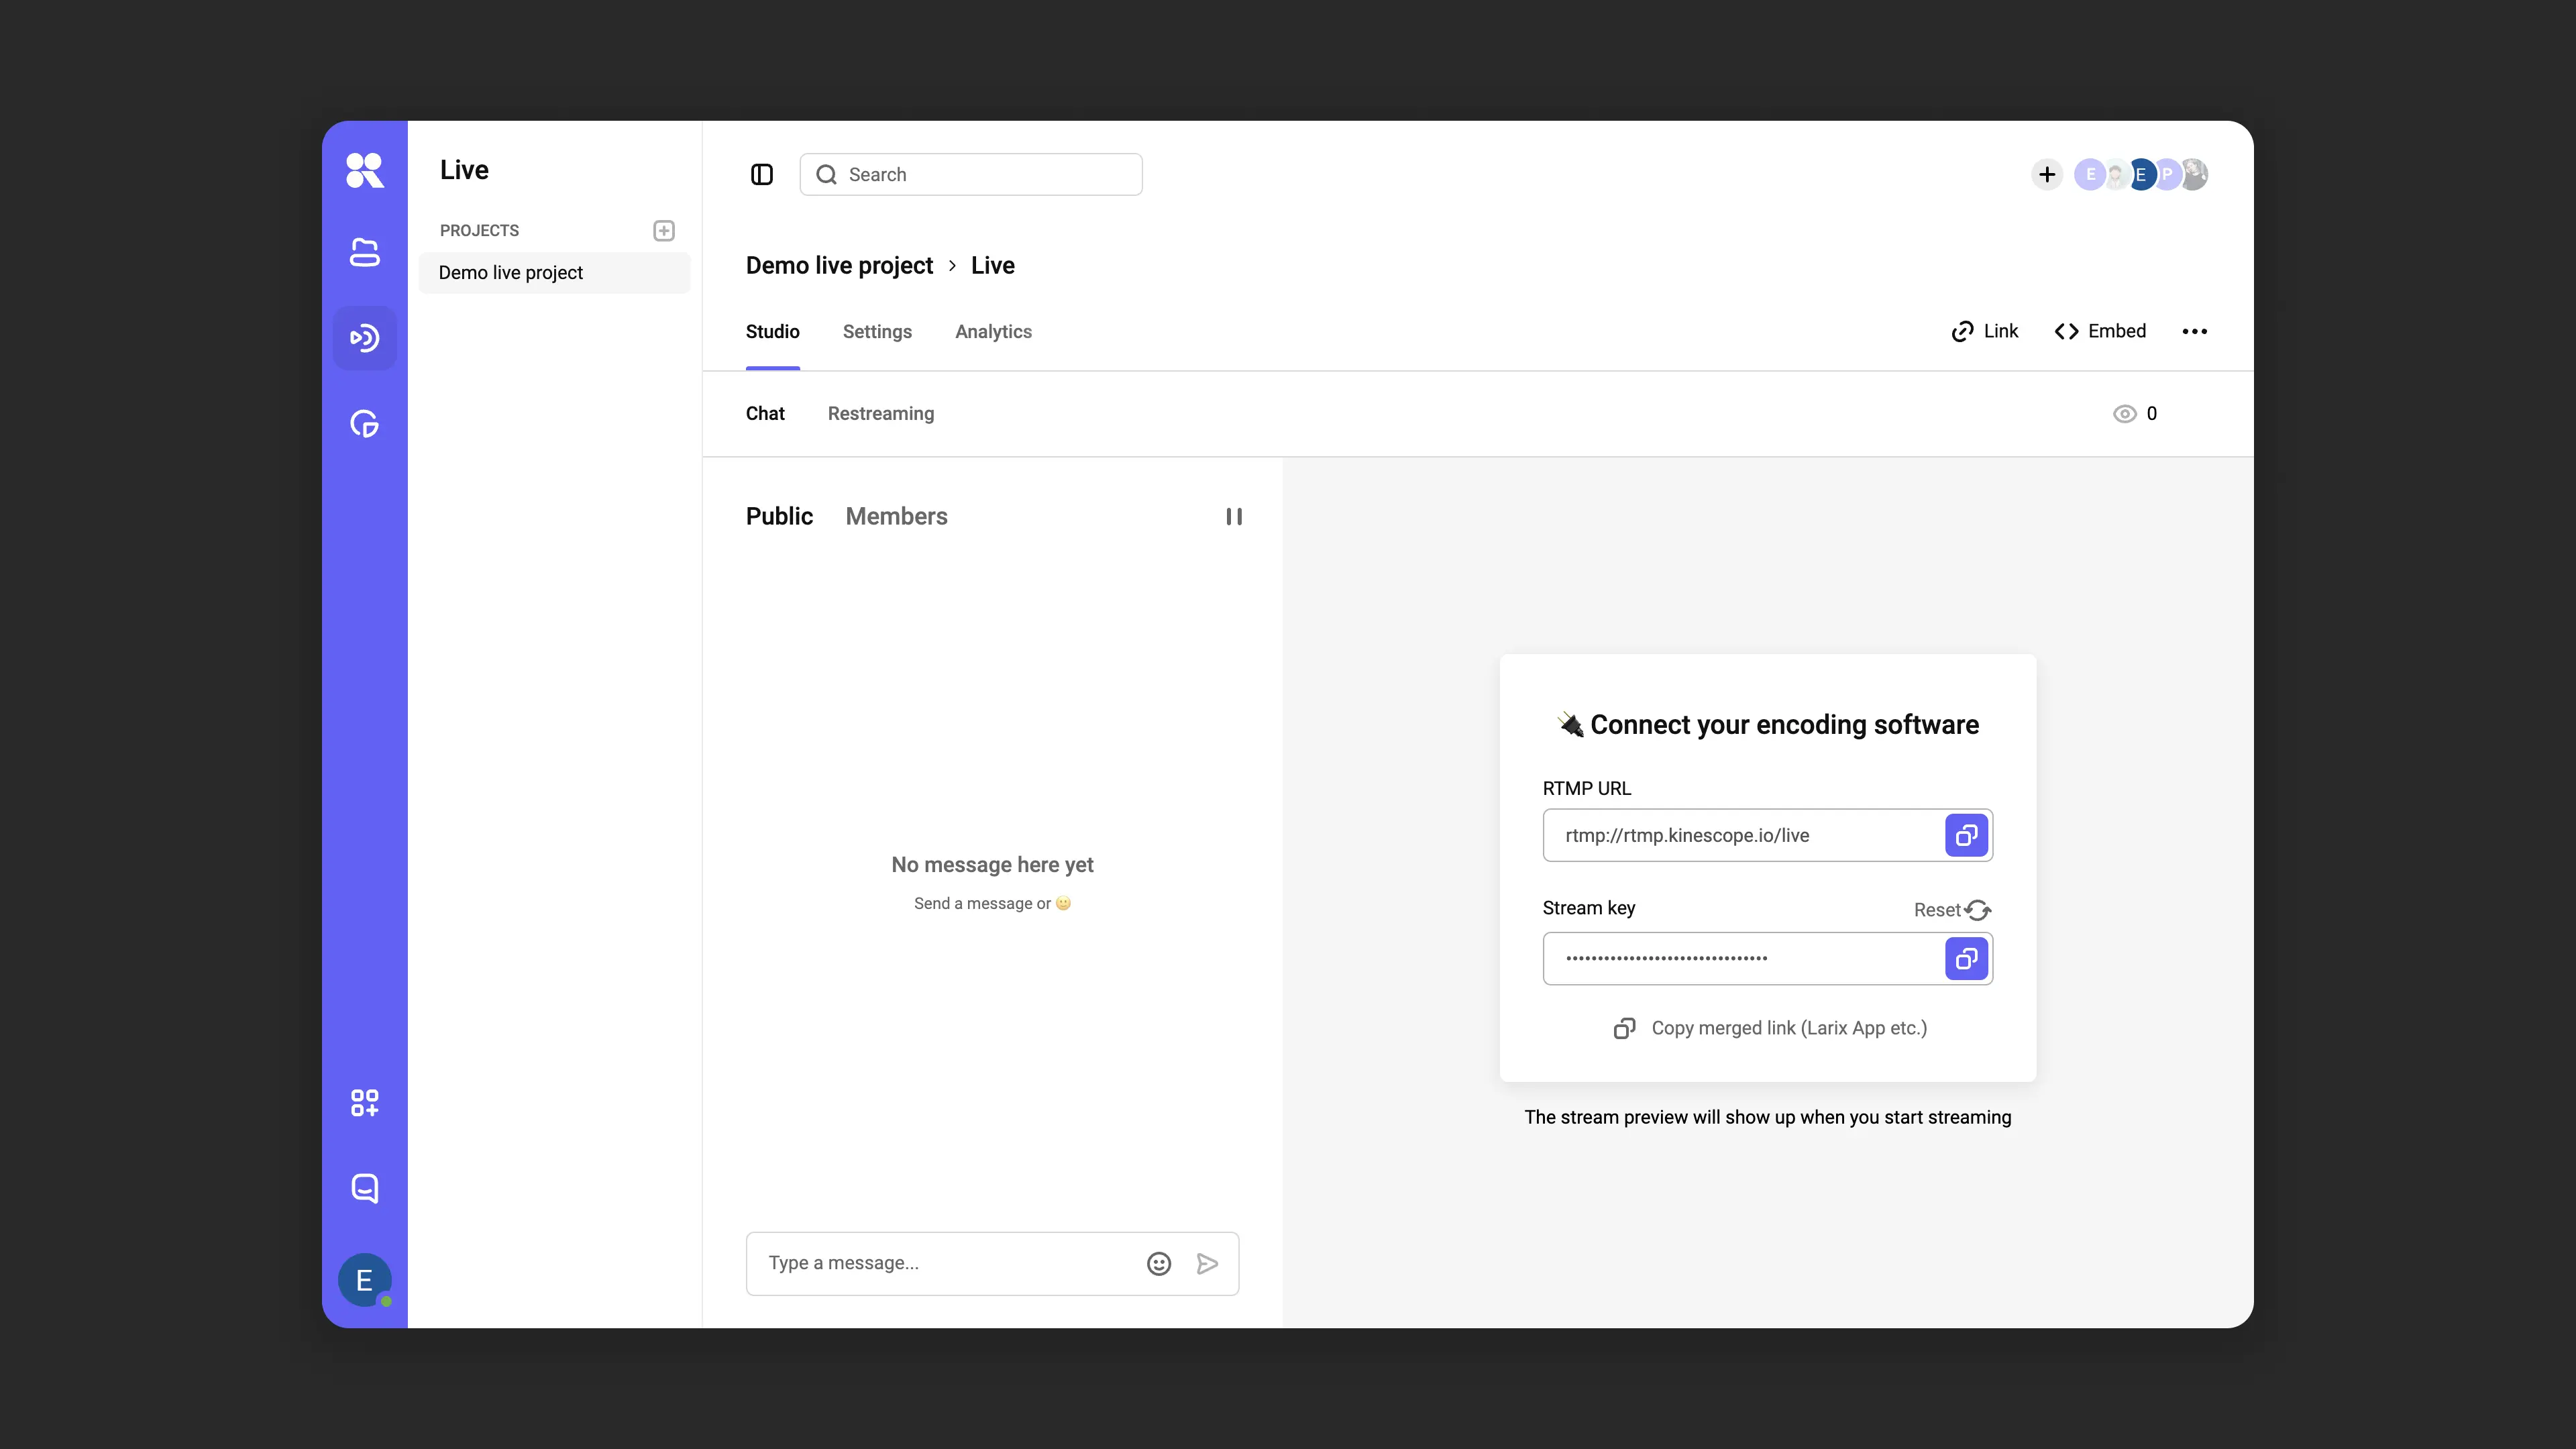
Step 2: Configure the stream in Kinescope
Log in to your account on Kinescope .
Go to the “Streams” section and create a new stream.
Choose: “One-time event” (each stream with a new link) or “Recurring event” (one link for all streams).
After creating, you will receive the server URL (RTMP server) and stream key. You will need these for OBS Studio configuration.
Step 3: Configure OBS Studio
- Open OBS Studio and go to “File” → “Settings”.
- In the “Stream” section, set:
- Service: “Custom”.
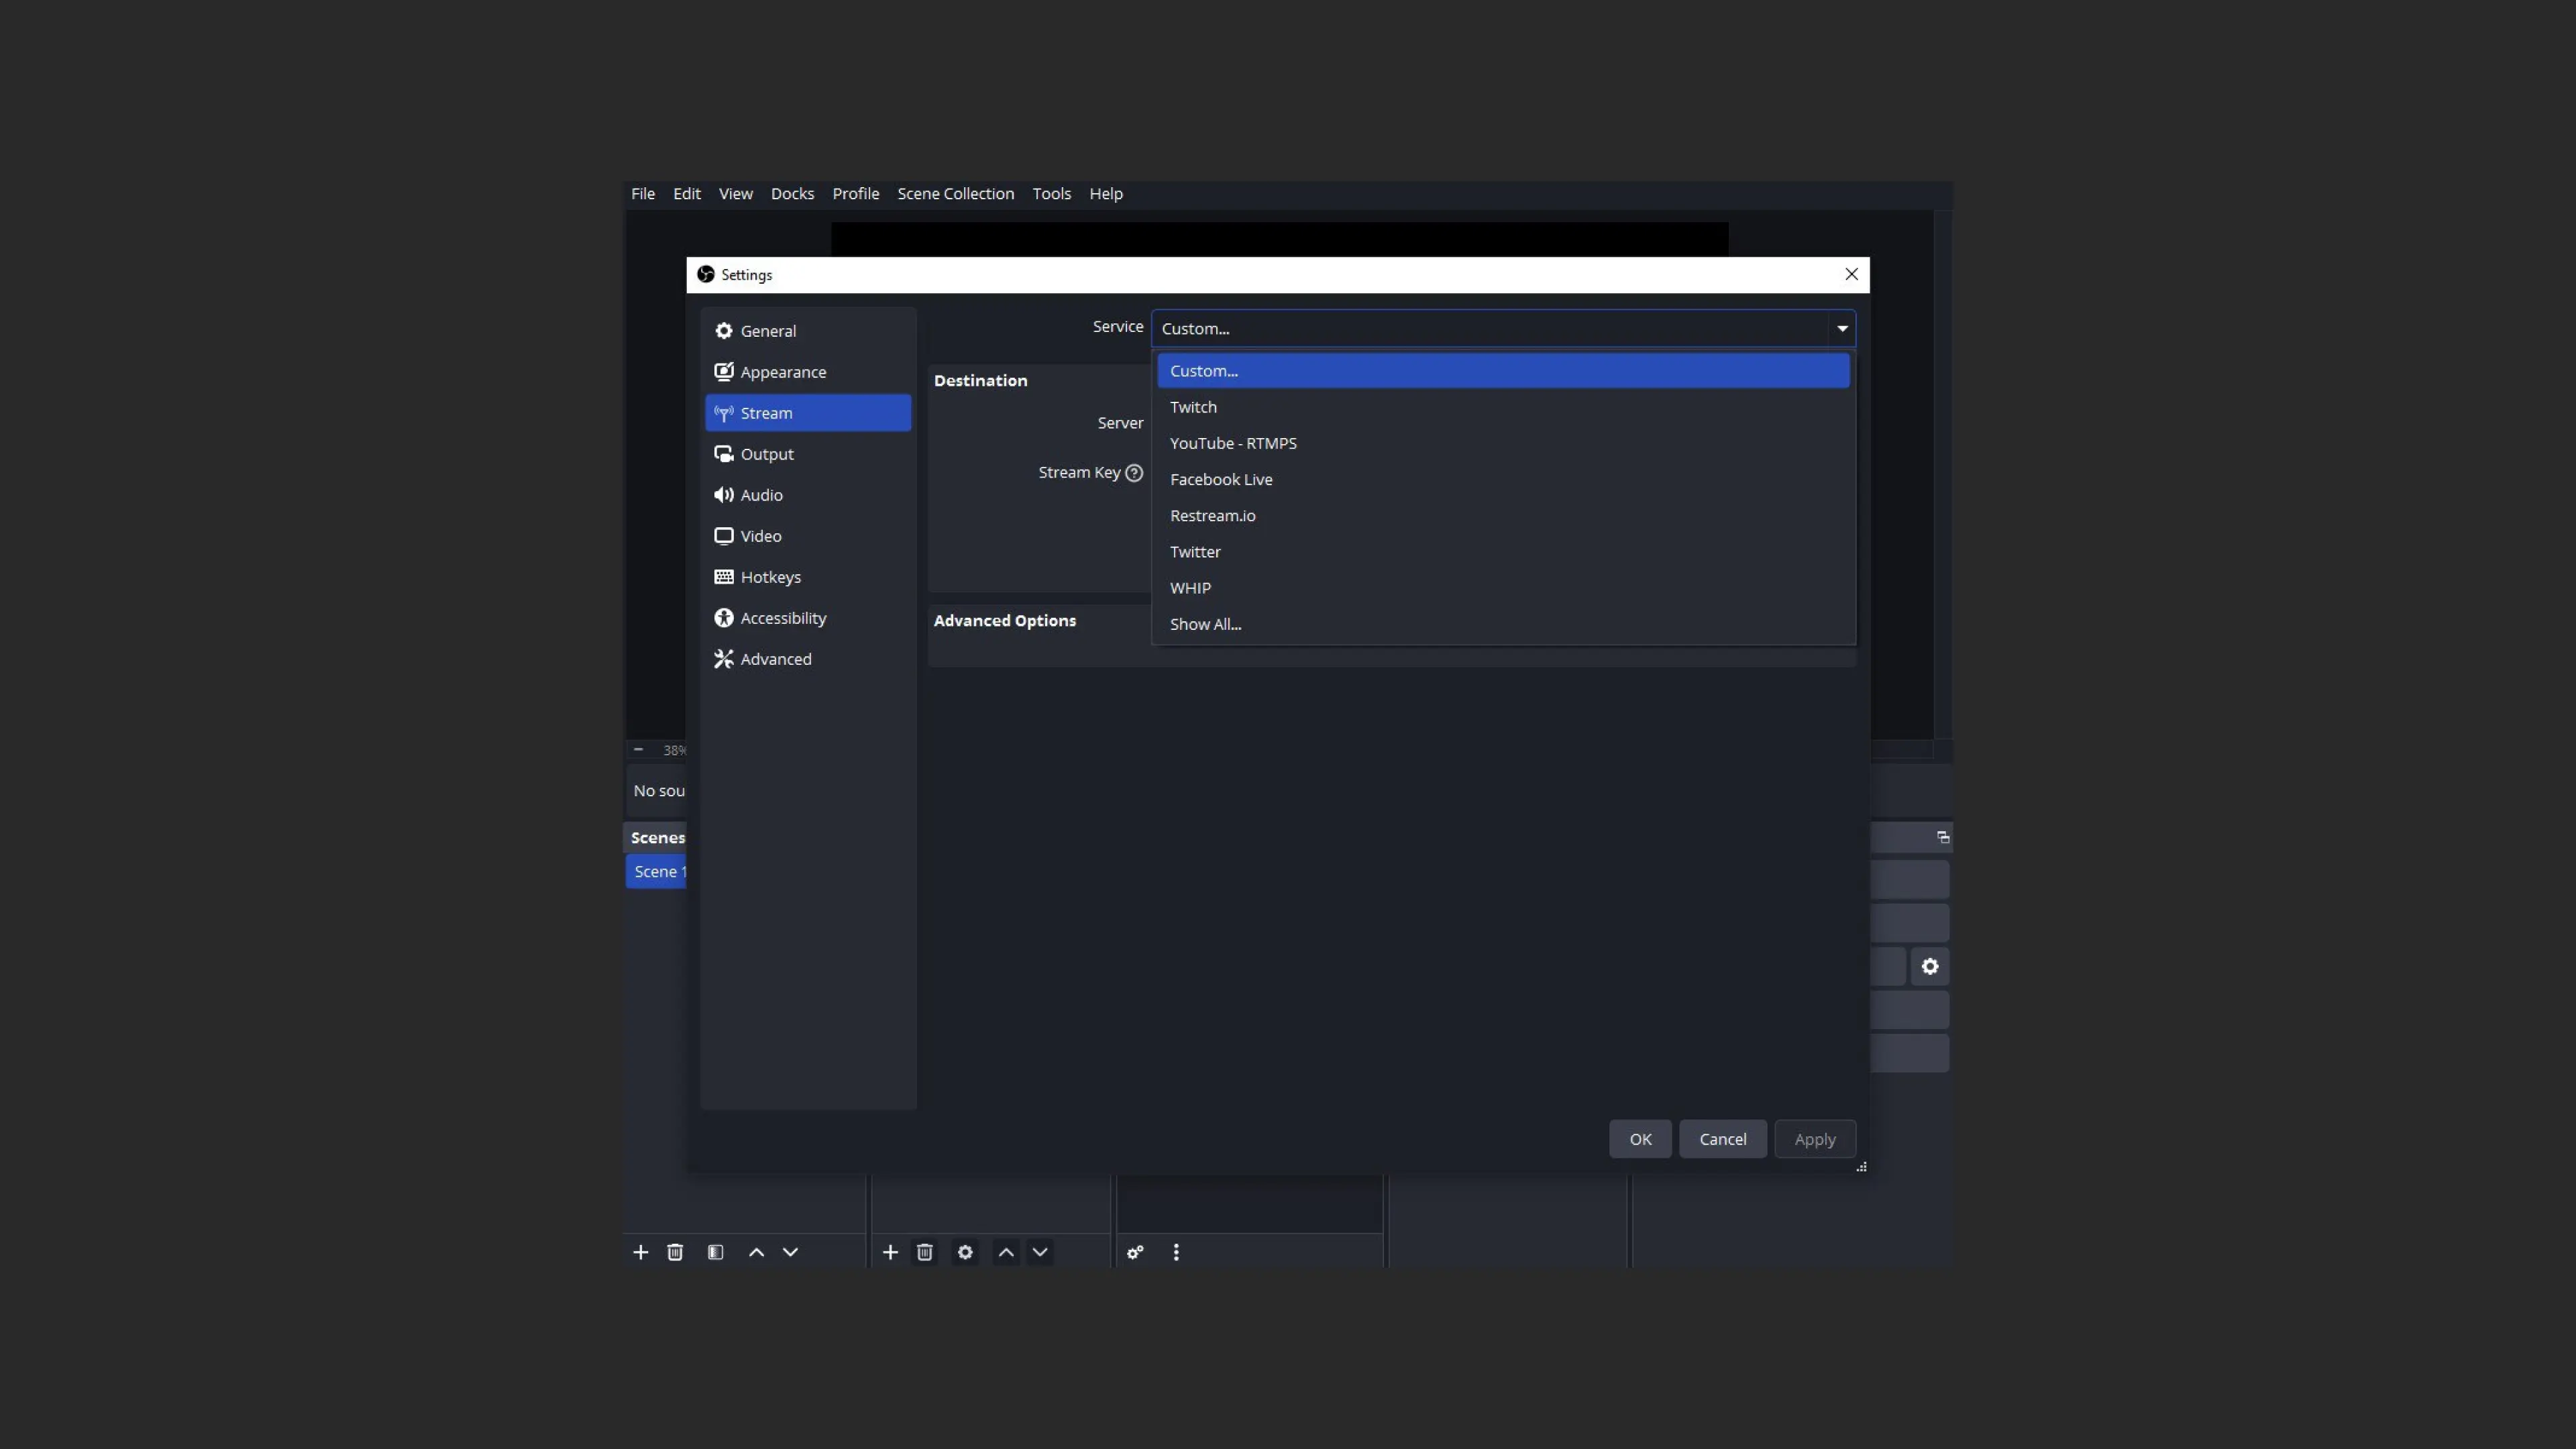
- Server: paste the RTMP server received from Kinescope.
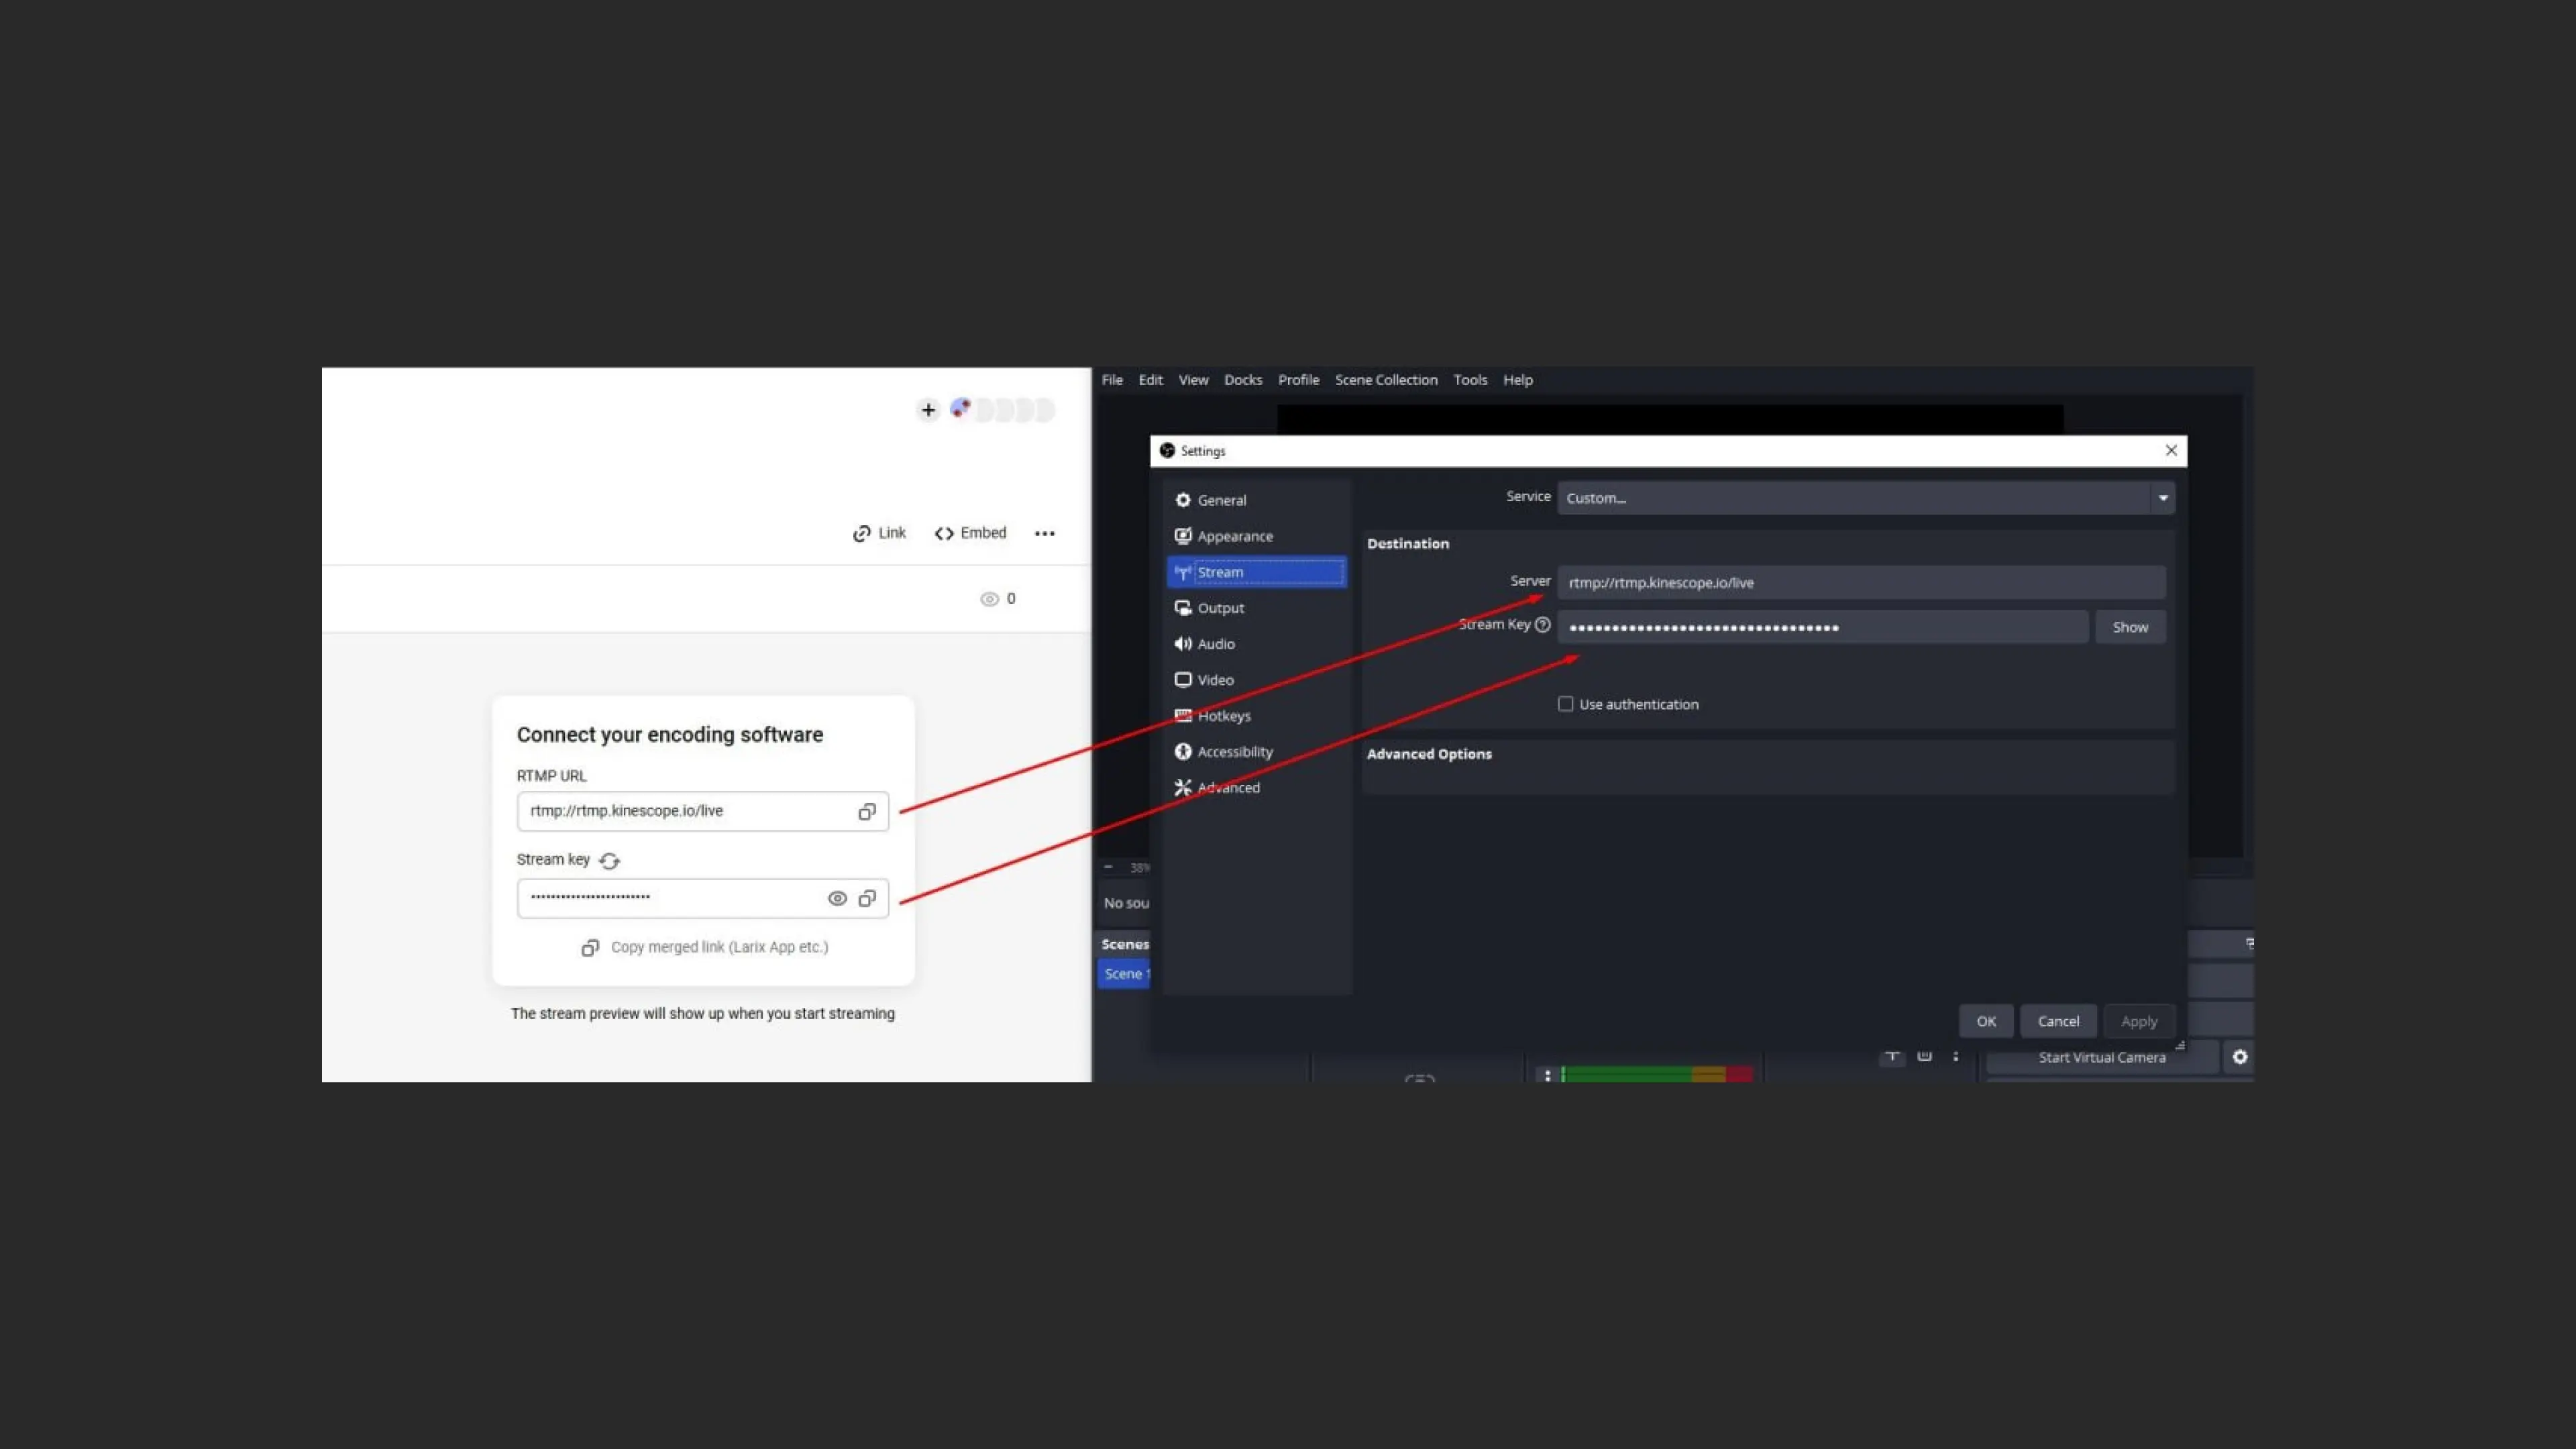
- Stream key: paste the corresponding key from Kinescope.
- Click “Apply” and “OK”.
Step 4: Configure video and audio
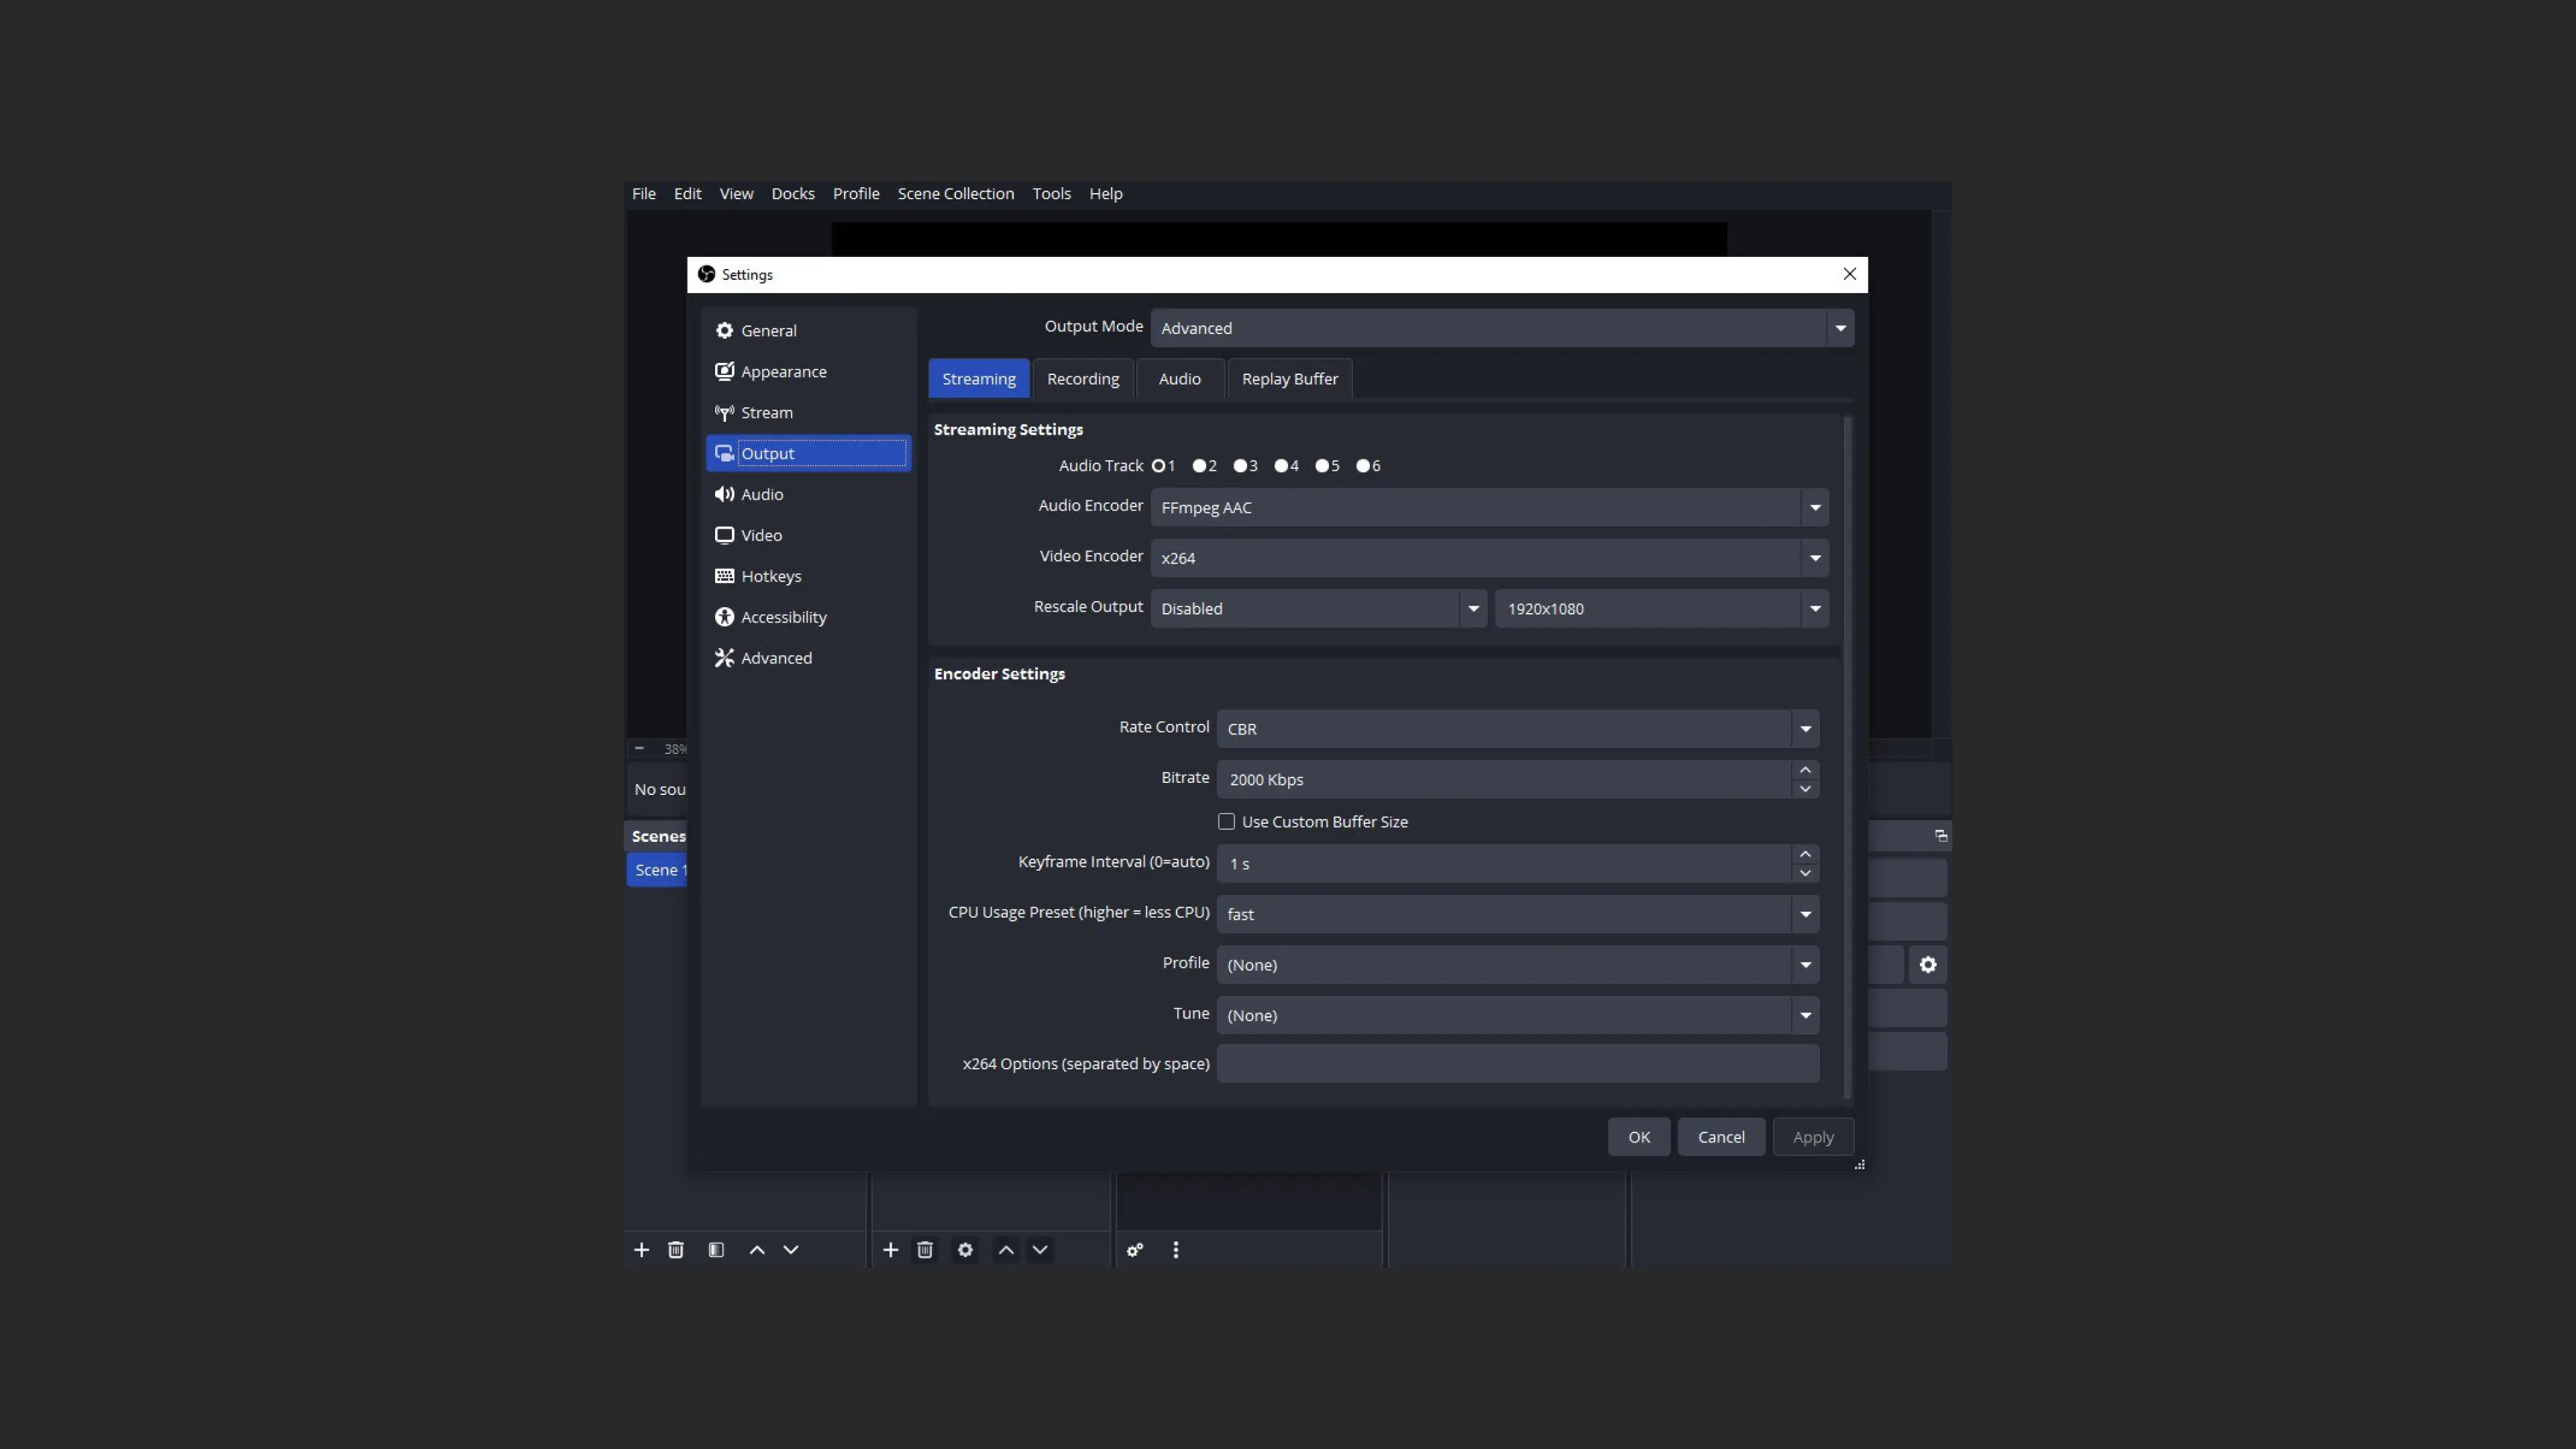
- In the “Output” section, set:
- Output mode: “Advanced”.
- Video bitrate. For “talking head” and presentations — 2000–2500 Kbps, for dynamic content — 4000 Kbps, for Full HD streams — up to 6000 Kbps.
- Encoder: choose based on your hardware (NVENC for Nvidia graphics cards or x264 for CPU). Keyframe interval: 1 s.
- In the “Audio” section, set the audio bitrate to 128–192 Kbps.
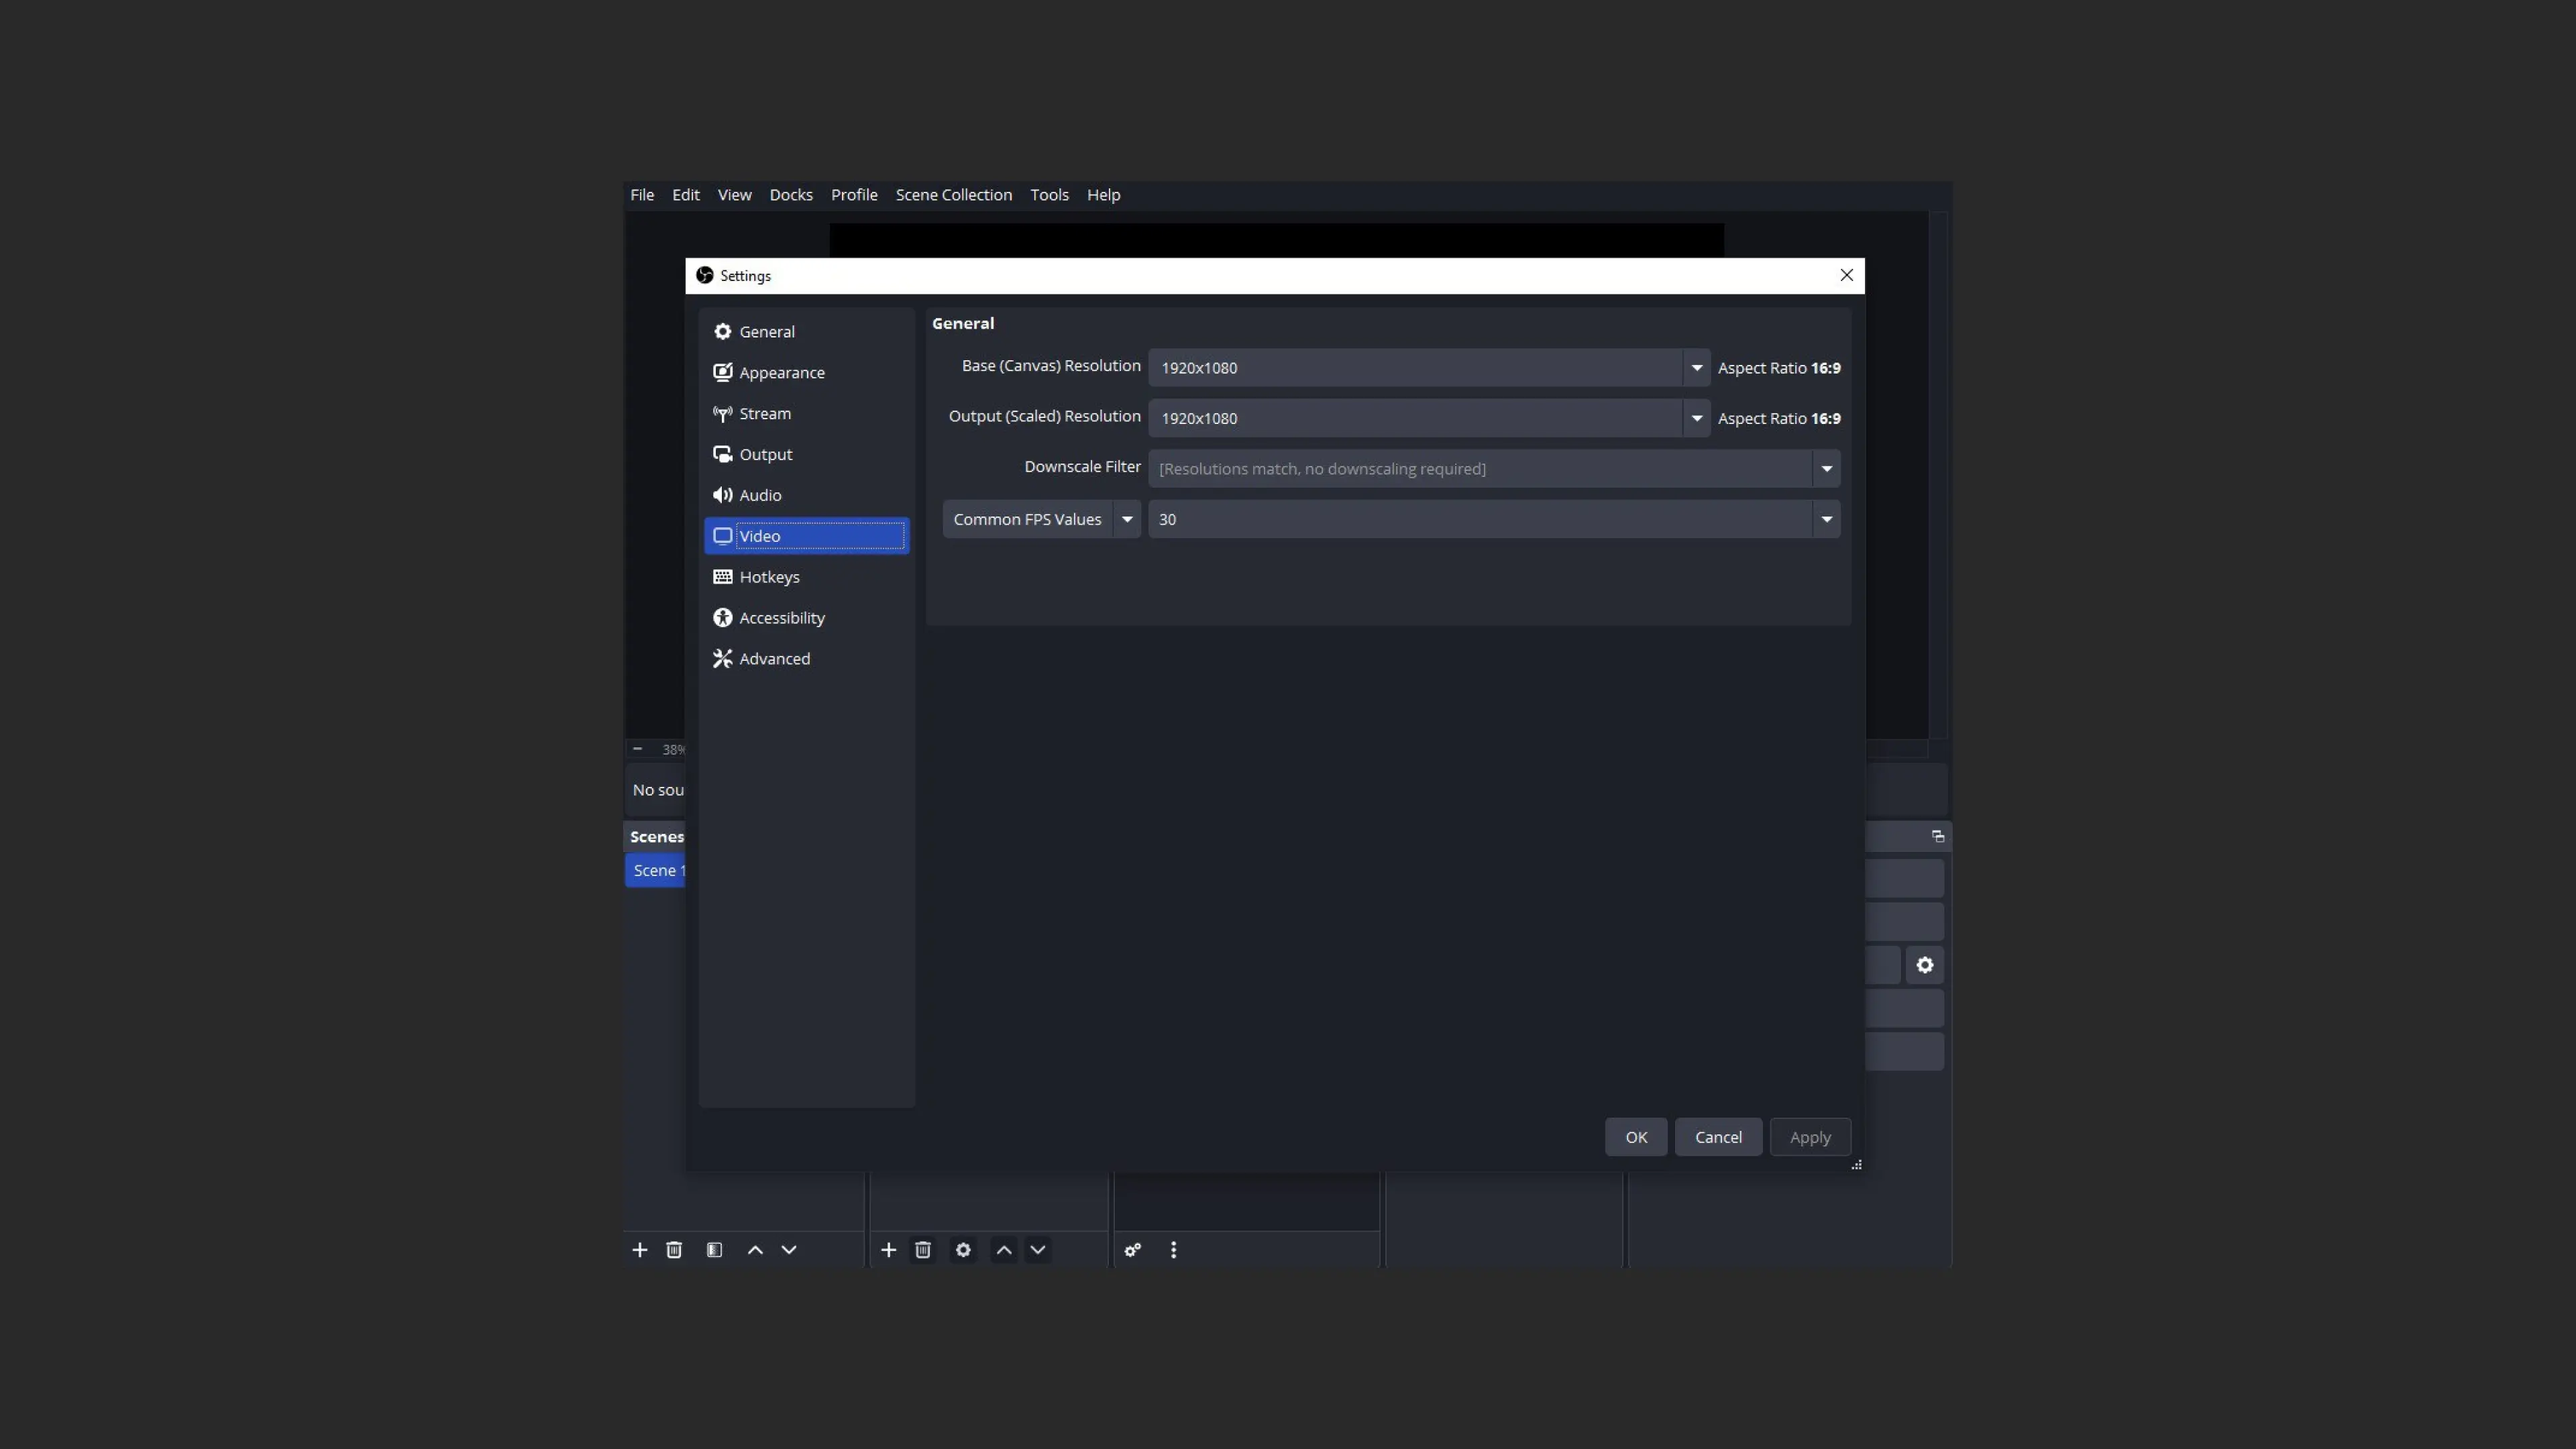
- In the “Video” section, set:
- Base (canvas) resolution: 1920×1080.
- Output resolution: 1280×720 (HD) or 1920×1080 (Full HD).
- Frame rate: 30 FPS.
Step 5: Create scenes and add sources
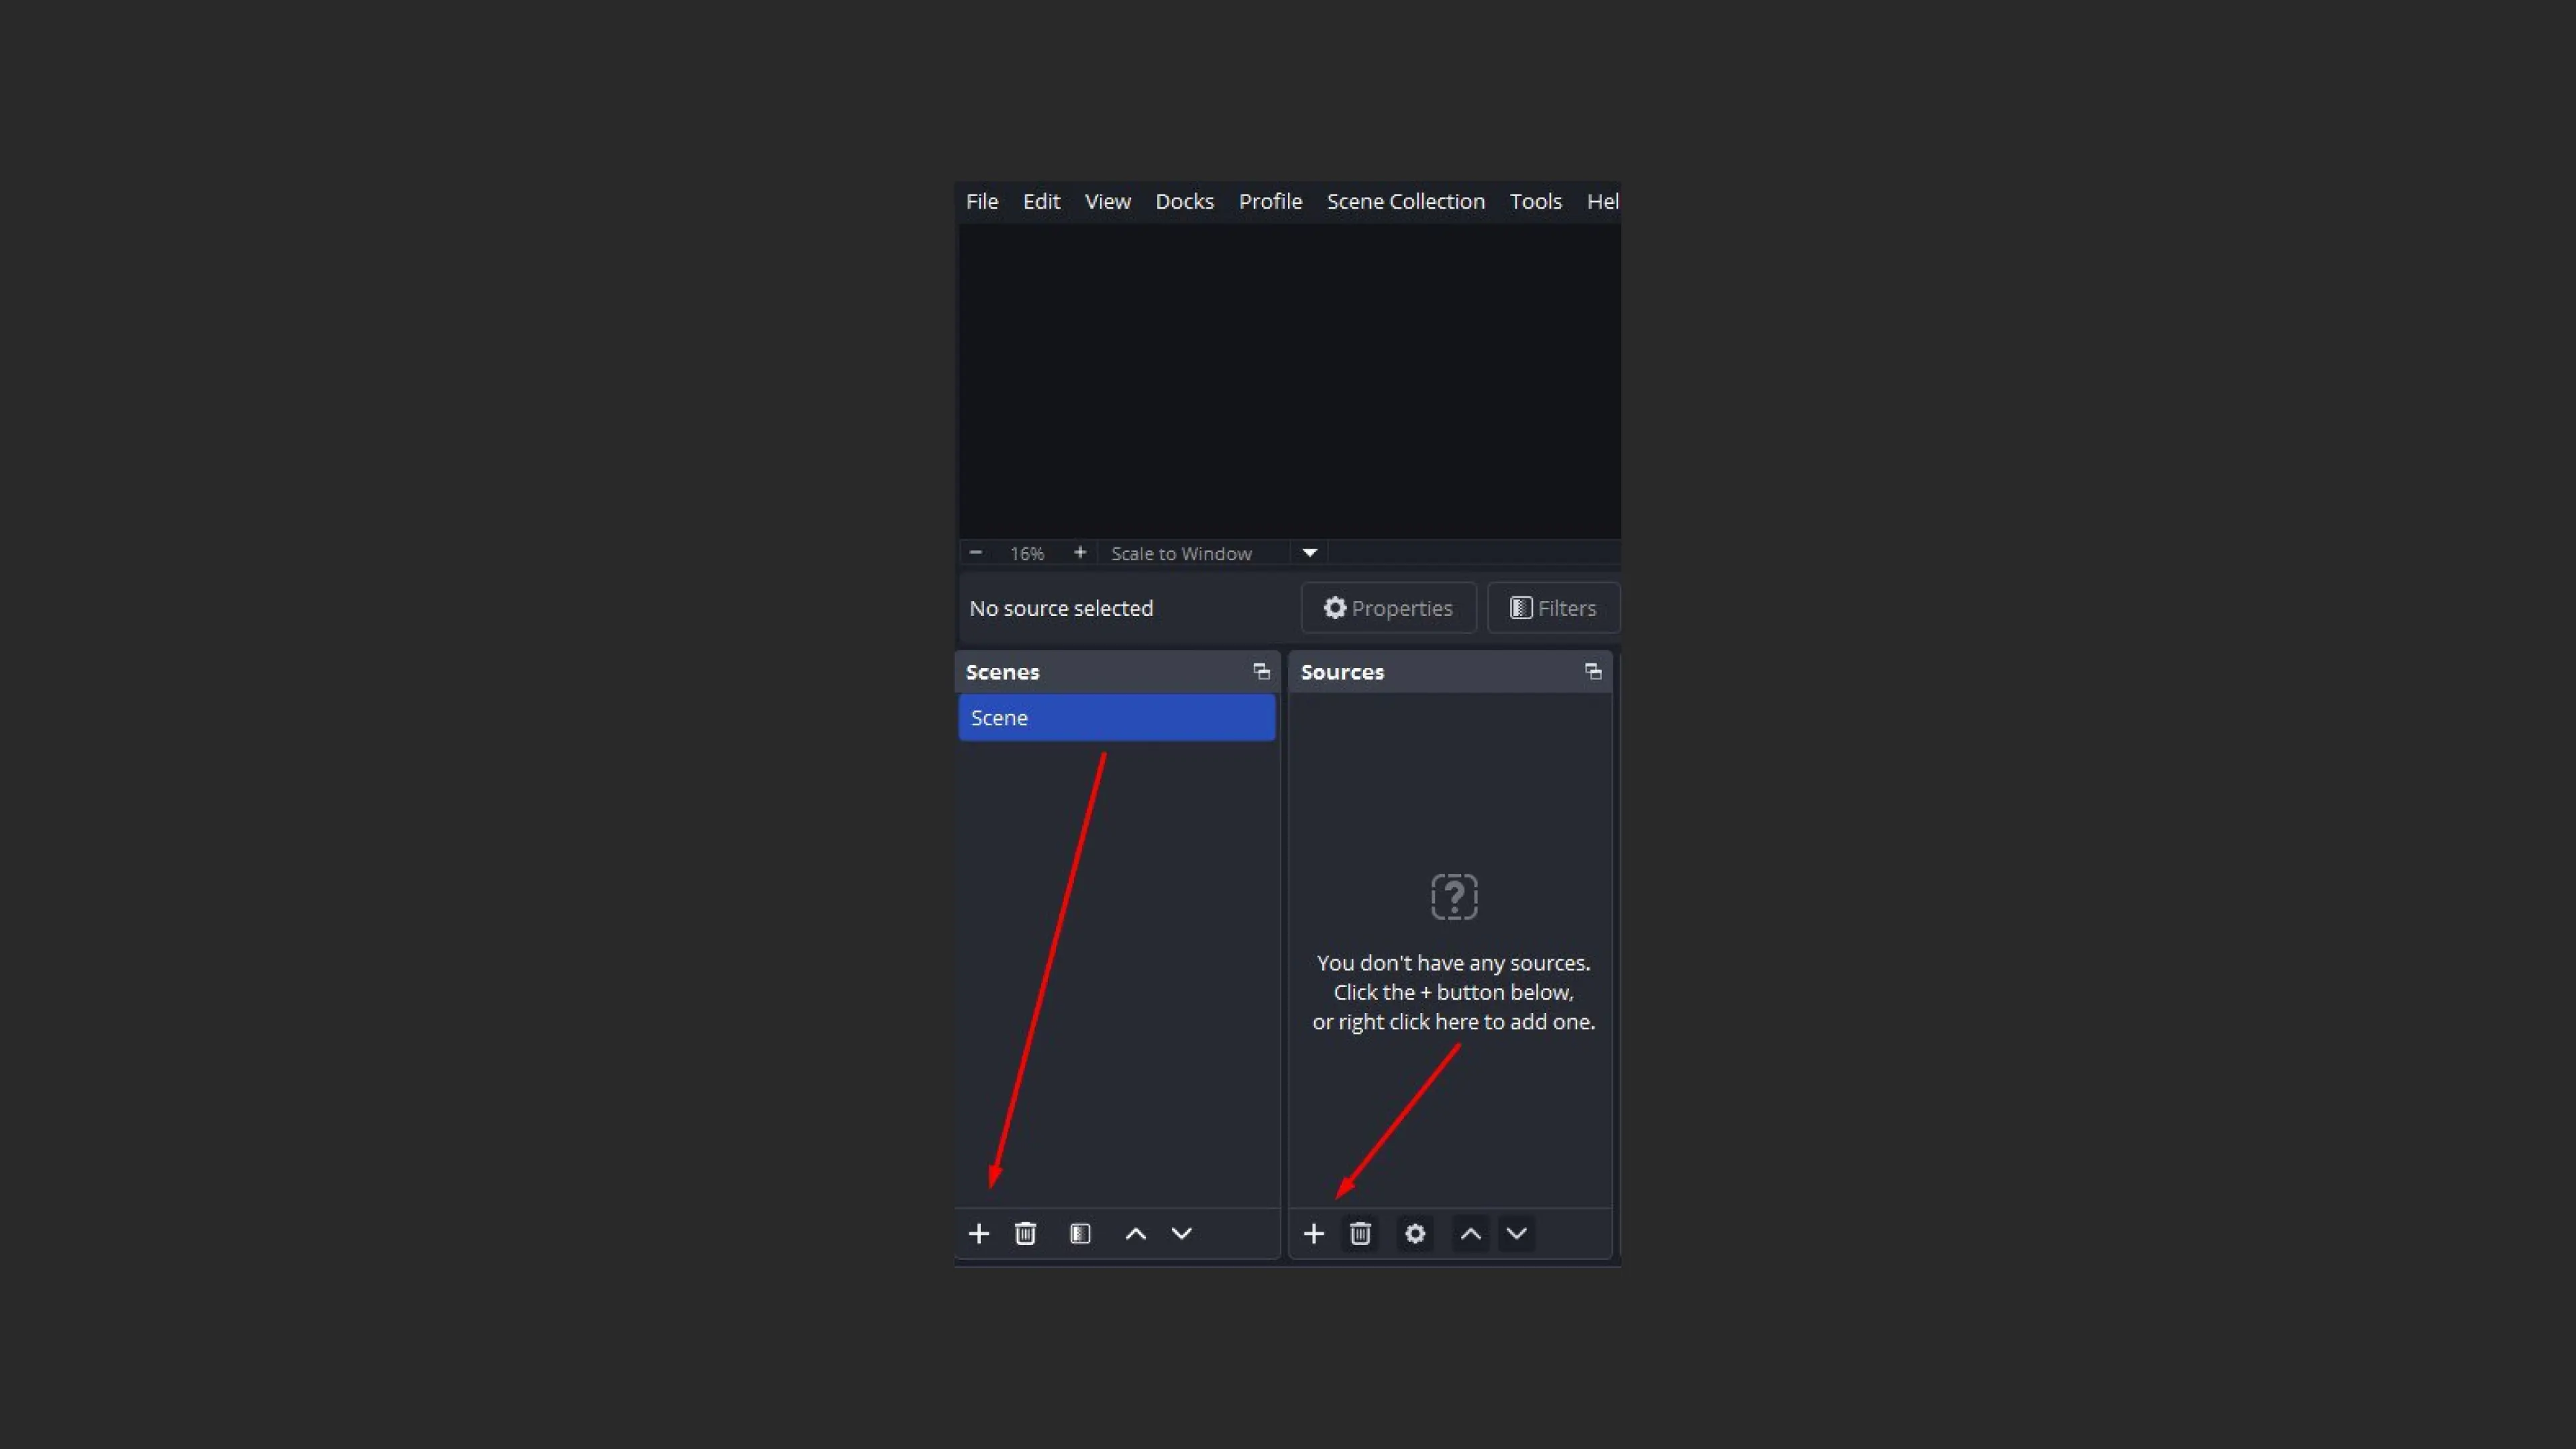
In the OBS Studio main window, in the “Scenes” panel, click “+” and create a new scene (for example, “Main”).
In the “Sources” panel, click “+” and add the required sources:
- Screen capture: to show the entire screen.
- Window capture: to show a specific application.
- Video capture device: to connect a webcam.
Step 6: Test and start the stream
- Click “Start Streaming” in OBS Studio.
- Go to the Kinescope dashboard and make sure the stream status is “Active” and the image is displayed correctly in the player.
OBS Studio recommendations
- Stable internet connection: for quality streaming, using a wired connection is recommended.
- Test stream: before the main broadcast, run a test stream to verify the settings are correct.
- Load monitoring: monitor CPU and RAM usage during the stream to avoid overloads.
- Backup: save a stream recording in case of technical issues.
If you have questions or difficulties, Kinescope support is always ready to help. Happy streaming!
Setting up Zoom for streams via Kinescope
Below is a step-by-step guide to properly setting up the paid version of Zoom for streaming video to Kinescope.
Step 1: Prepare accounts
Make sure you have accounts in Zoom and Kinescope:
Step 2: Create a stream in Kinescope
Log in to your Kinescope account:
- Go to the “Streams” section.
- Create a new stream.
- Copy the server URL (RTMP server) and stream key, which you will need in Zoom.
Step 3: Configure Zoom for streaming
Log in to your Zoom account on the website:
- Go to the “Settings” section.
- Enable the “Allow live streaming meetings” option and select “Custom Streaming Service”.
- Create and schedule a meeting or webinar.
- Start the meeting and click “More” → “Live on Custom Live Streaming Service”.
Step 4: Connect Zoom to Kinescope
In the Zoom streaming popup window:
Paste the RTMP server URL and stream key received from Kinescope.
In the “Live Stream Page” field, paste a link to your website or the page with the Kinescope player.
Click the “Go Live!” button.
Your webinar is now being streamed through Kinescope.
Step 5: Verify the stream
Log in to the Kinescope dashboard and make sure:
- The stream status is “Active”.
- The video is displayed correctly in the player.
Replacing the RTMP URL in Zoom
If you want to change the RTMP URL in a Zoom stream, you need to restart the stream in Zoom. This can be done during the stream without ending the meeting. A one-time stream remains in standby mode for 10 minutes — during this time you can update the settings and resume the stream.
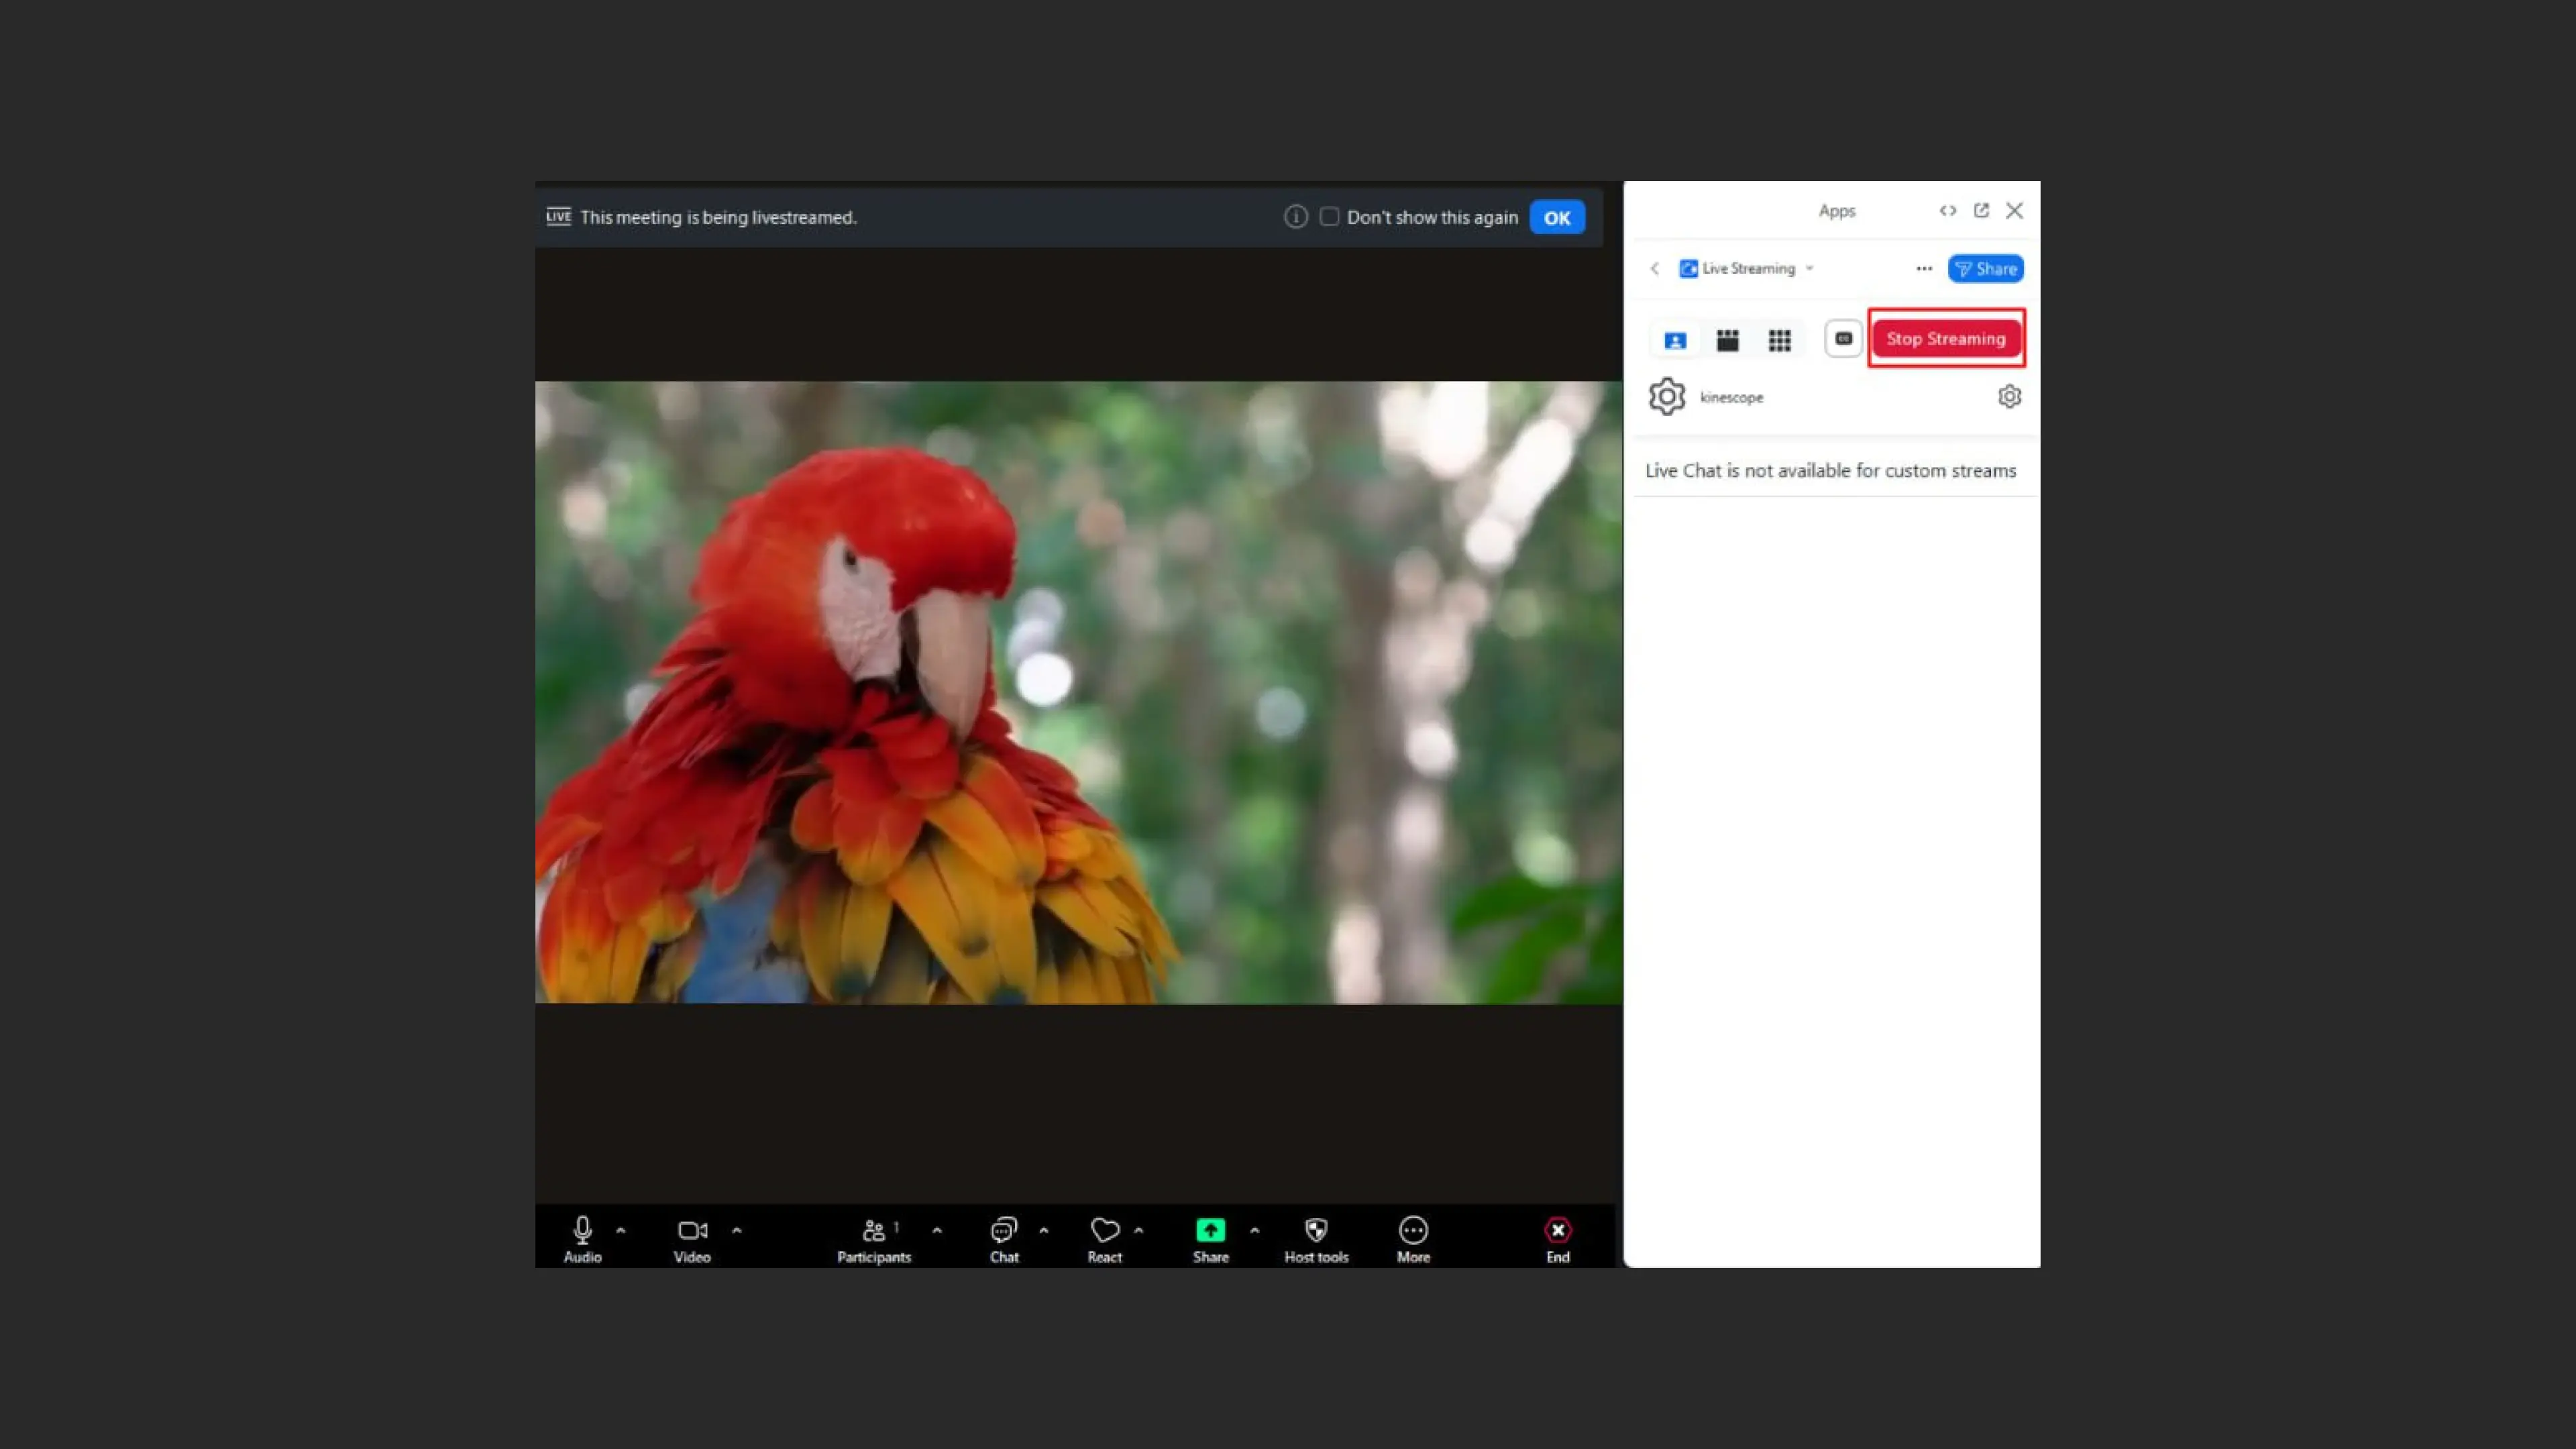
- Click the Stop Streaming button to stop the current stream.
- After stopping the stream, go to its settings to edit.
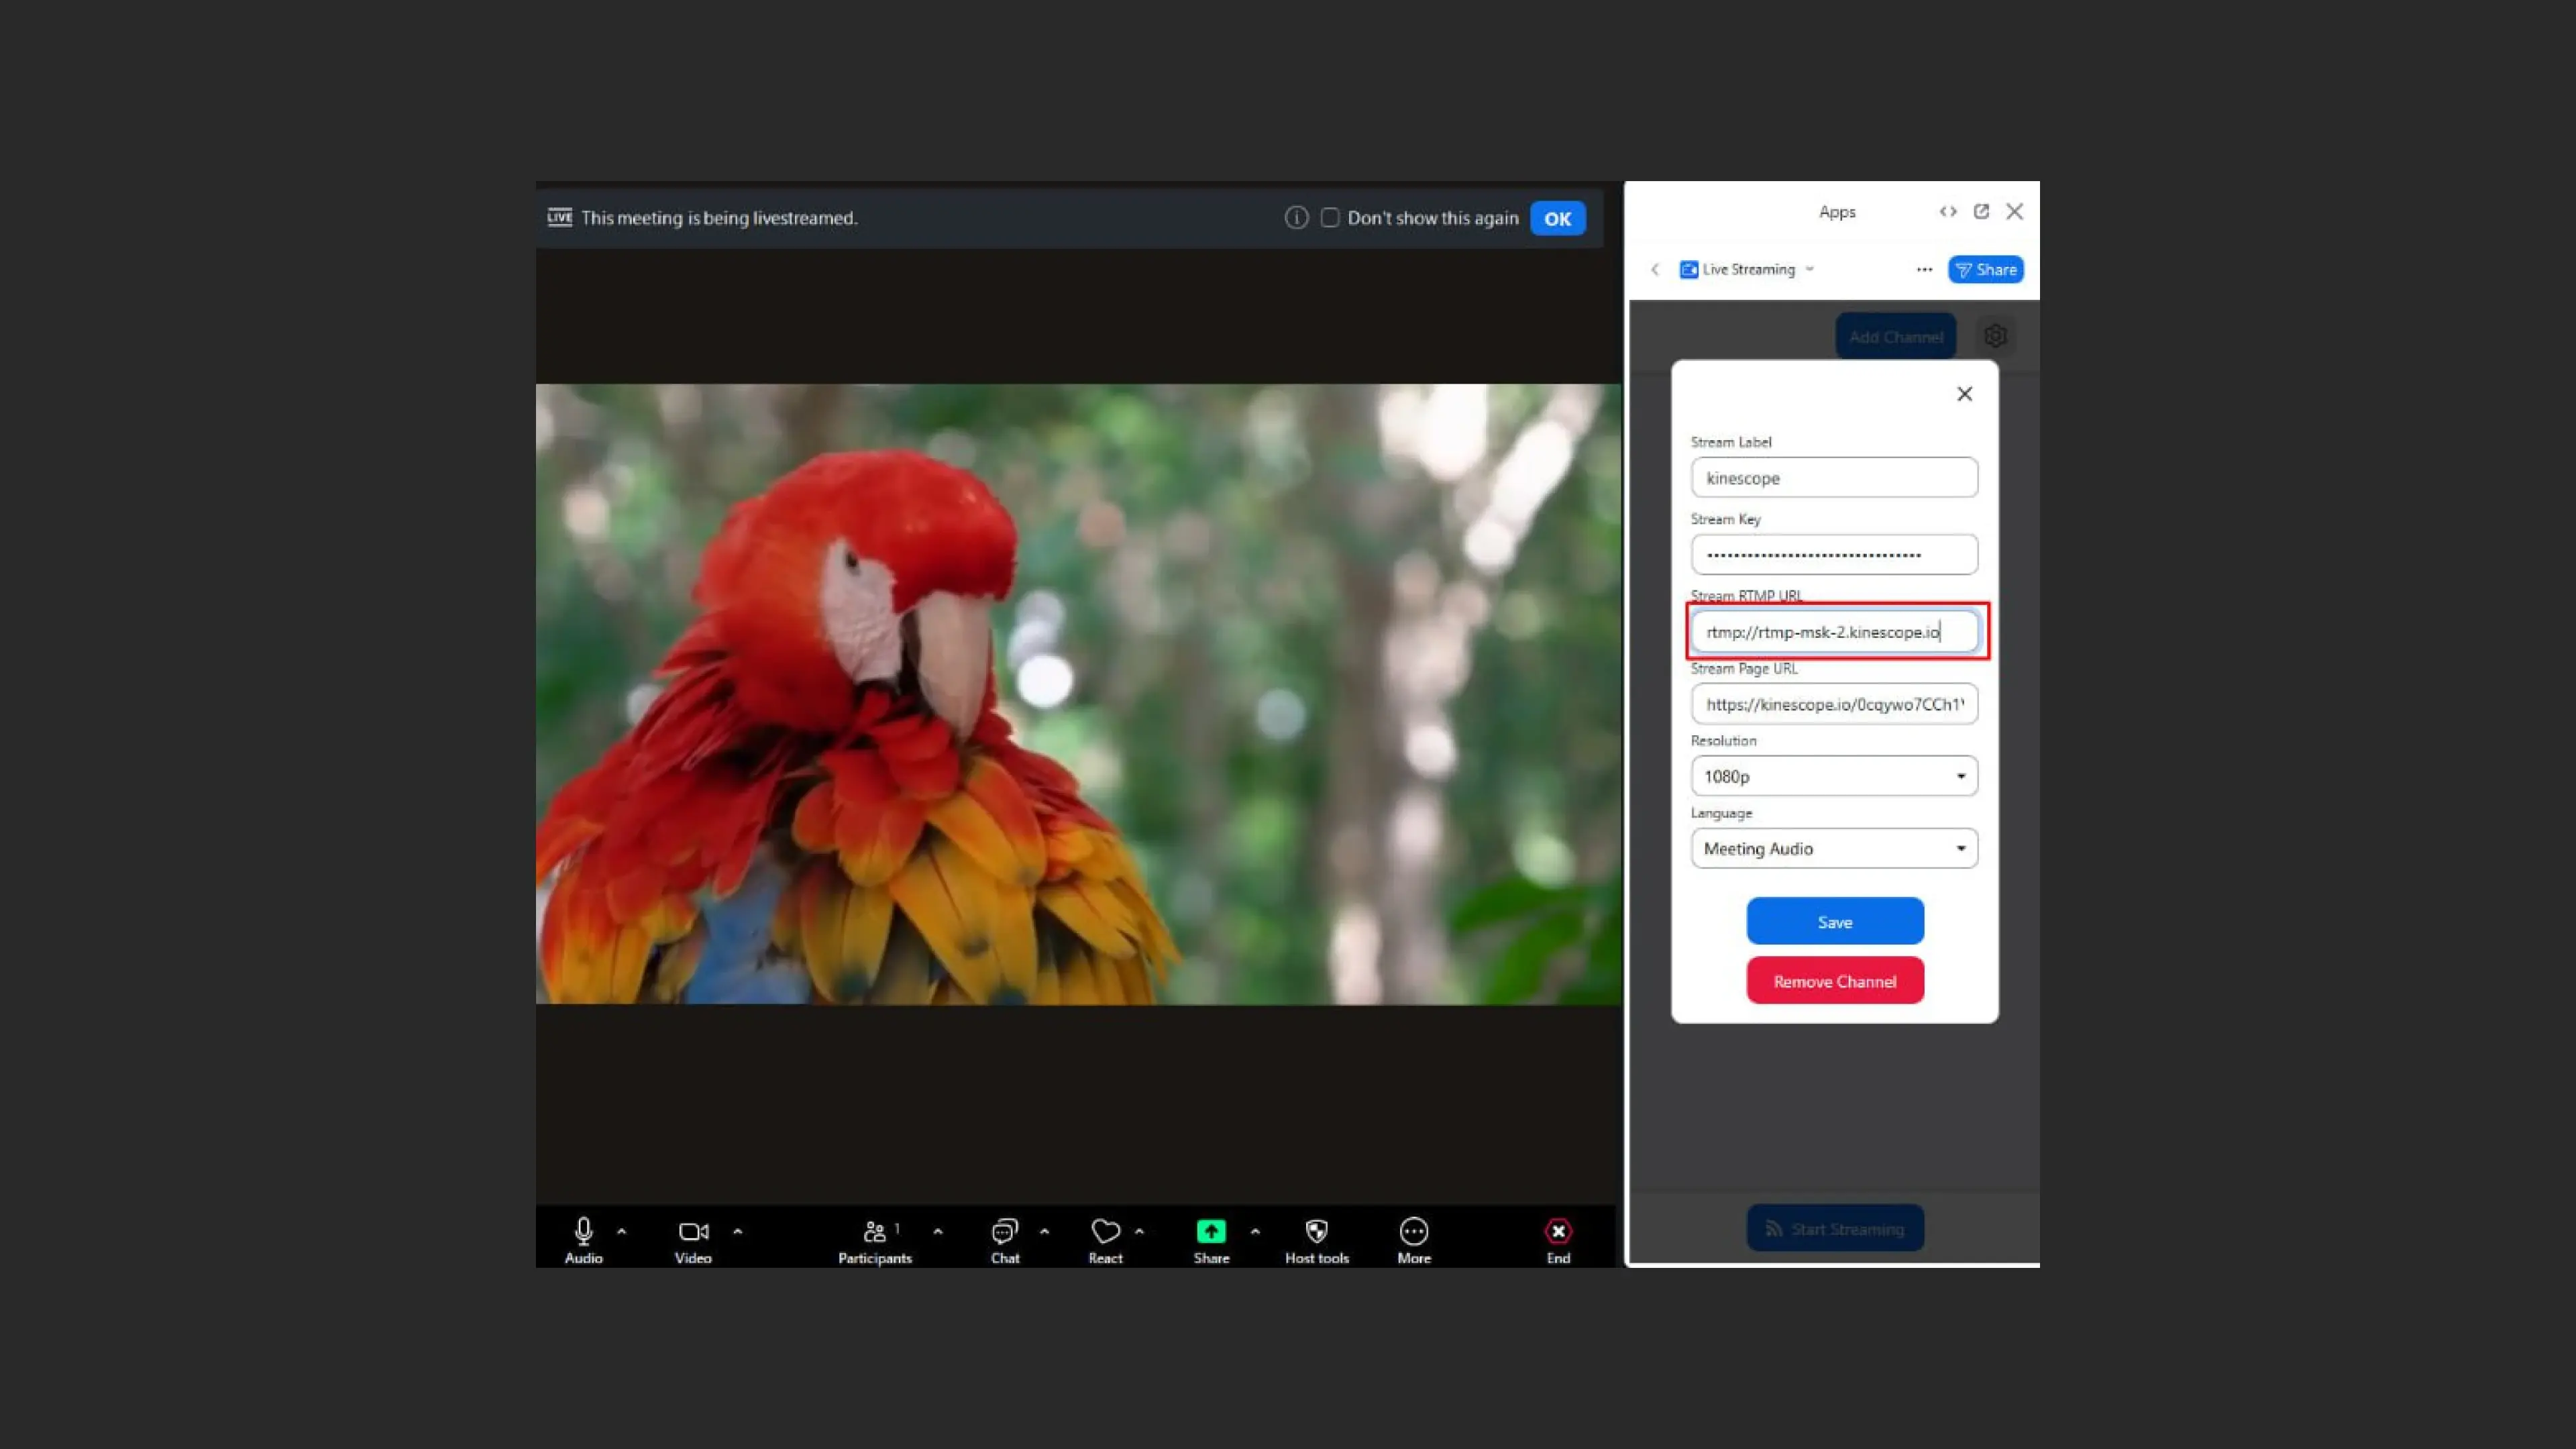
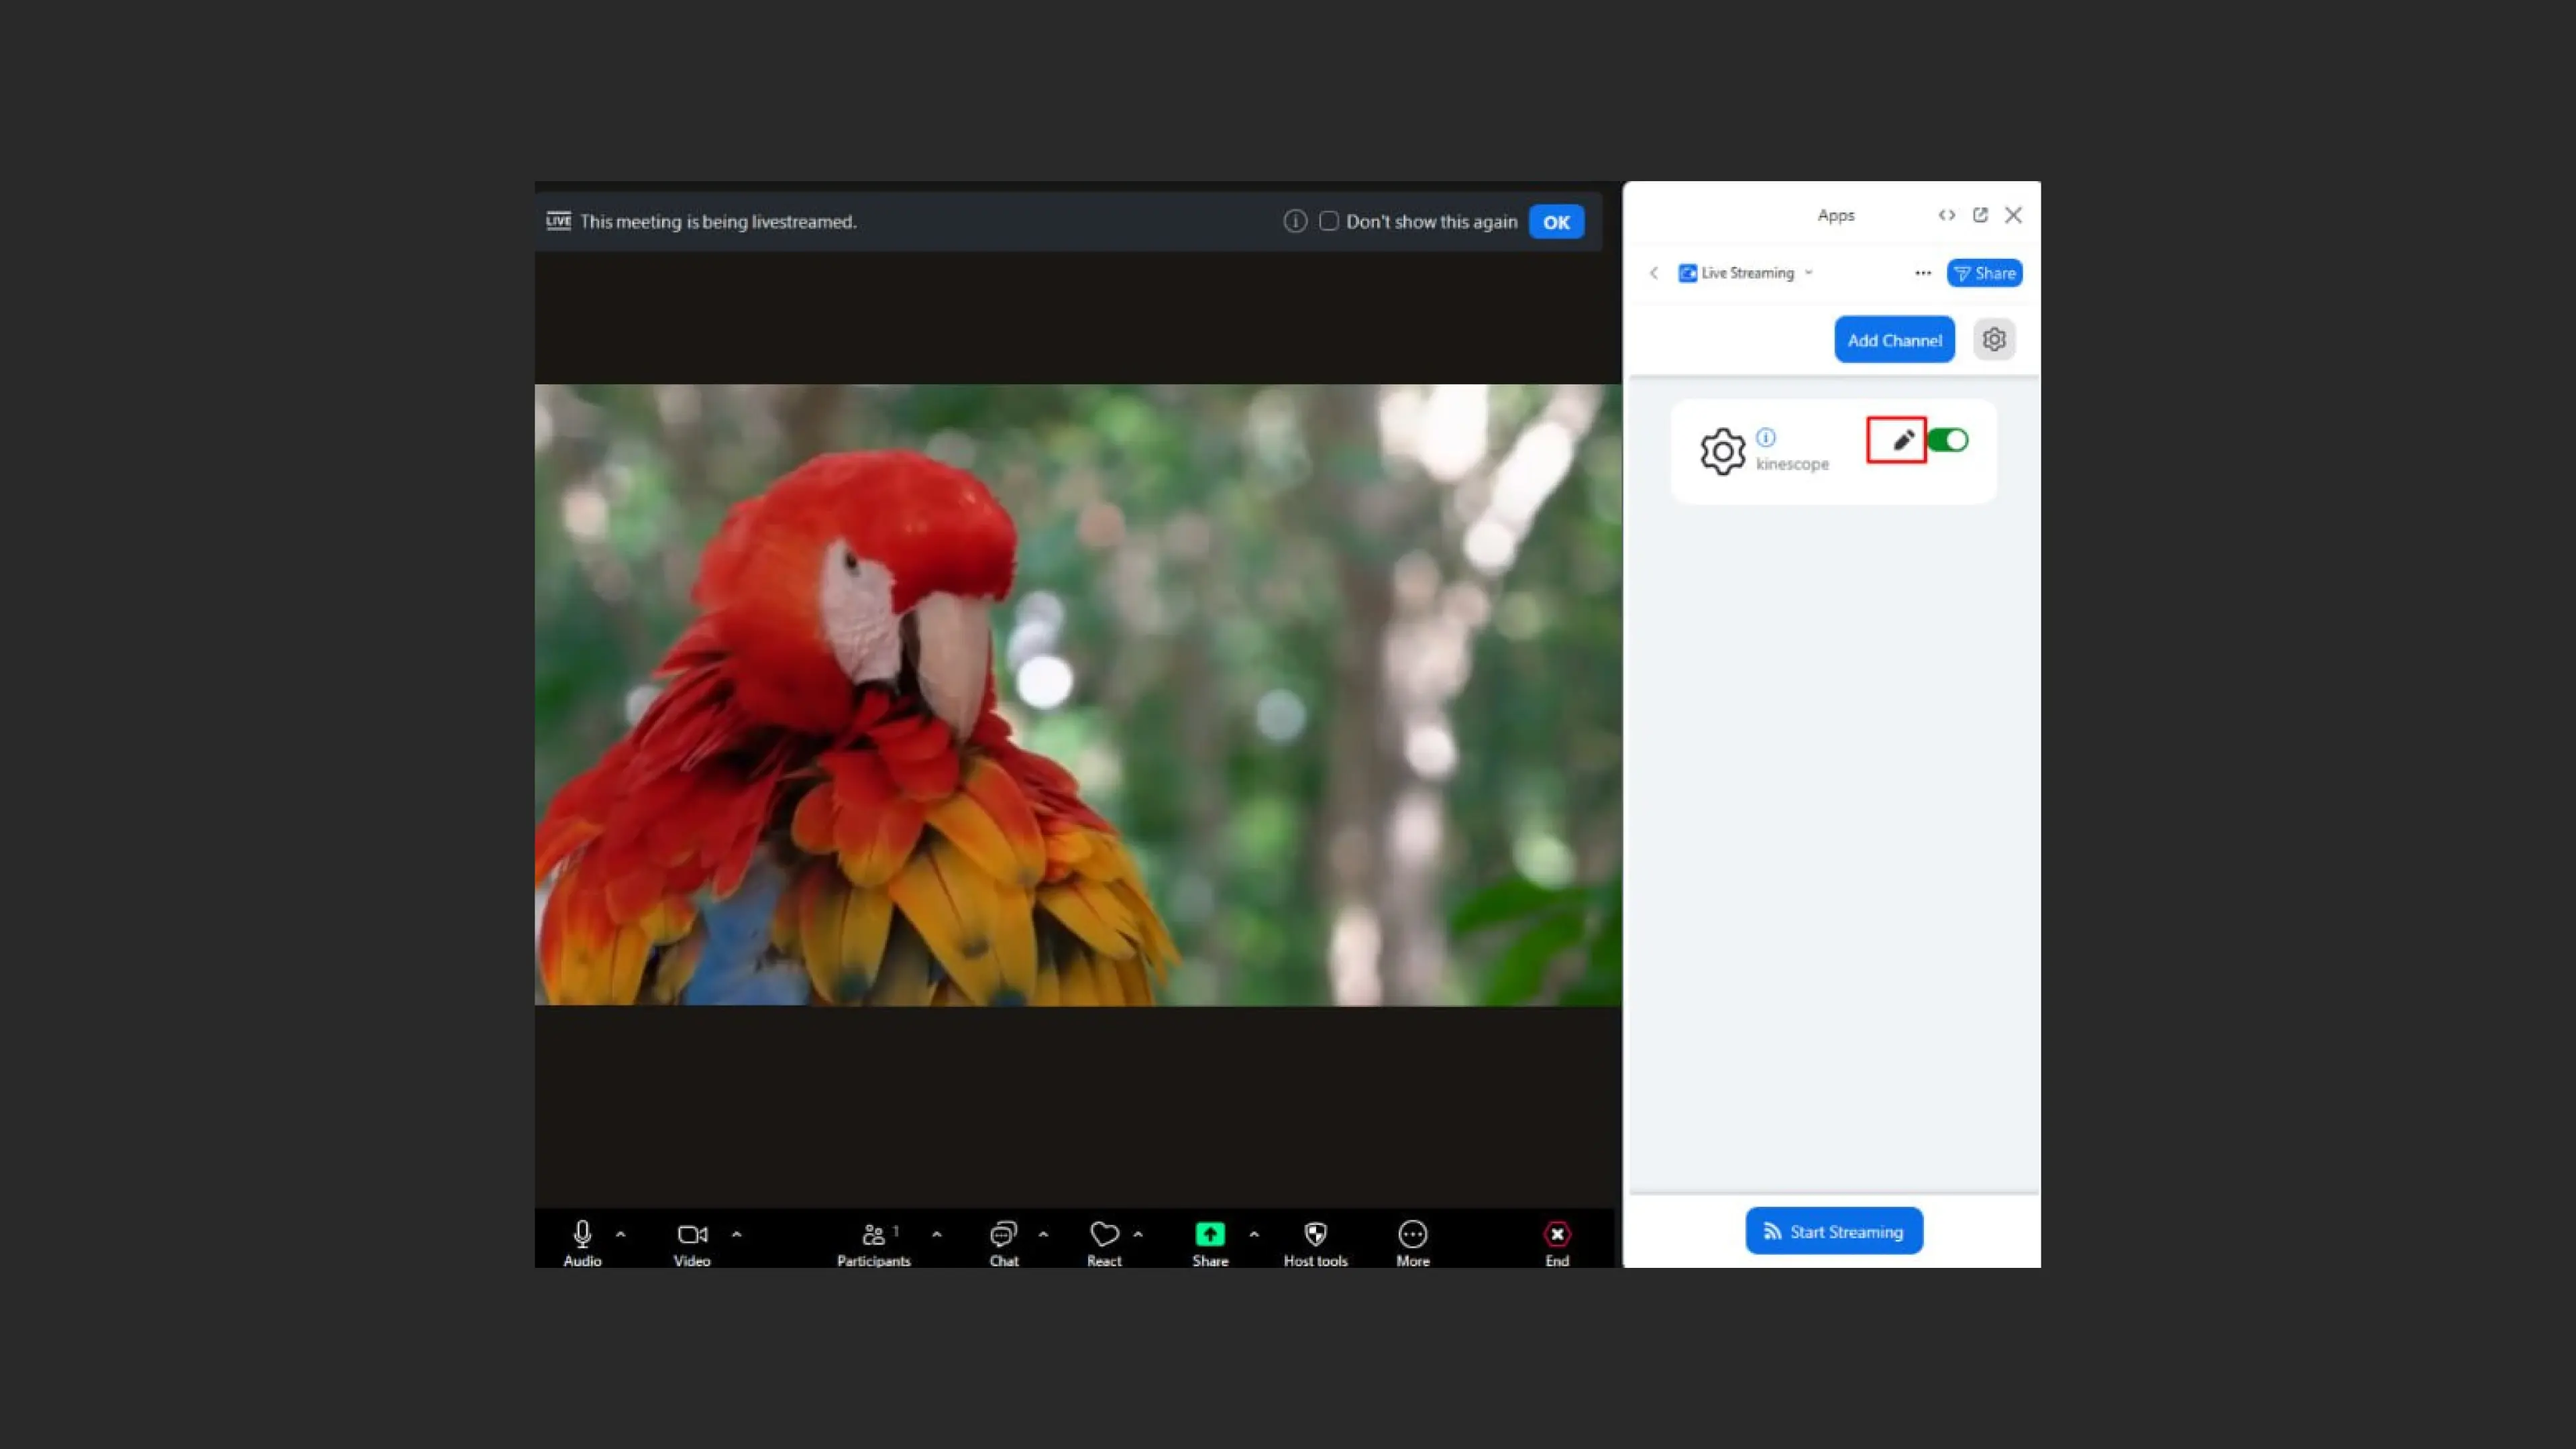
- Replace the old RTMP URL with the new one in the corresponding field of the stream settings form.
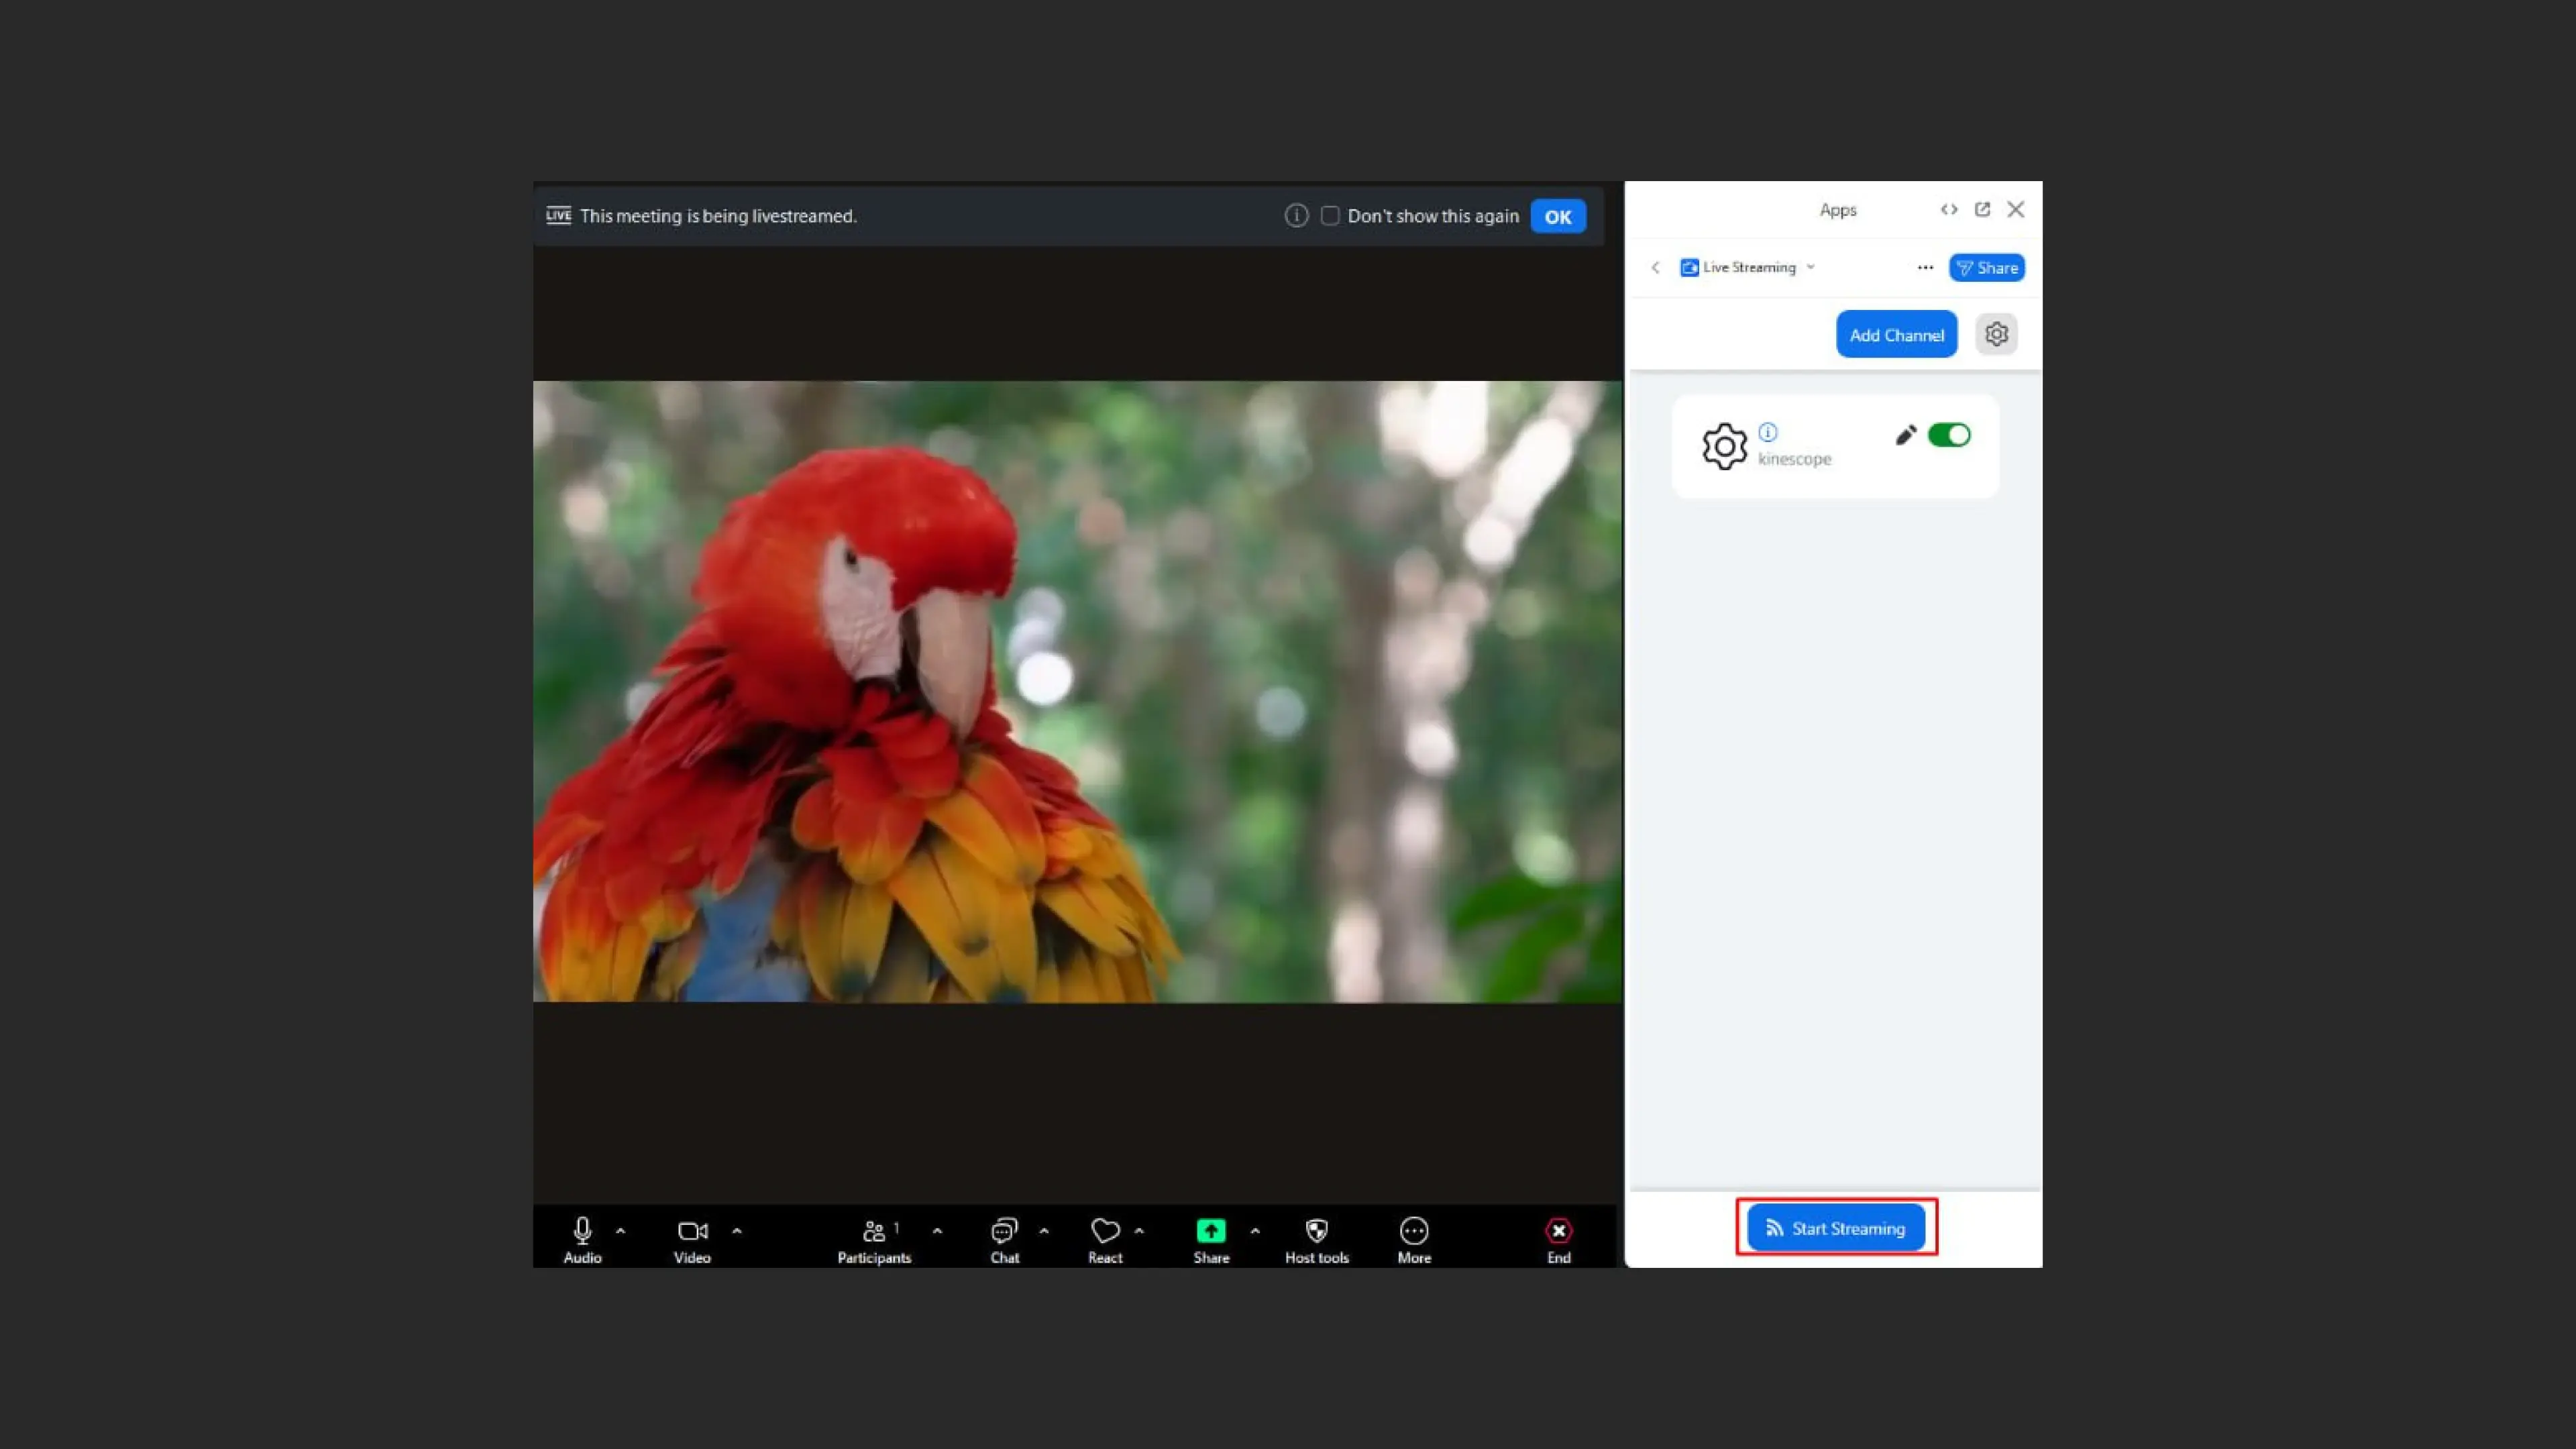
- Done. Now you can continue the stream. Click the Start Streaming button to launch the stream with the updated RTMP address.
Zoom recommendations
- Run a test stream in advance to eliminate technical issues.
- Make sure the internet connection is stable; using a wired connection is preferred.
- Use Kinescope analytics to monitor participant engagement and evaluate webinar effectiveness.
If you have questions or difficulties, Kinescope support is always ready to help. Happy streaming!
What’s next?
After setting up streams, we recommend:
- Live Stream Guide — learn more about stream capabilities in Kinescope
- Restreaming — configure simultaneous streaming to multiple platforms
- Analytics — track stream views and viewer engagement
- Troubleshooting — resolving stream issues
If you have questions, write to the support chat within the Kinescope interface — our specialists will help!