SSO Login Setup
With Single Sign-On (SSO), a user can log in to multiple related services with a single username and password. For example, log in to a corporate portal and simultaneously get access to Kinescope. This simplifies access management and improves security.
Who this article is for
- Corporate system administrators — need to integrate Kinescope with an existing authentication system
- IT specialists — need to configure SSO via Keycloak or AD FS
- Corporate account owners — need to simplify employee access management
- Integration developers — need to set up single sign-on for users
Creating and configuring a client in Keycloak
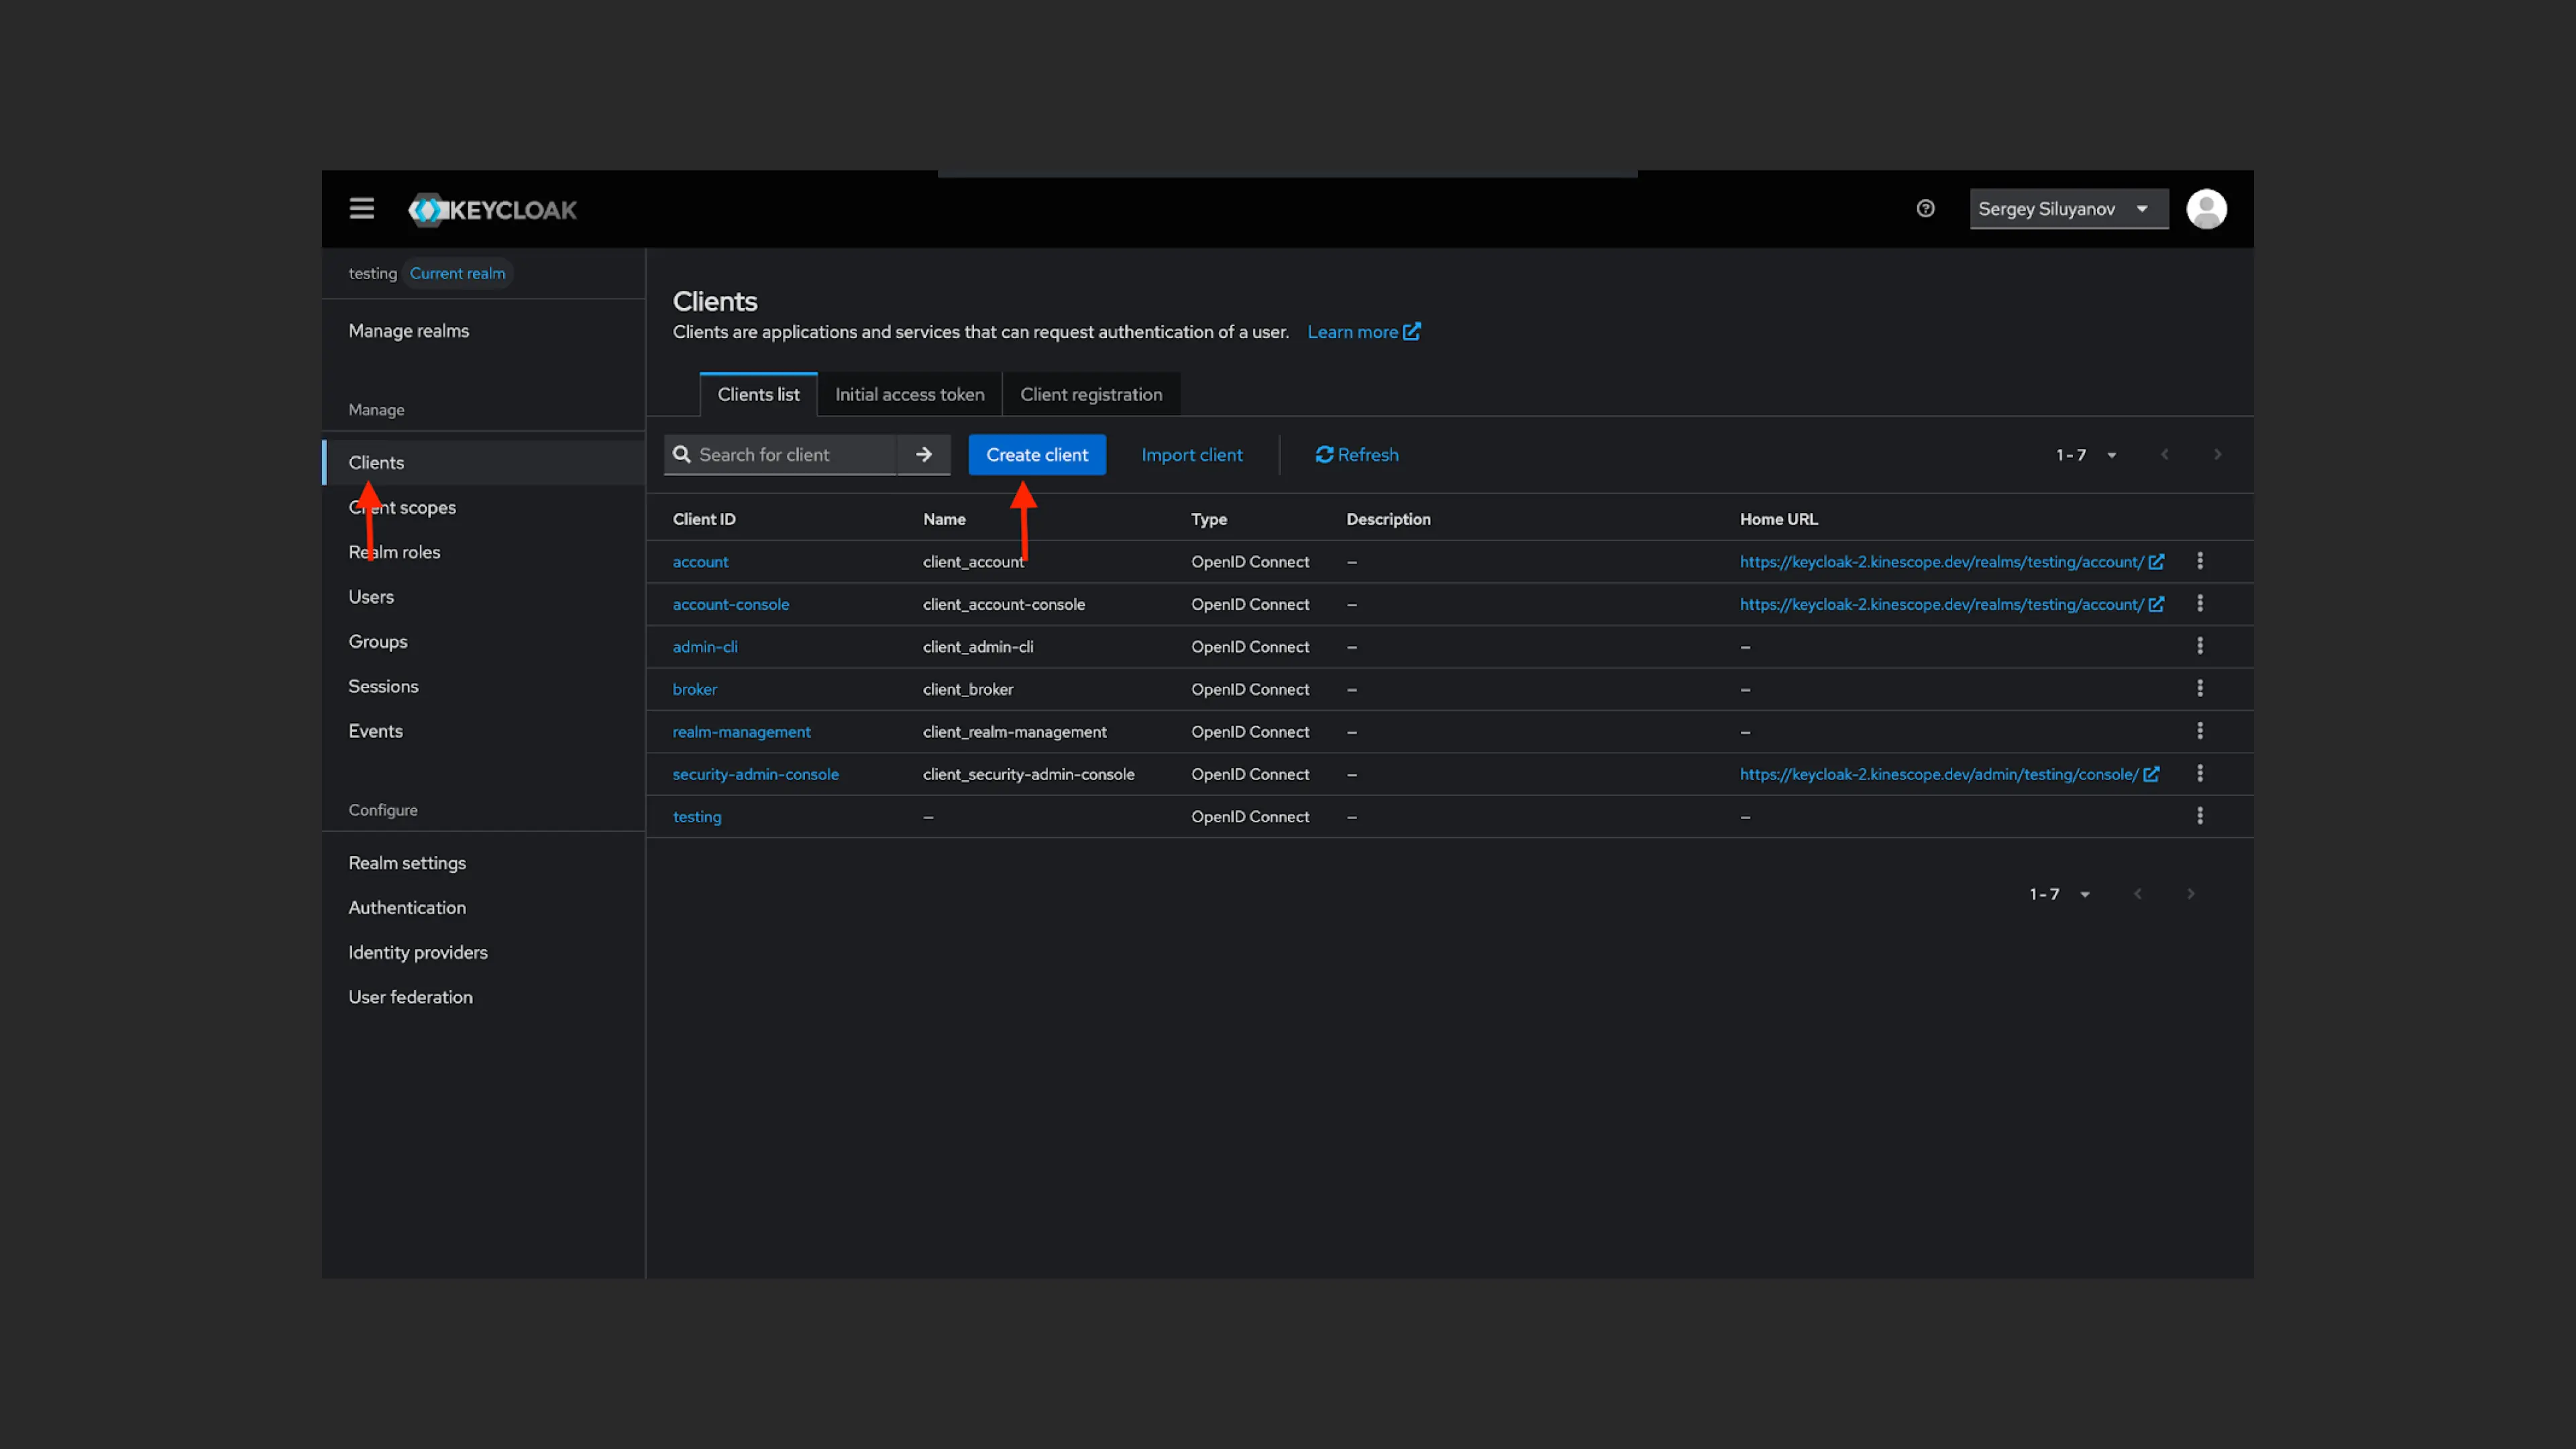
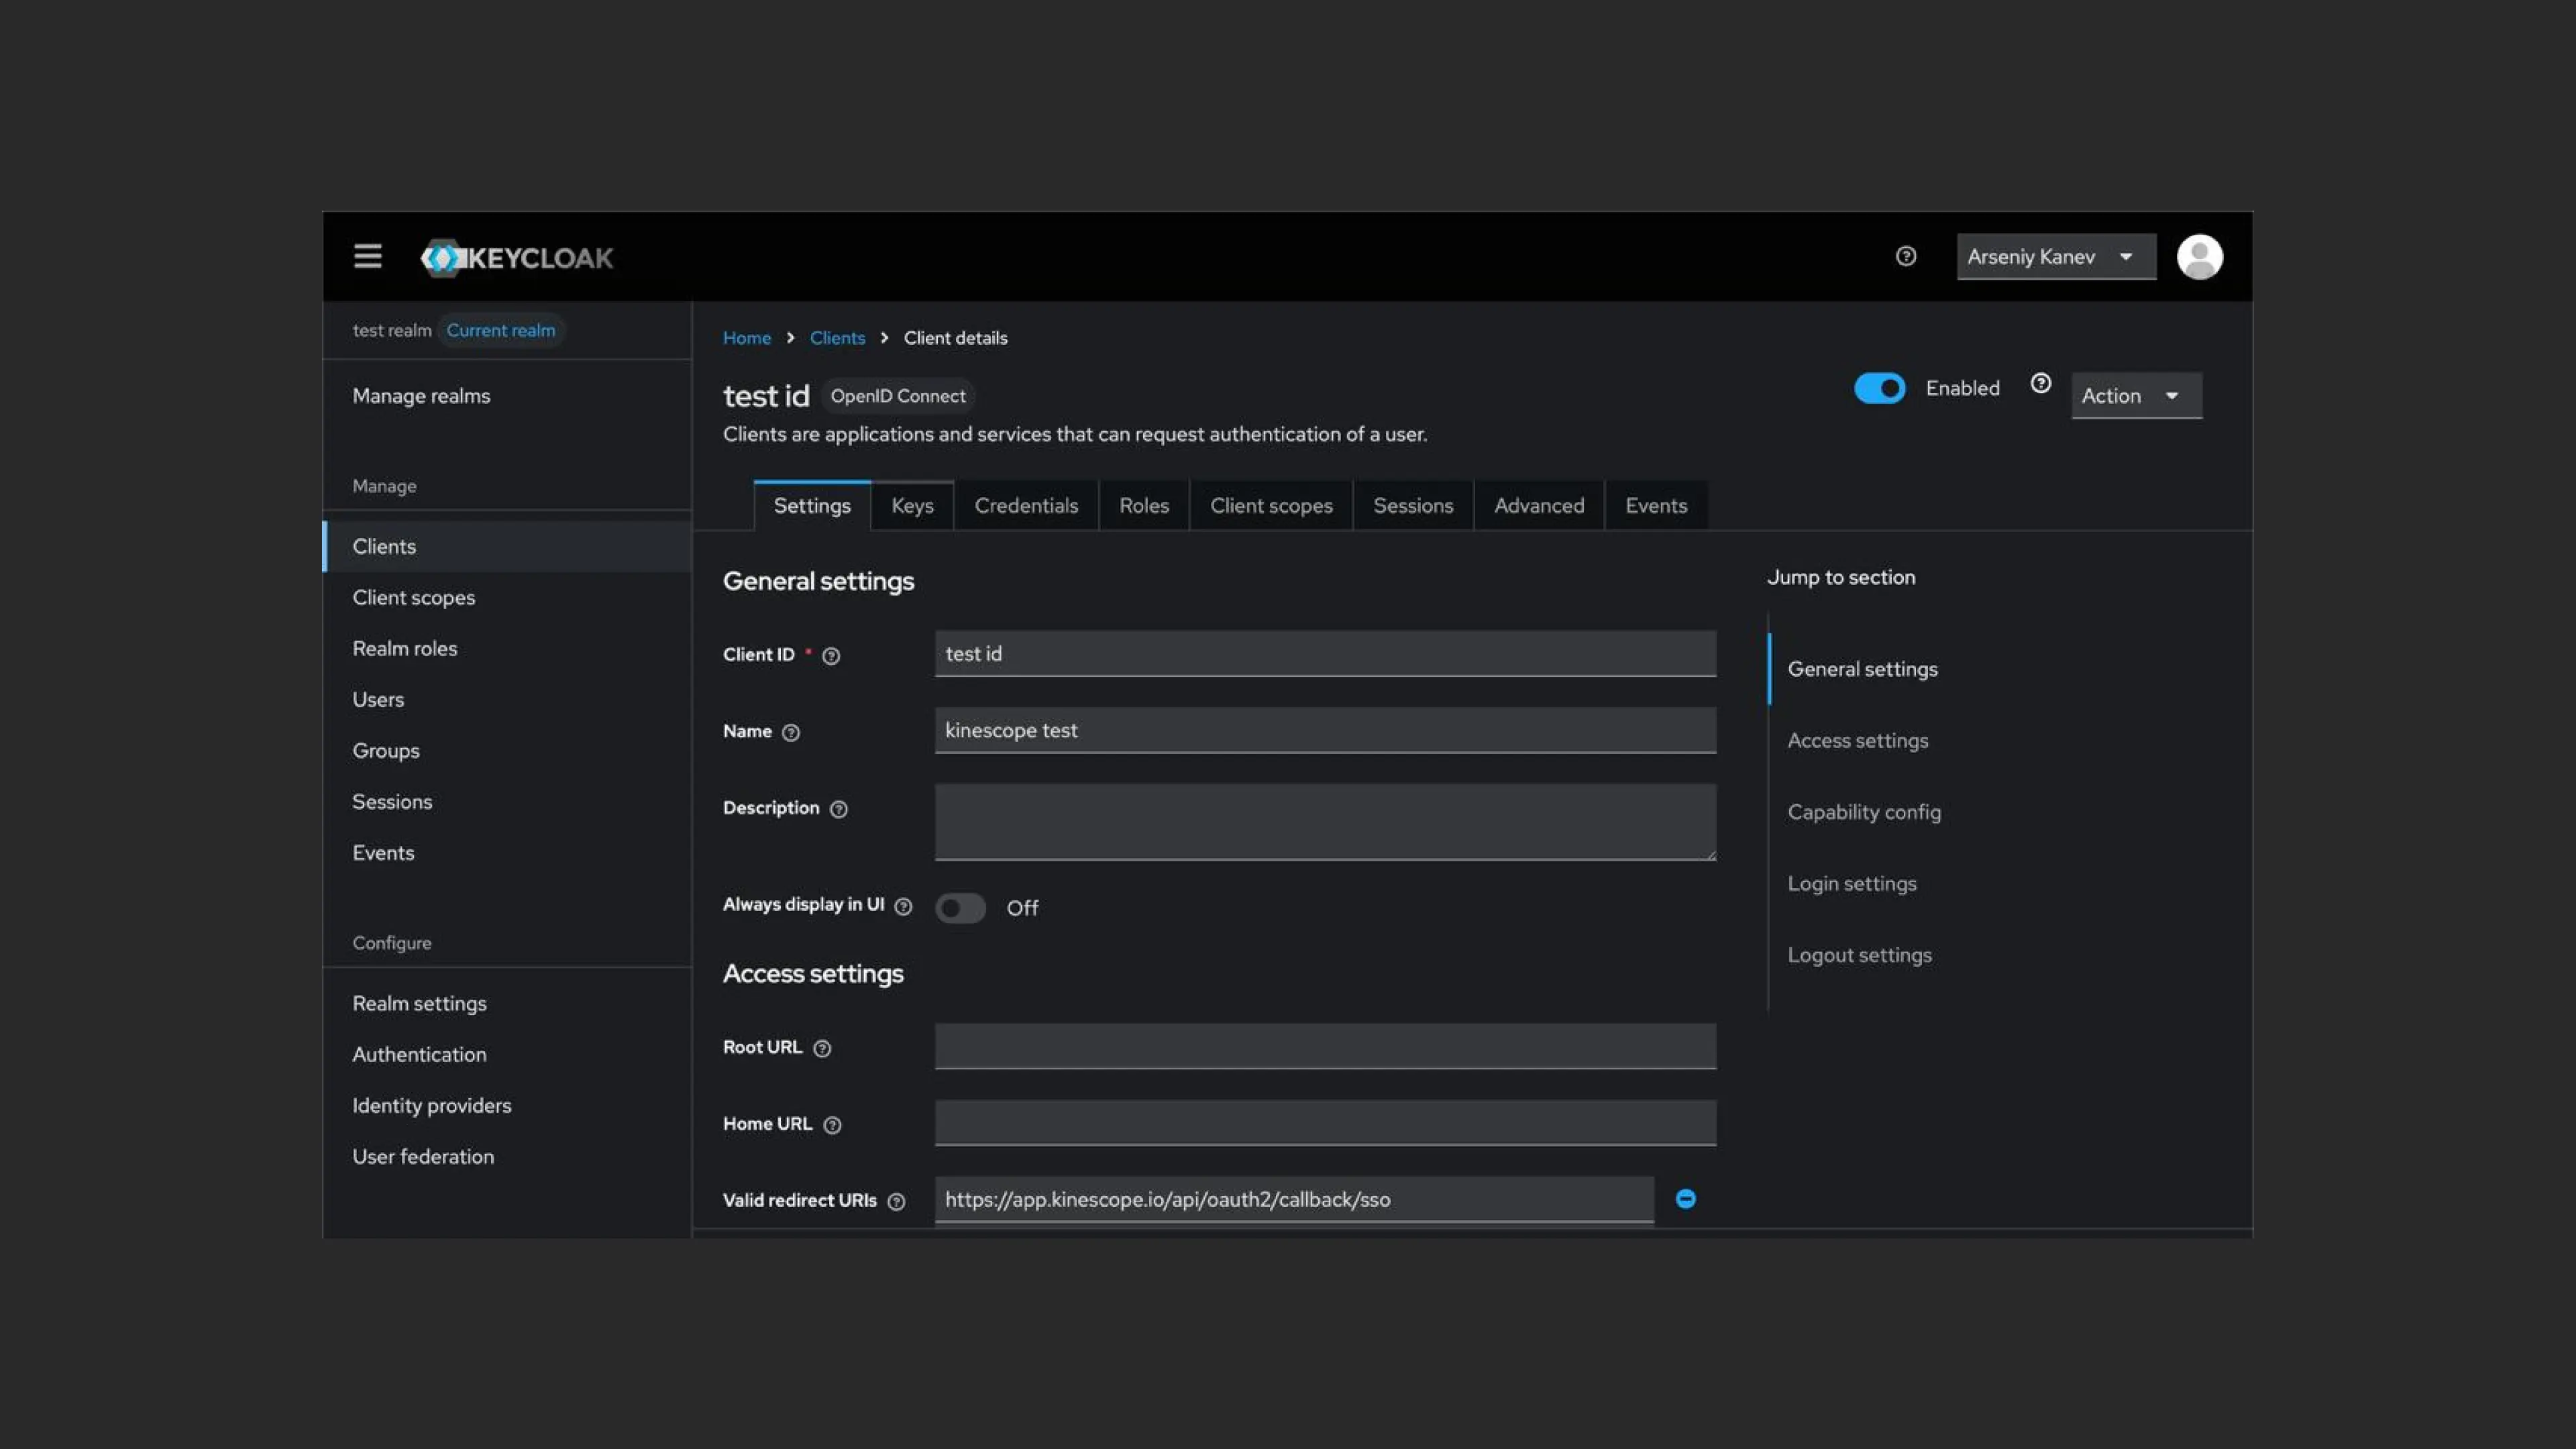
- To create a client in a new realm, go to “Clients” and click “Create client”.
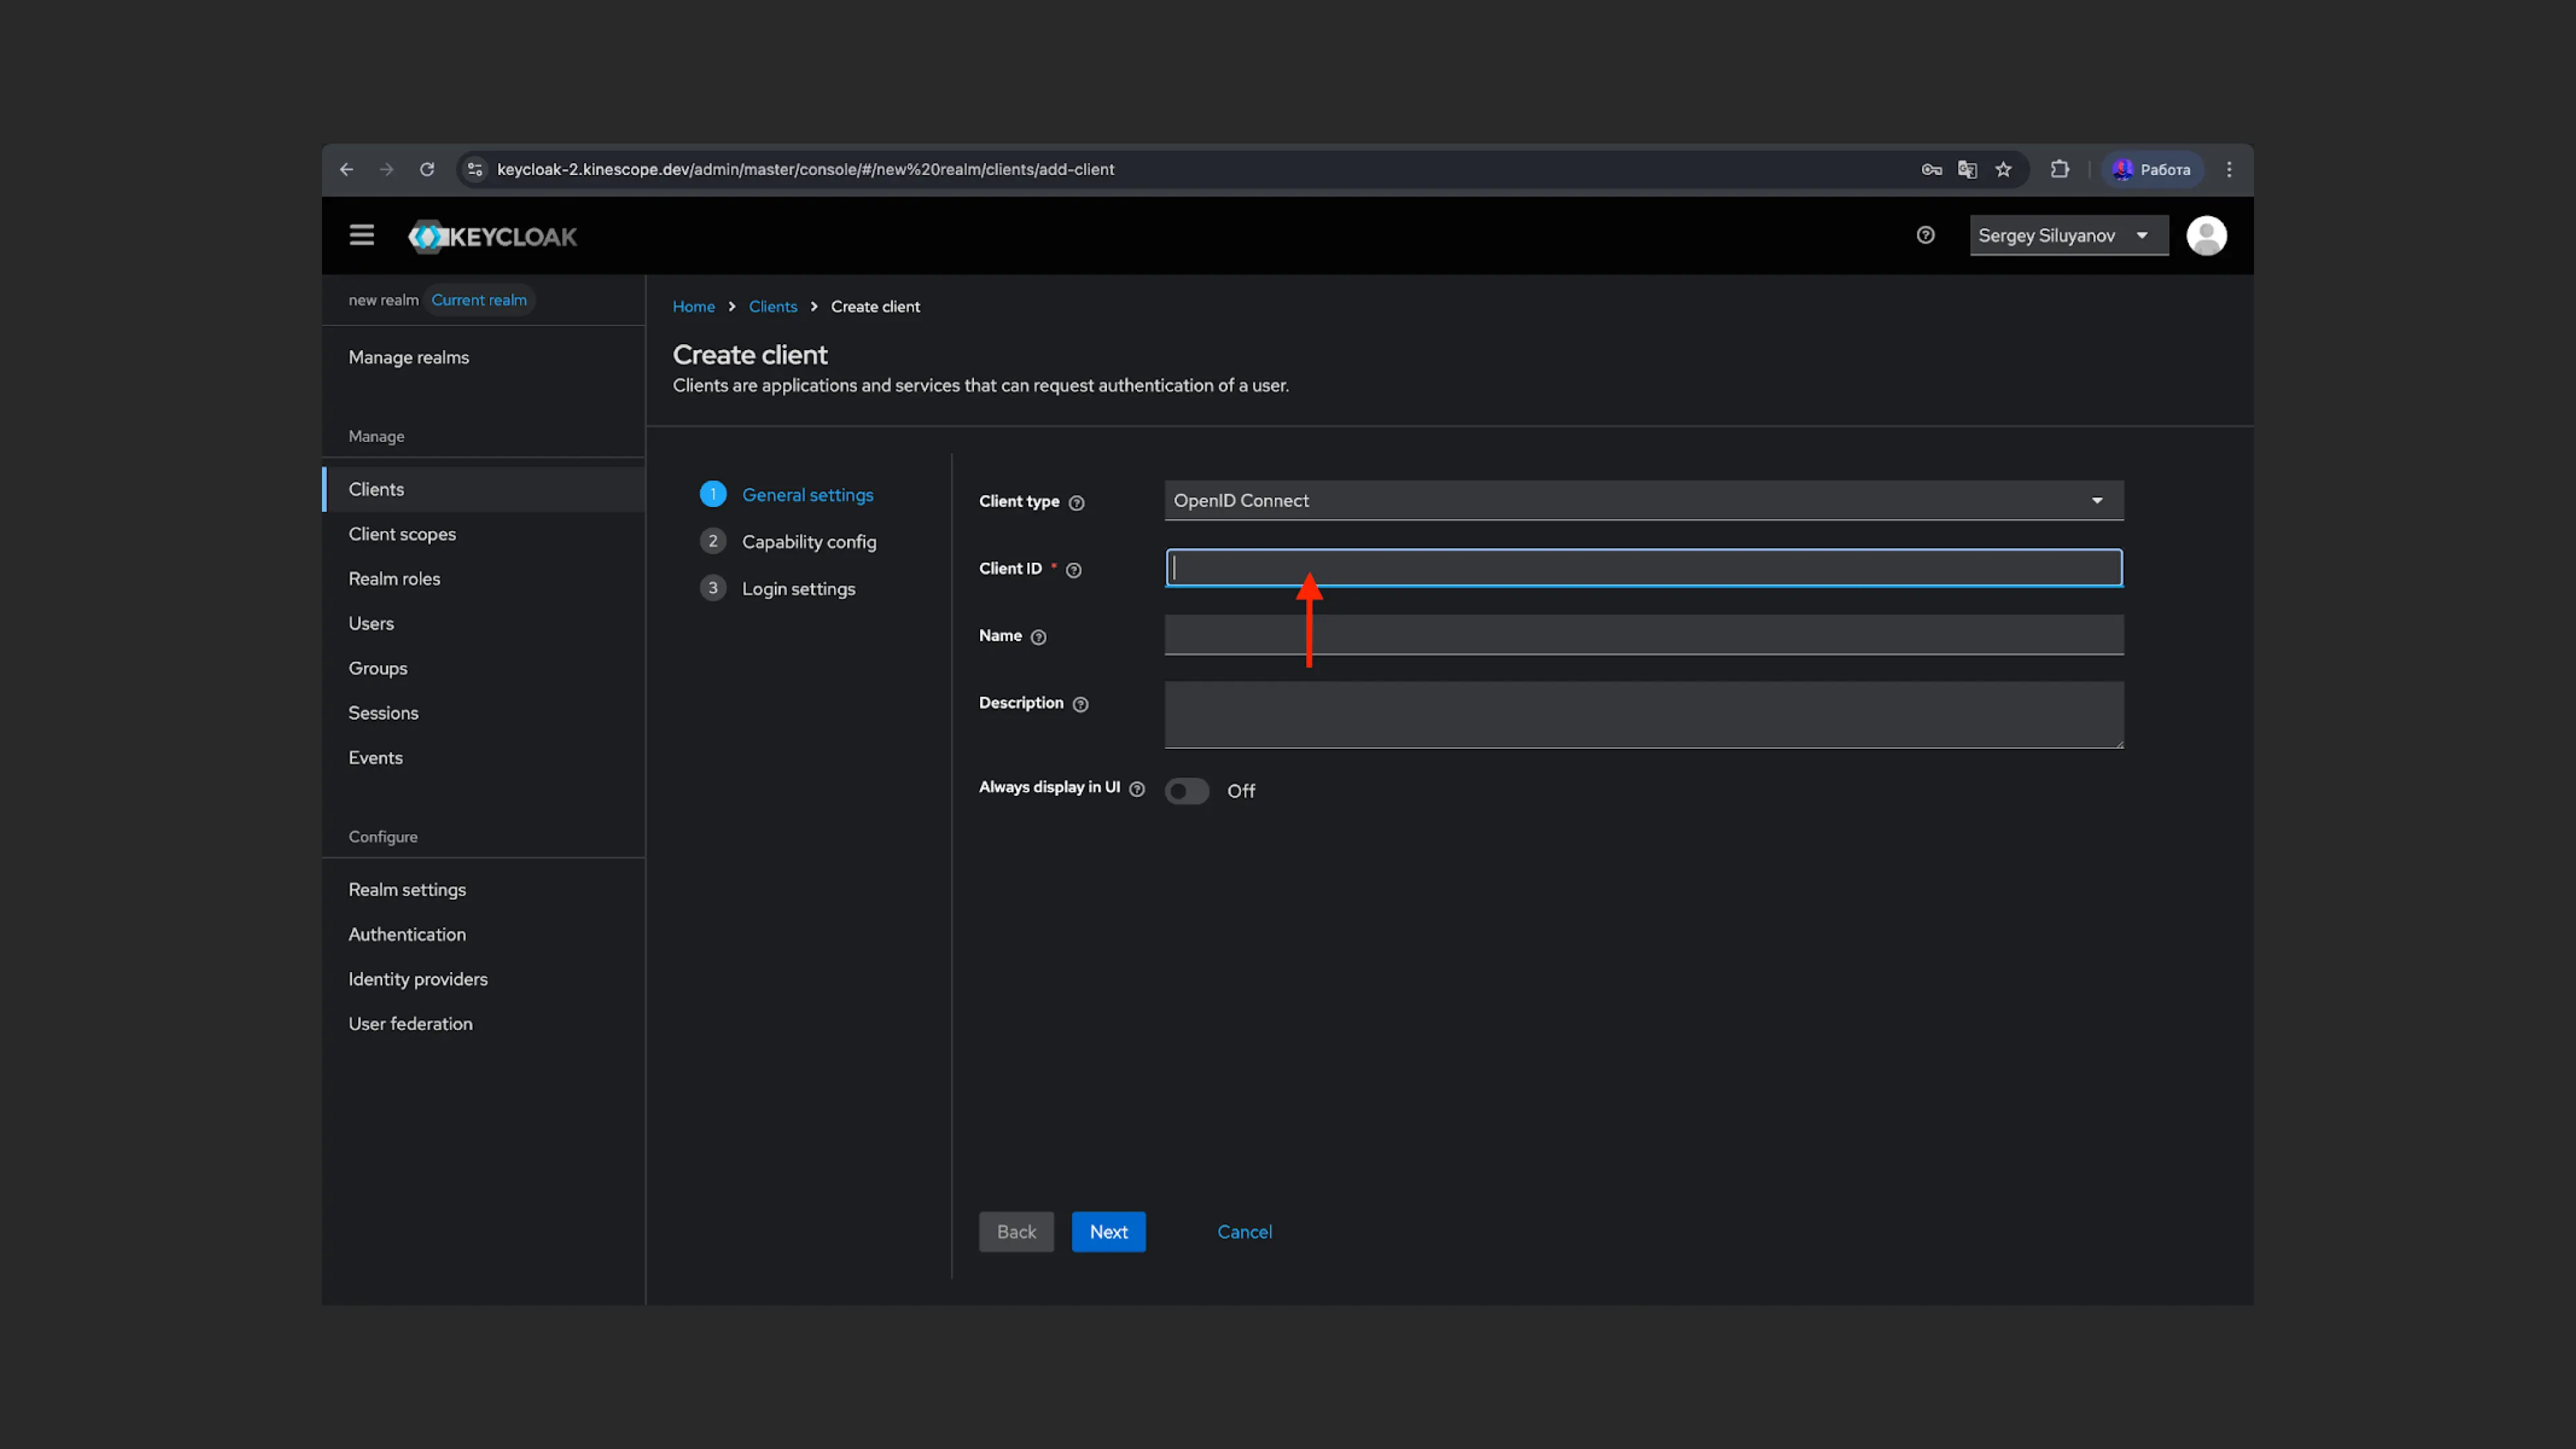
- Enter the client id (“Client ID”).
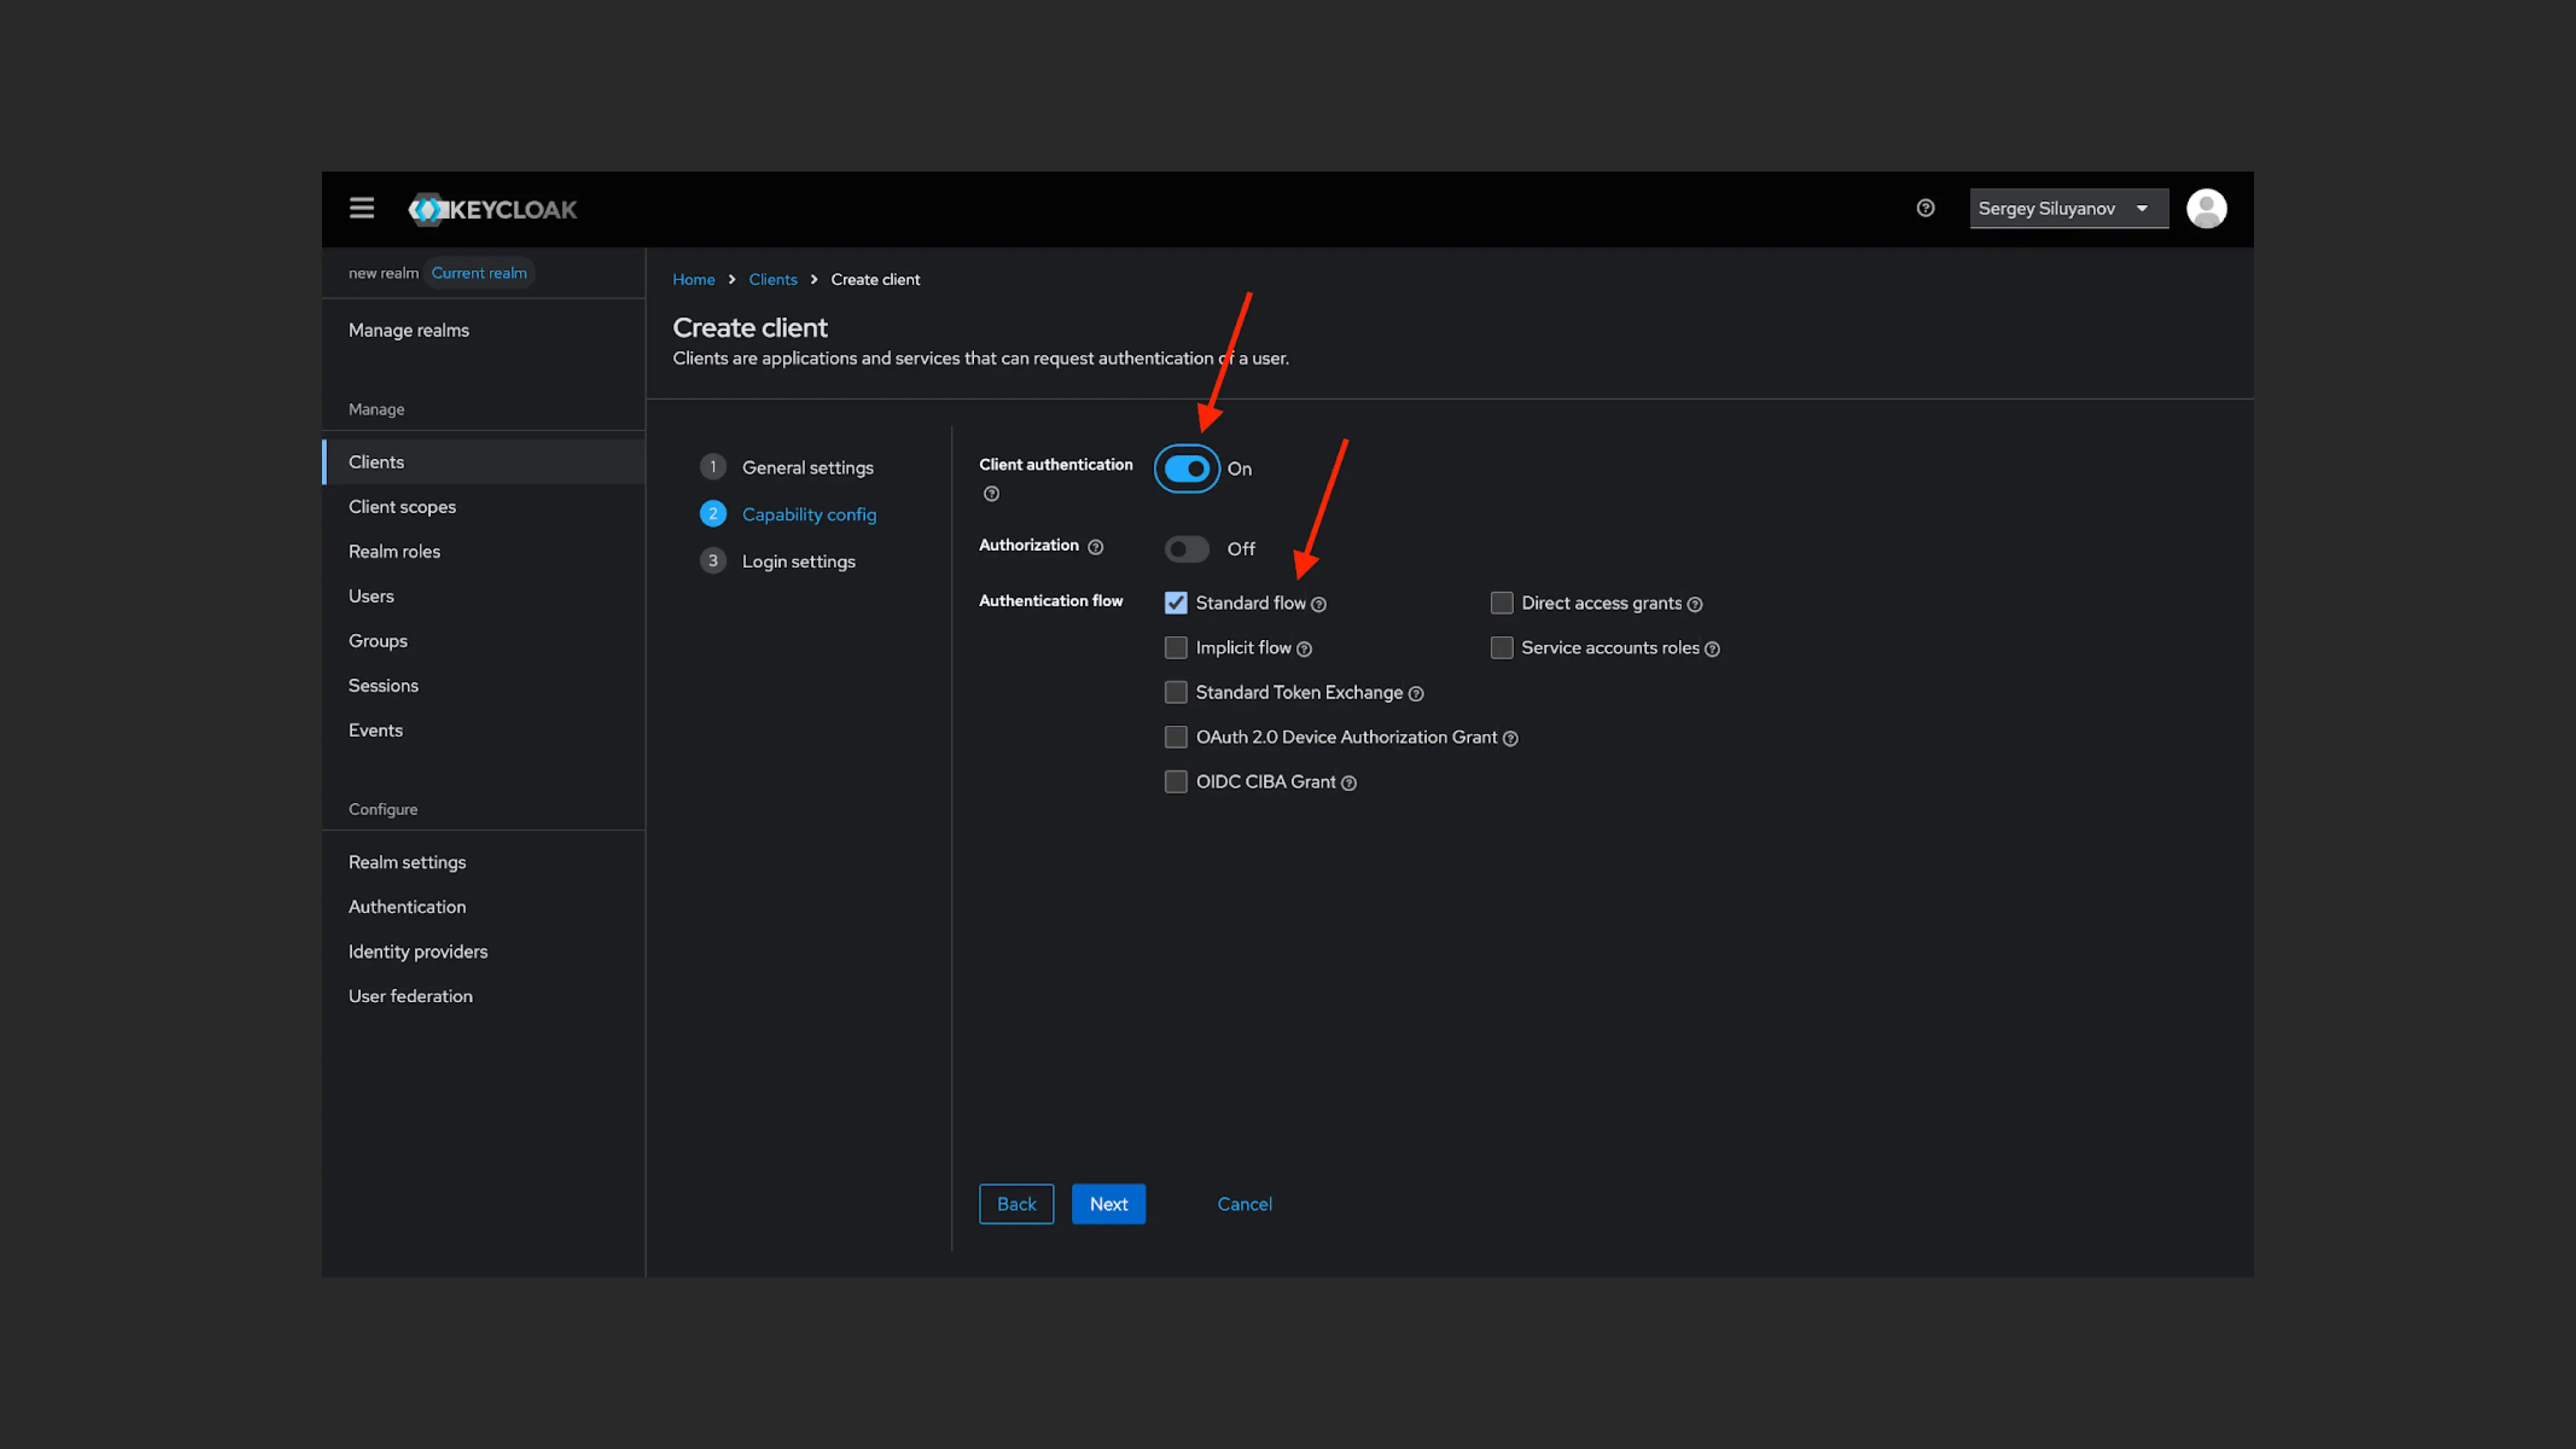
- Click “Next”, select “Standard flow”, and enable “Client authentication”.
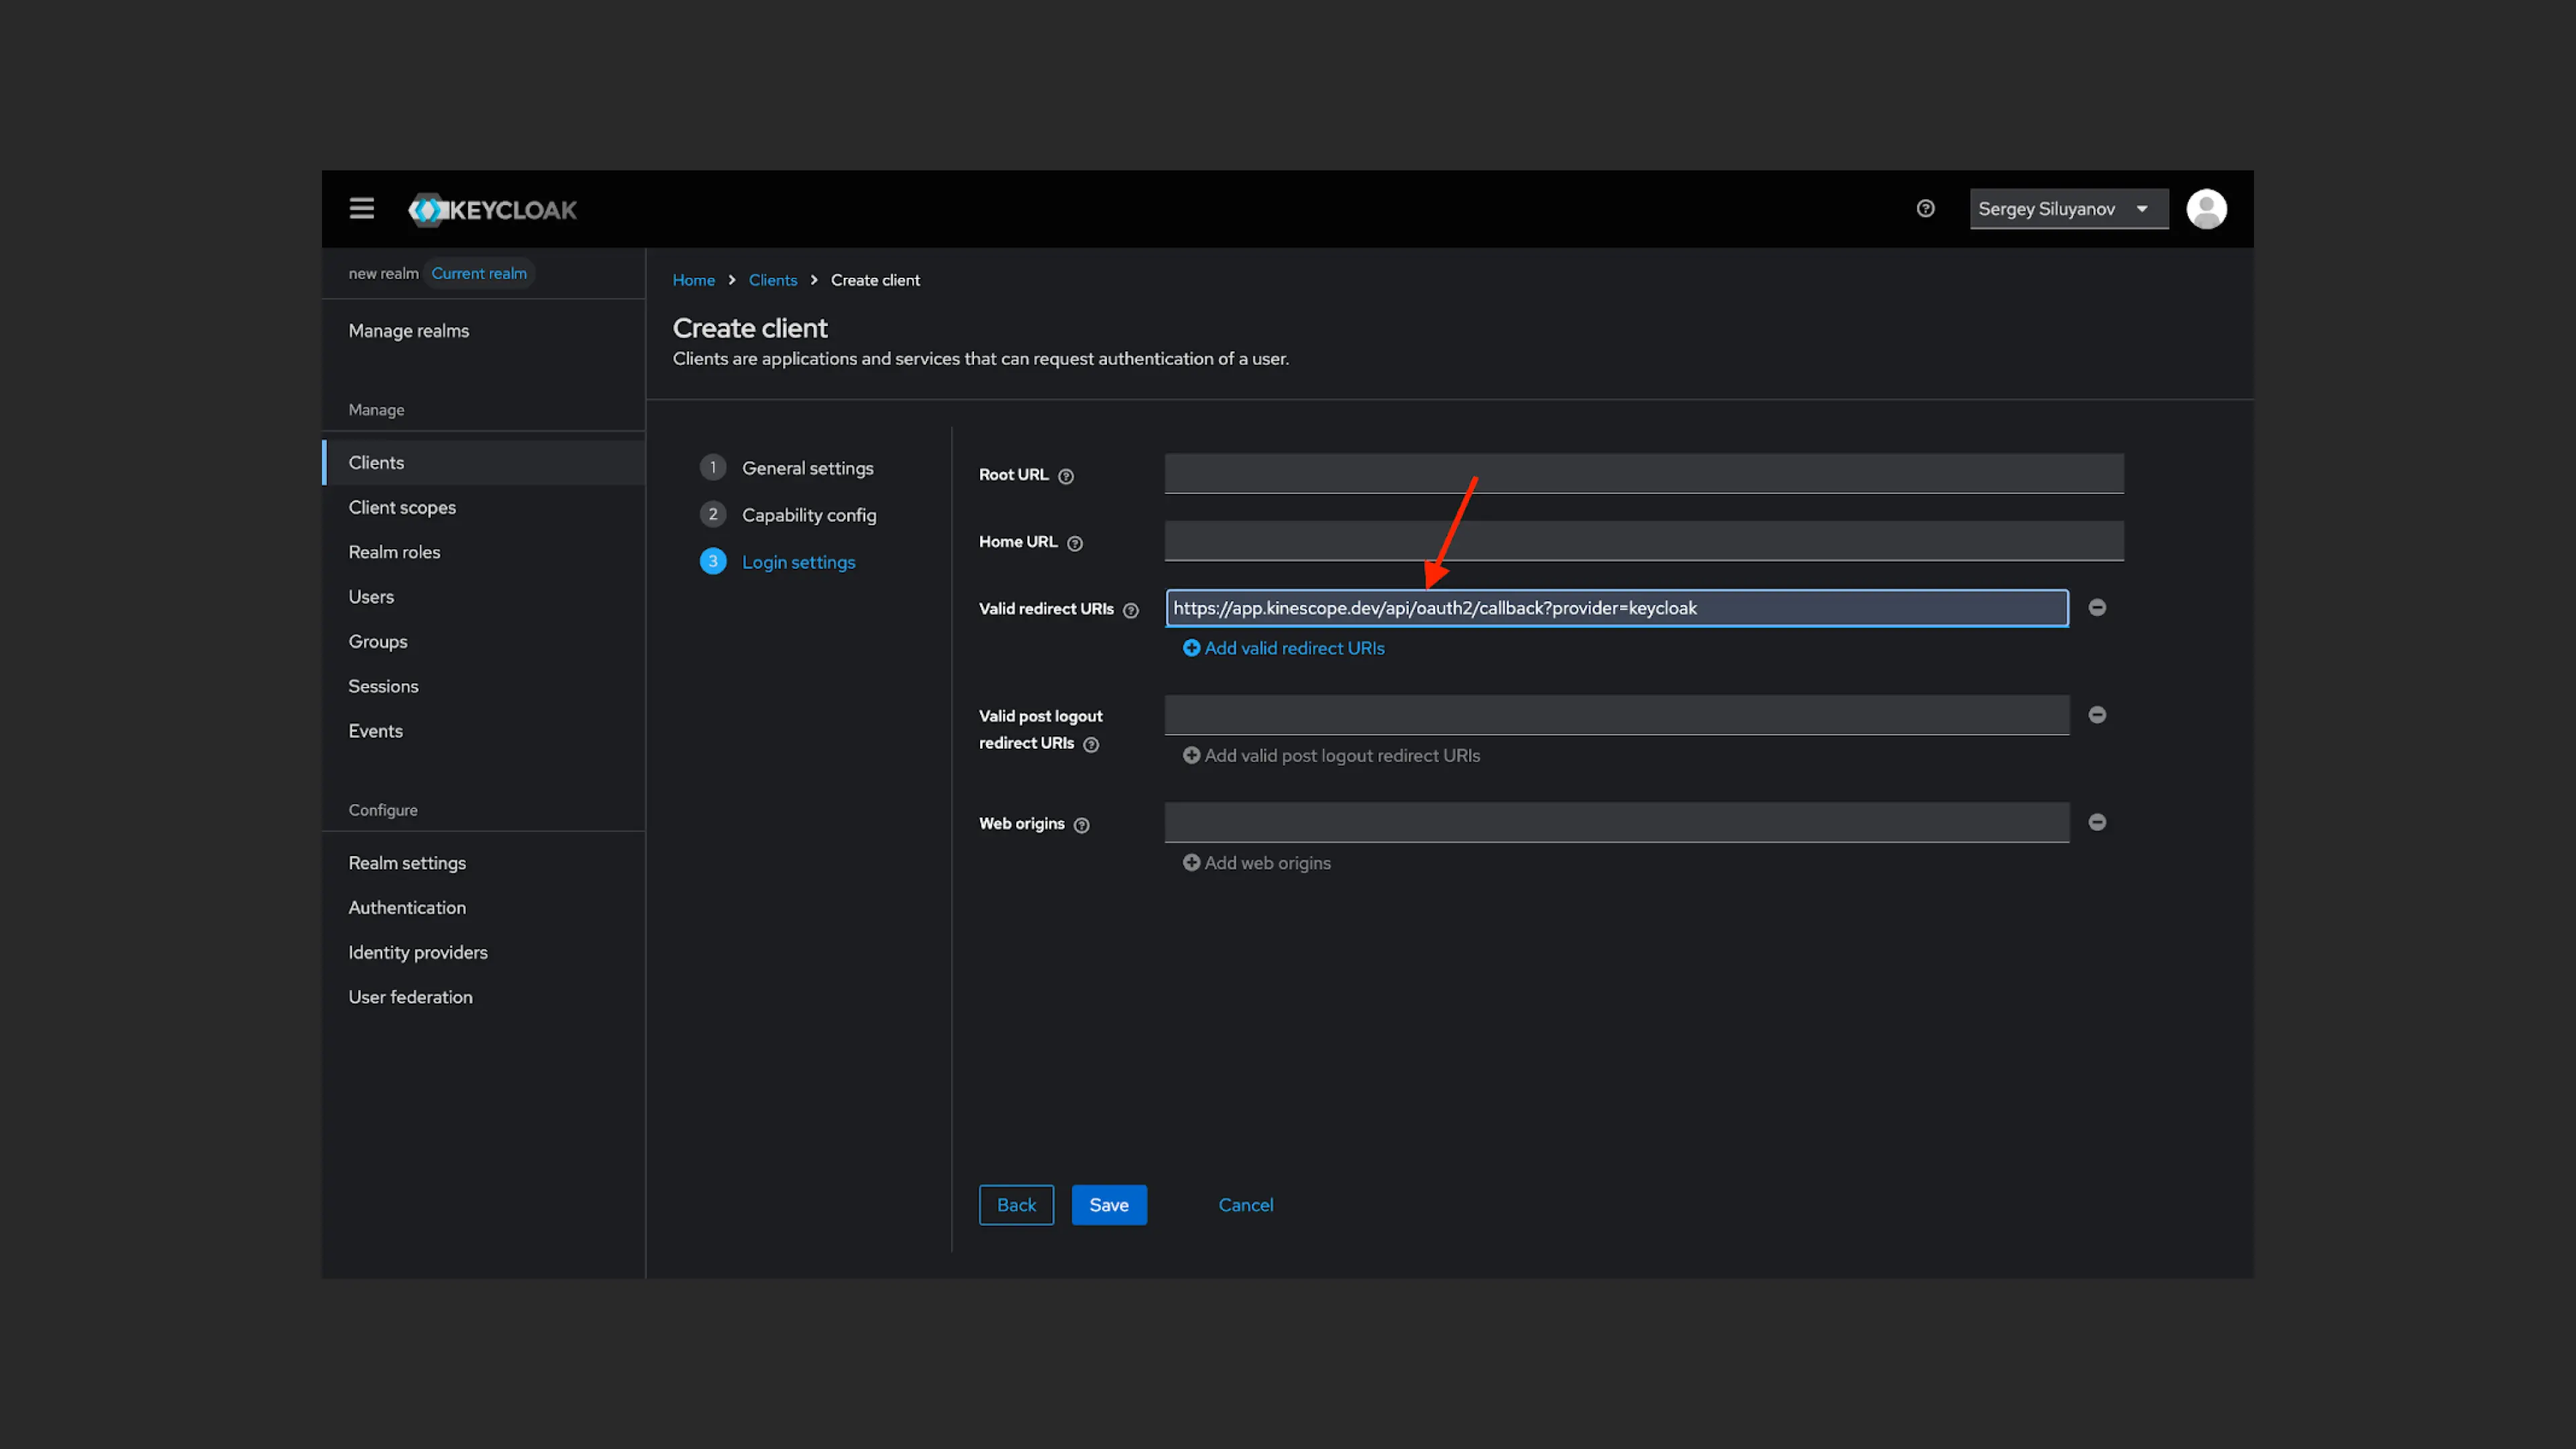
- In the “Valid redirect URLs” field, enter
https://app.kinescope.io/api/oauth2/callback/ssoand click “Save” to save the client.
- To create a client role, click “Clients” and select a client by ID or name from the list.
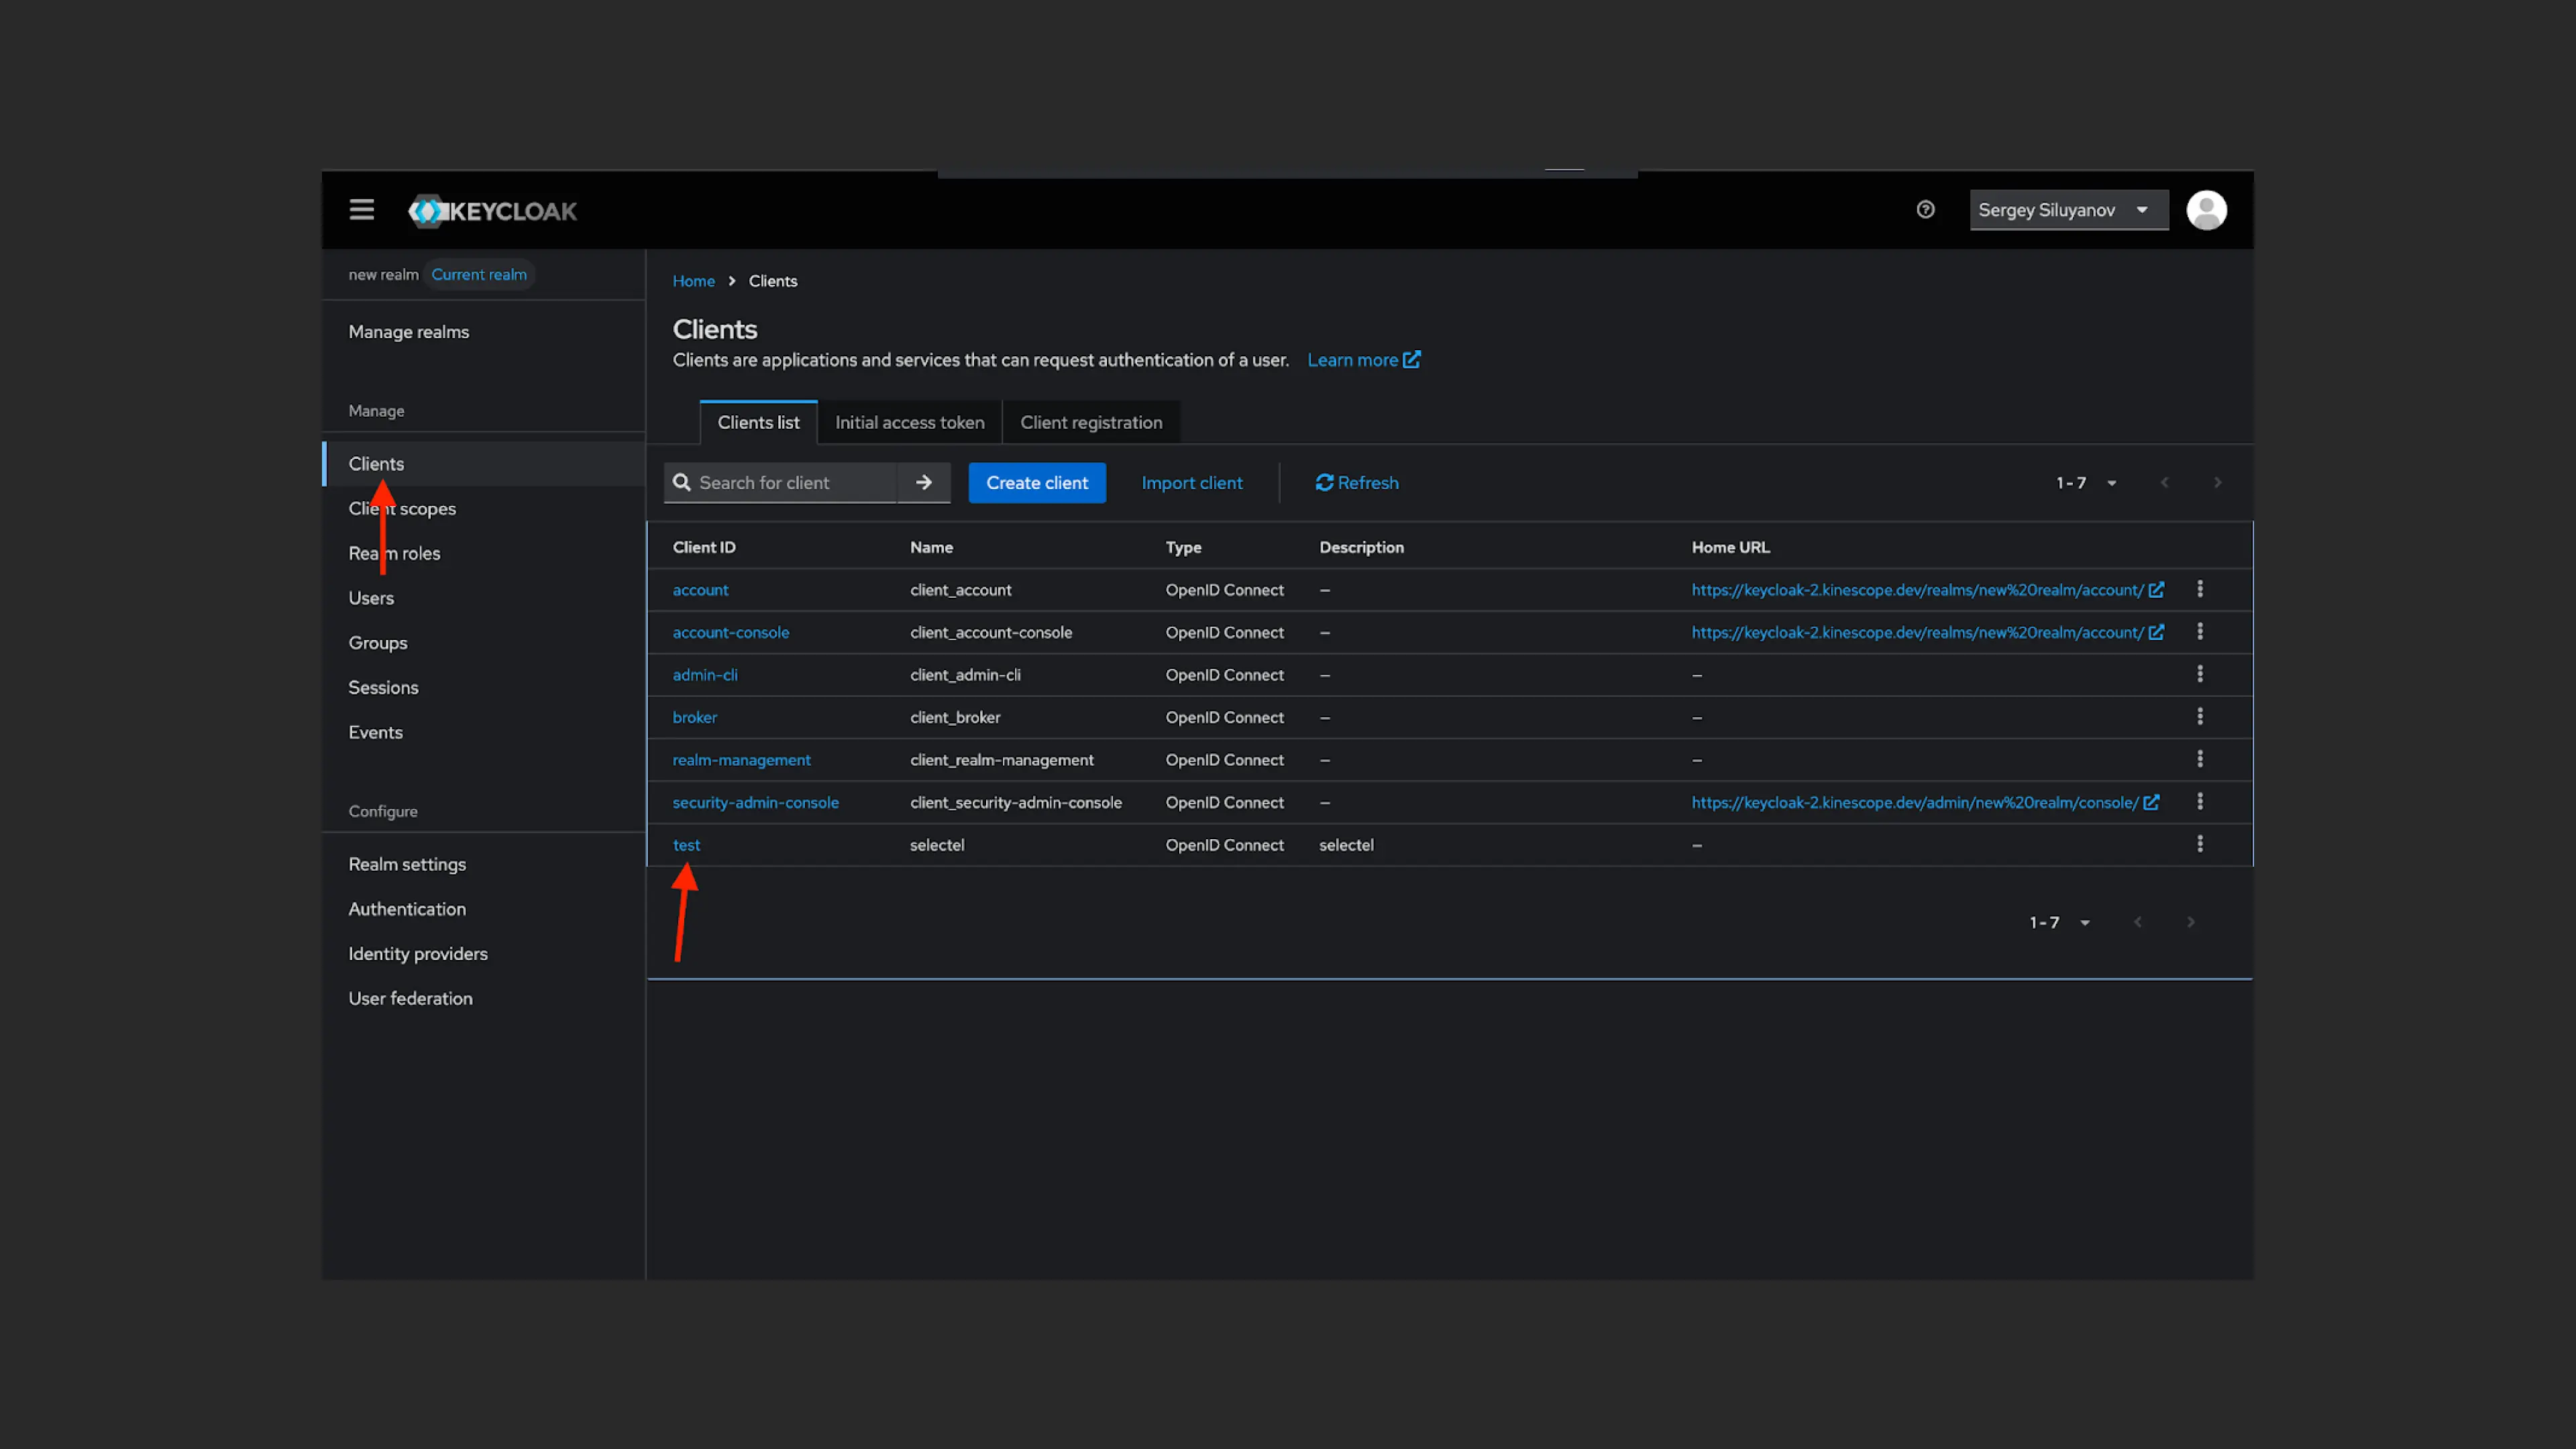
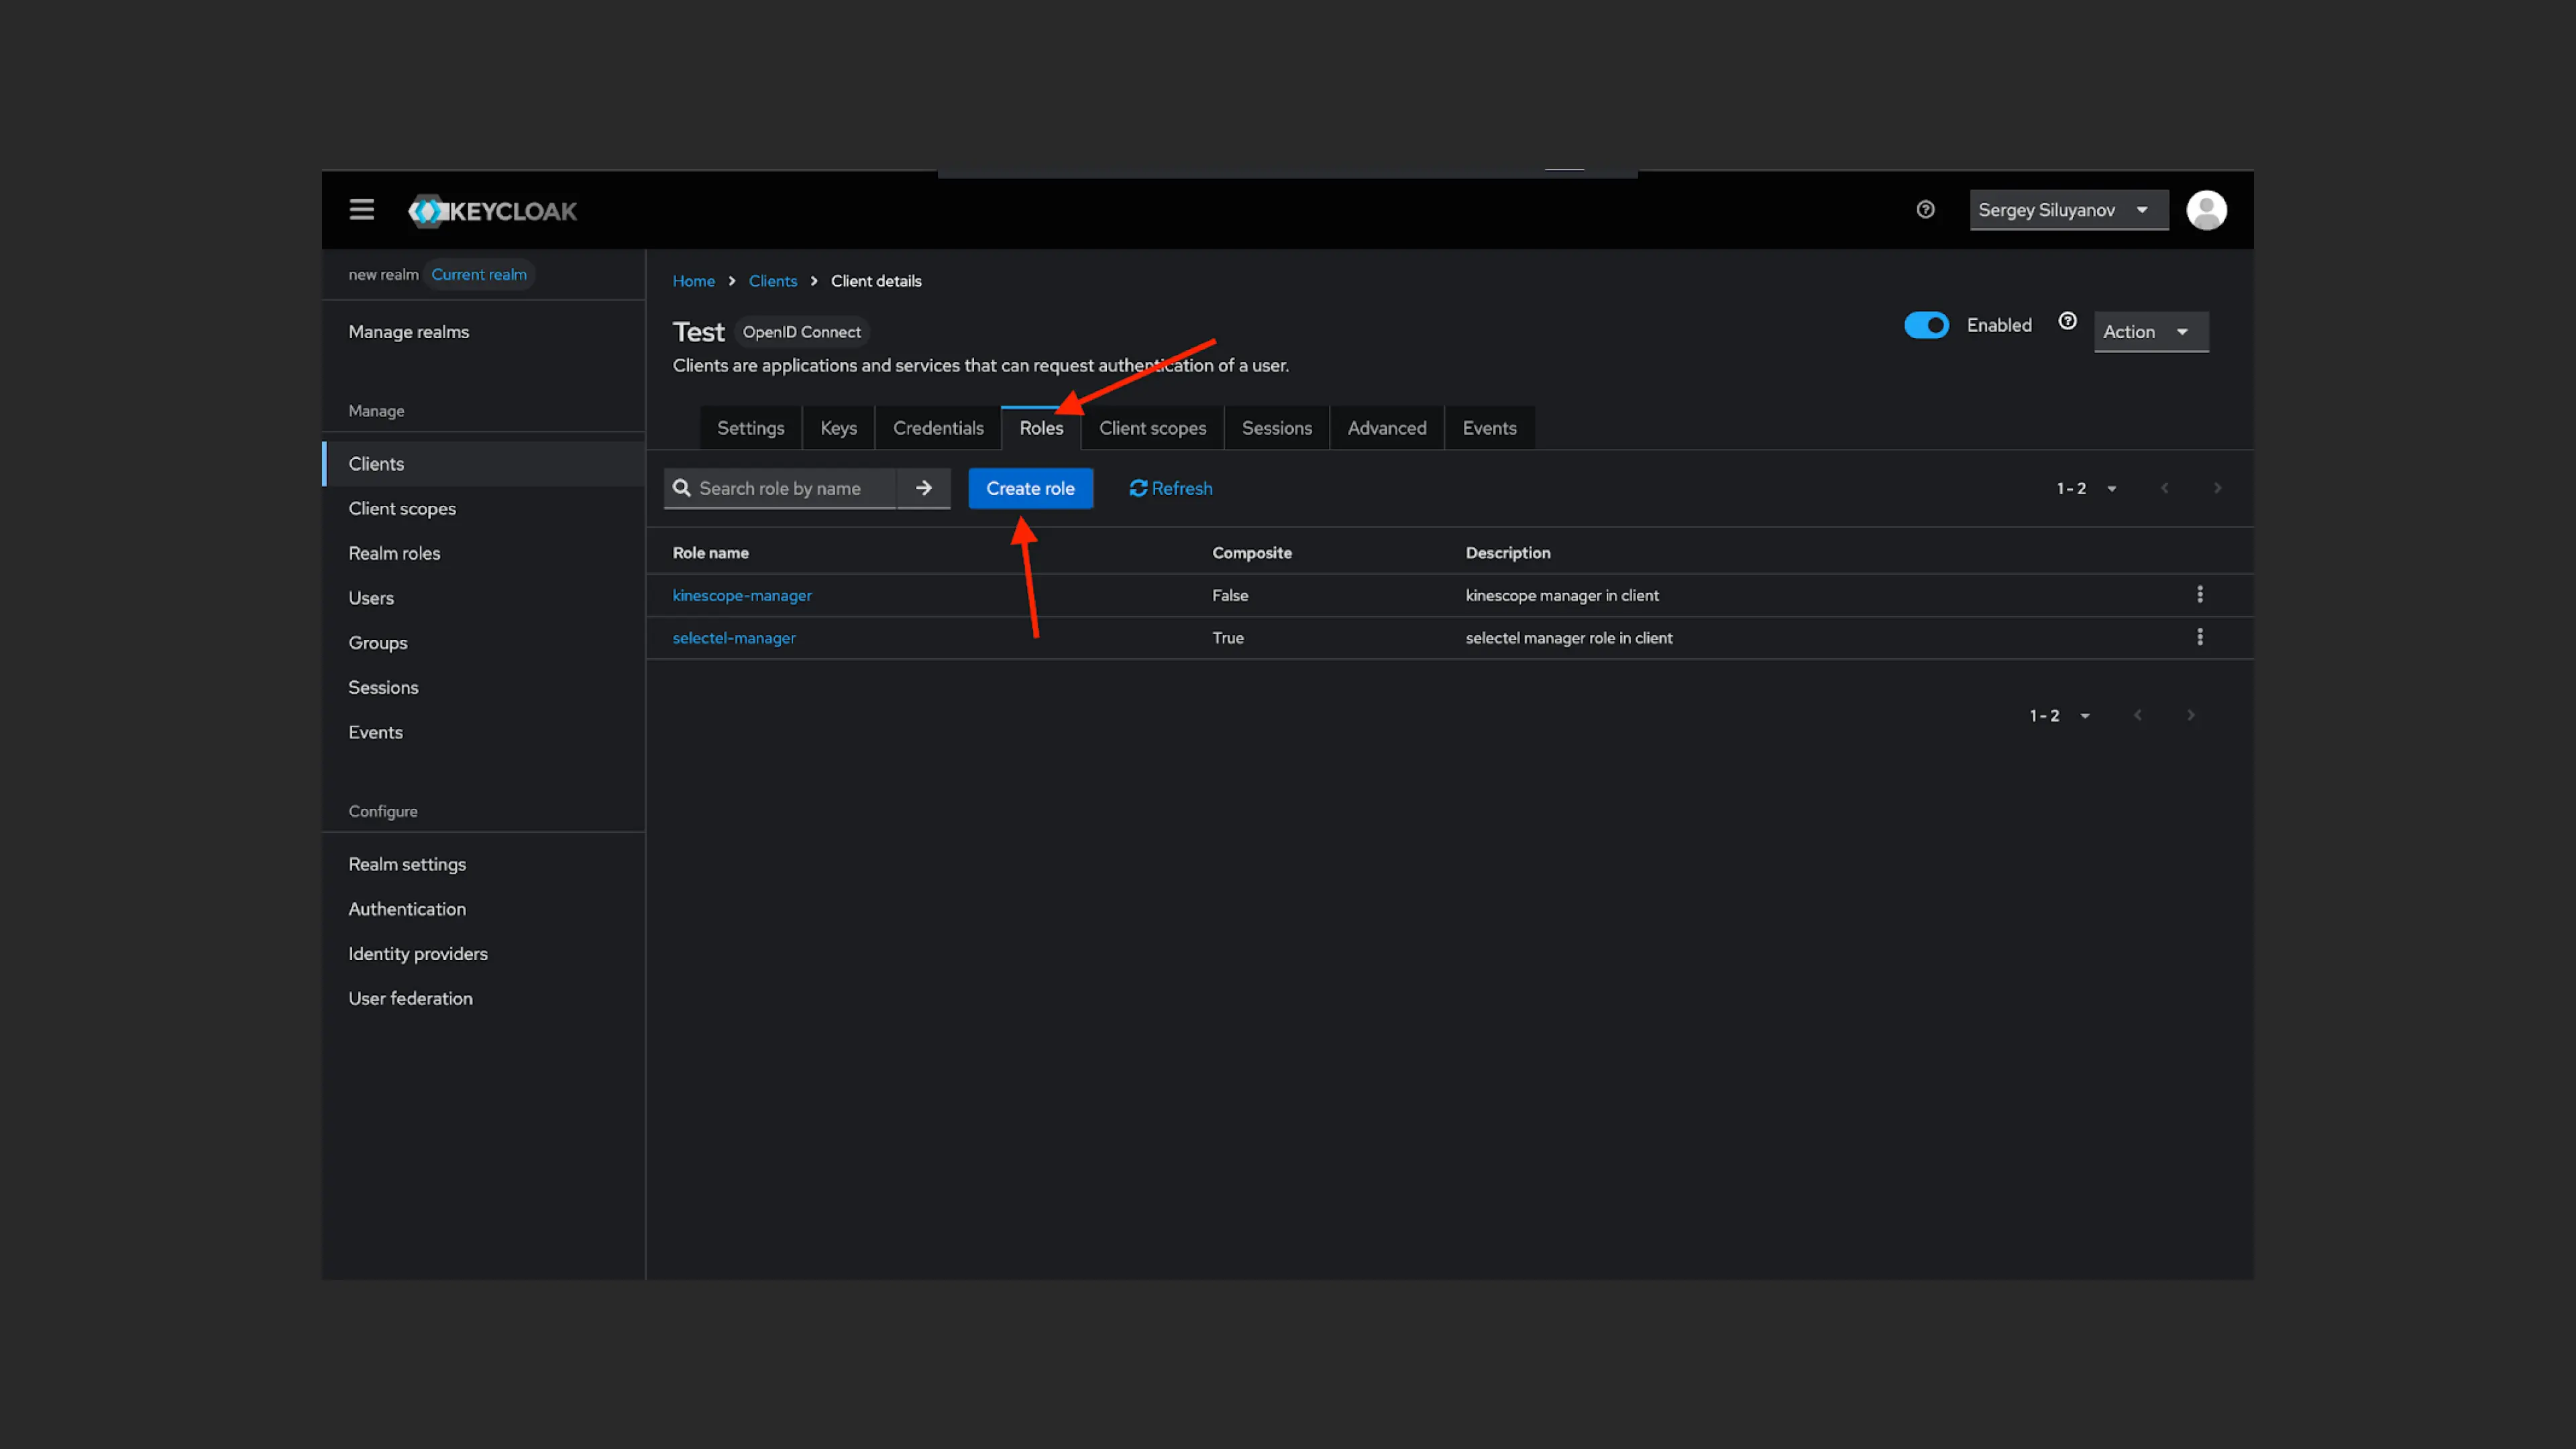
- Go to the “Roles” tab and create the required role for the Kinescope user via “Create role”. For example, “kinescope-manager”.
Use the following role names for correct configuration:
- kinescope-admin
- kinescope-editor_plus
- kinescope-editor
- kinescope-manager
- kinescope-accountant
- kinescope-viewer
Roles are listed in priority order. If multiple roles are passed, the user will be assigned the role with the lowest priority.
Learn more about Kinescope user roles and their capabilities in the article Managing team access rights .
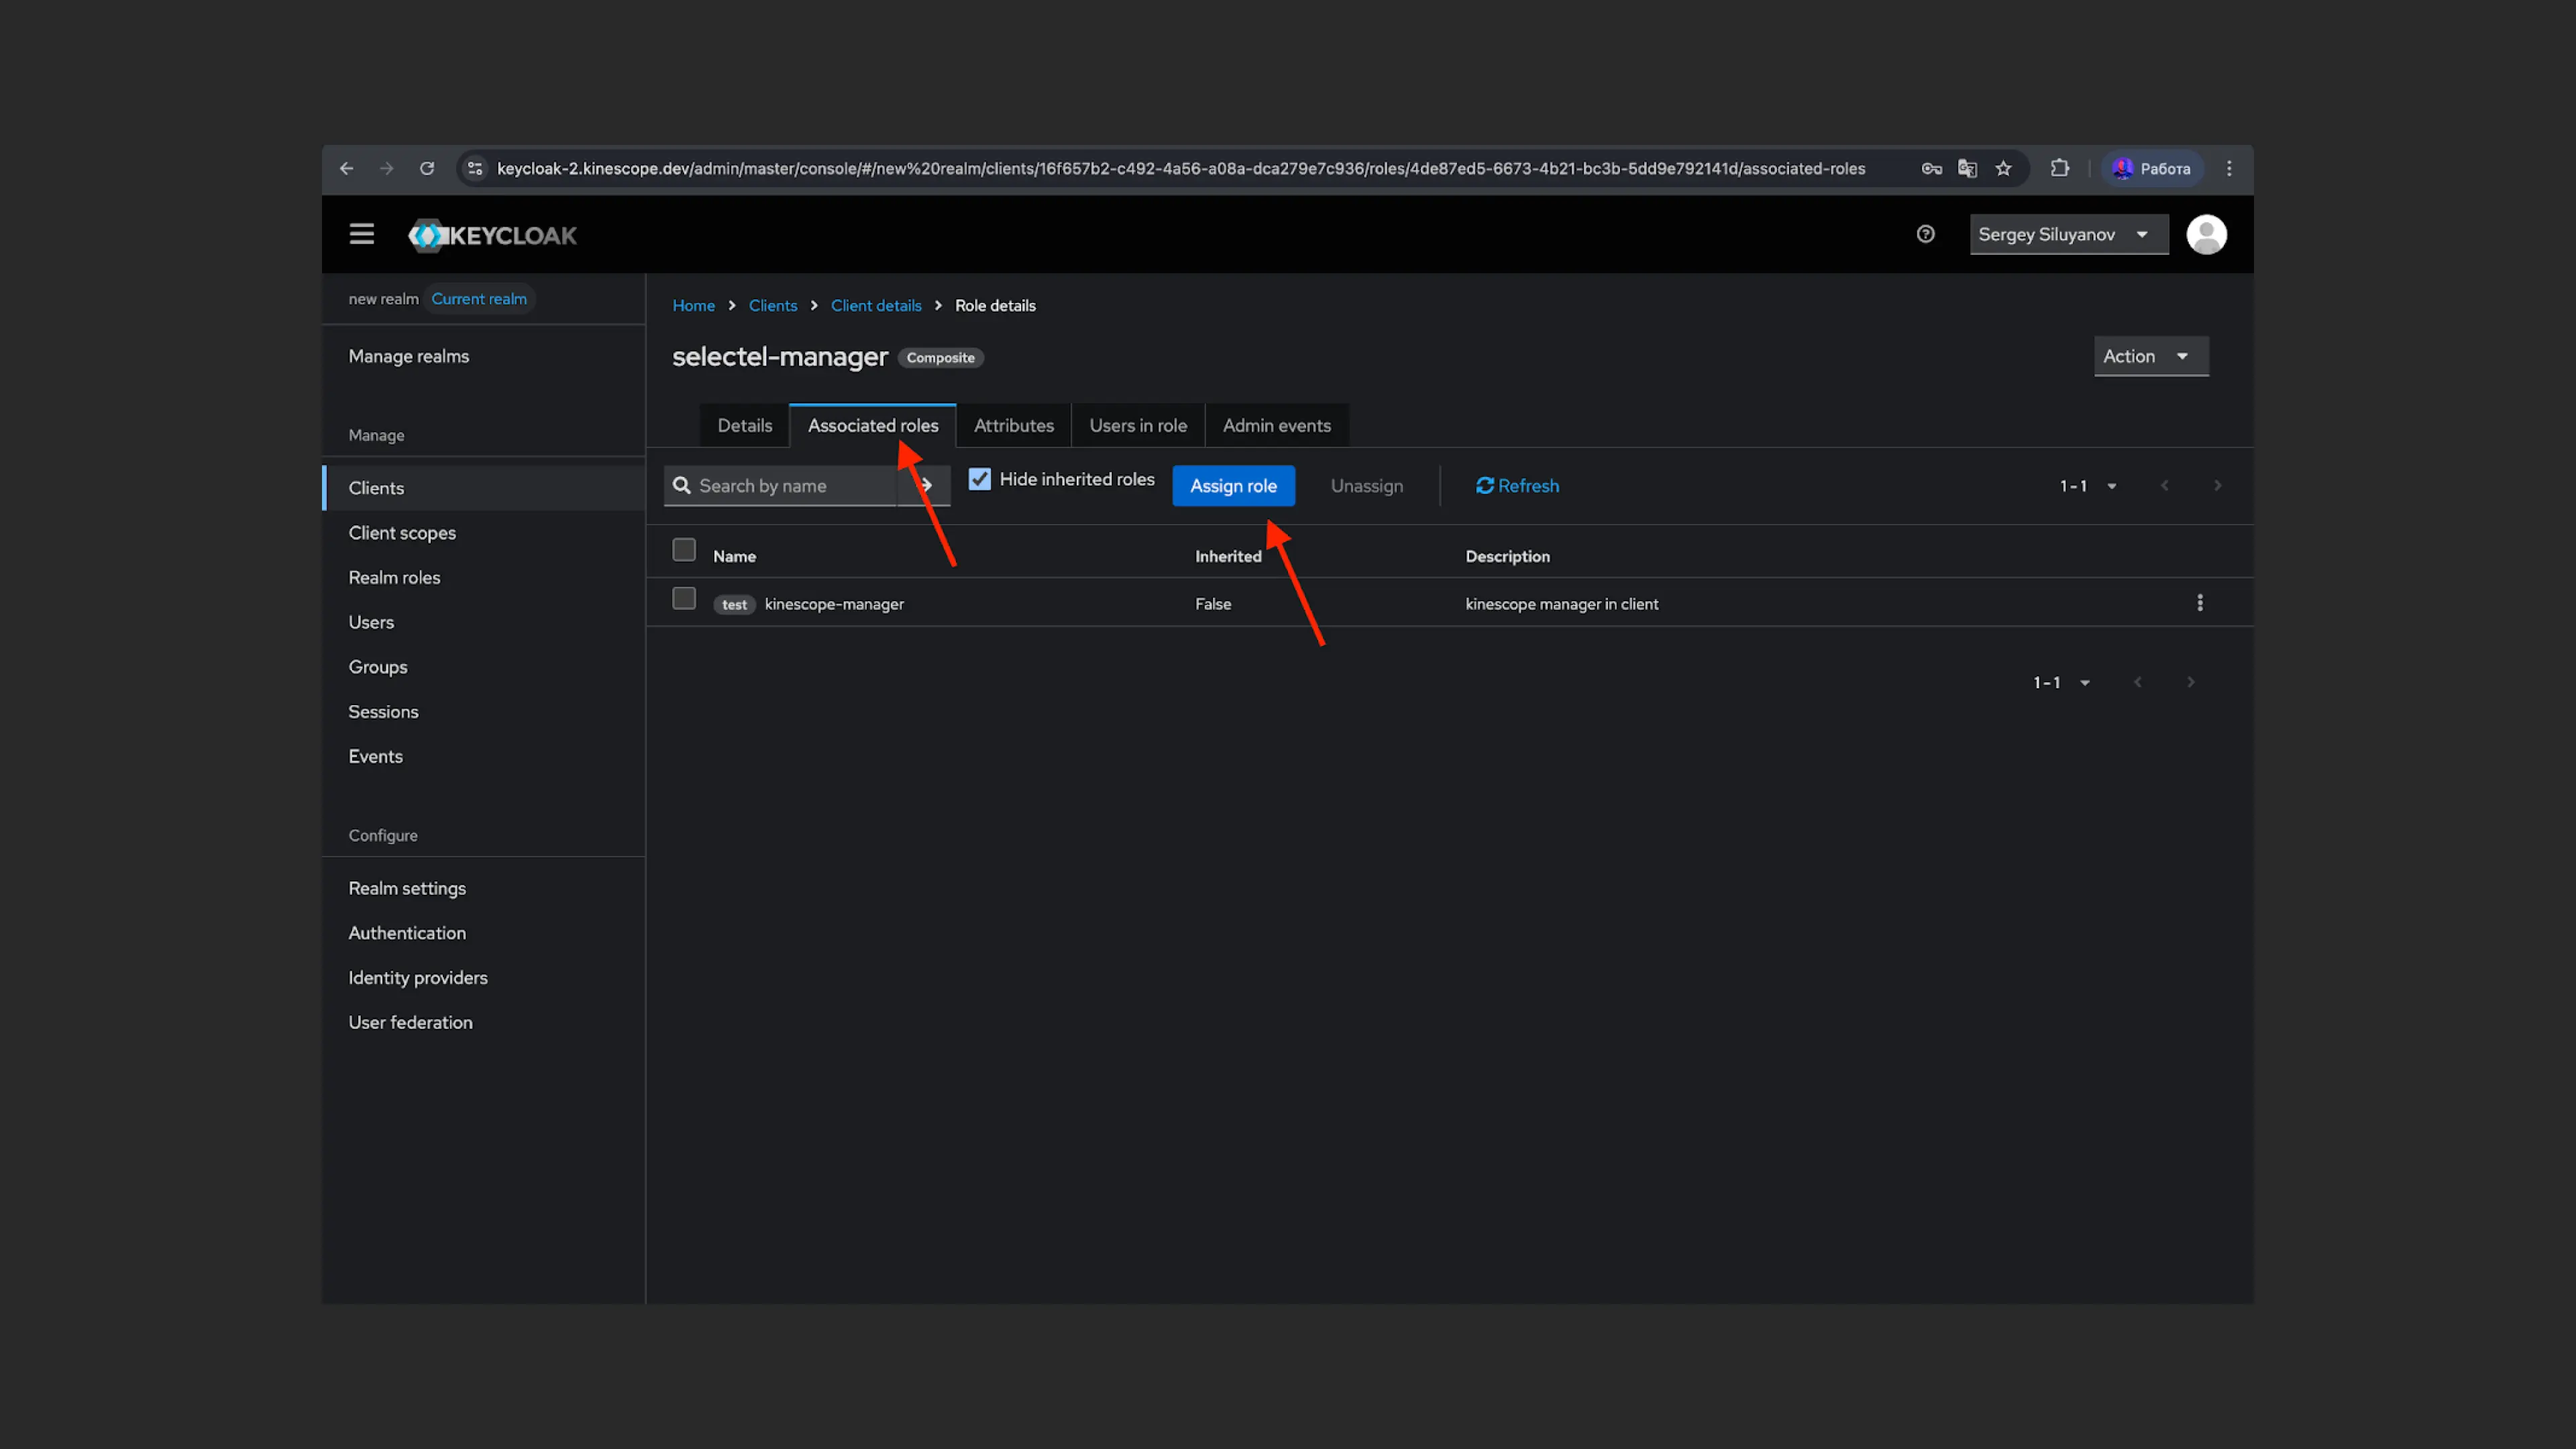
- Next, link the “kinescope-manager” role to the role in the connected system. From the “Roles” tab, click the created role to go to its details (“Role details”). In the “Associated roles” tab, click “Assign role”.
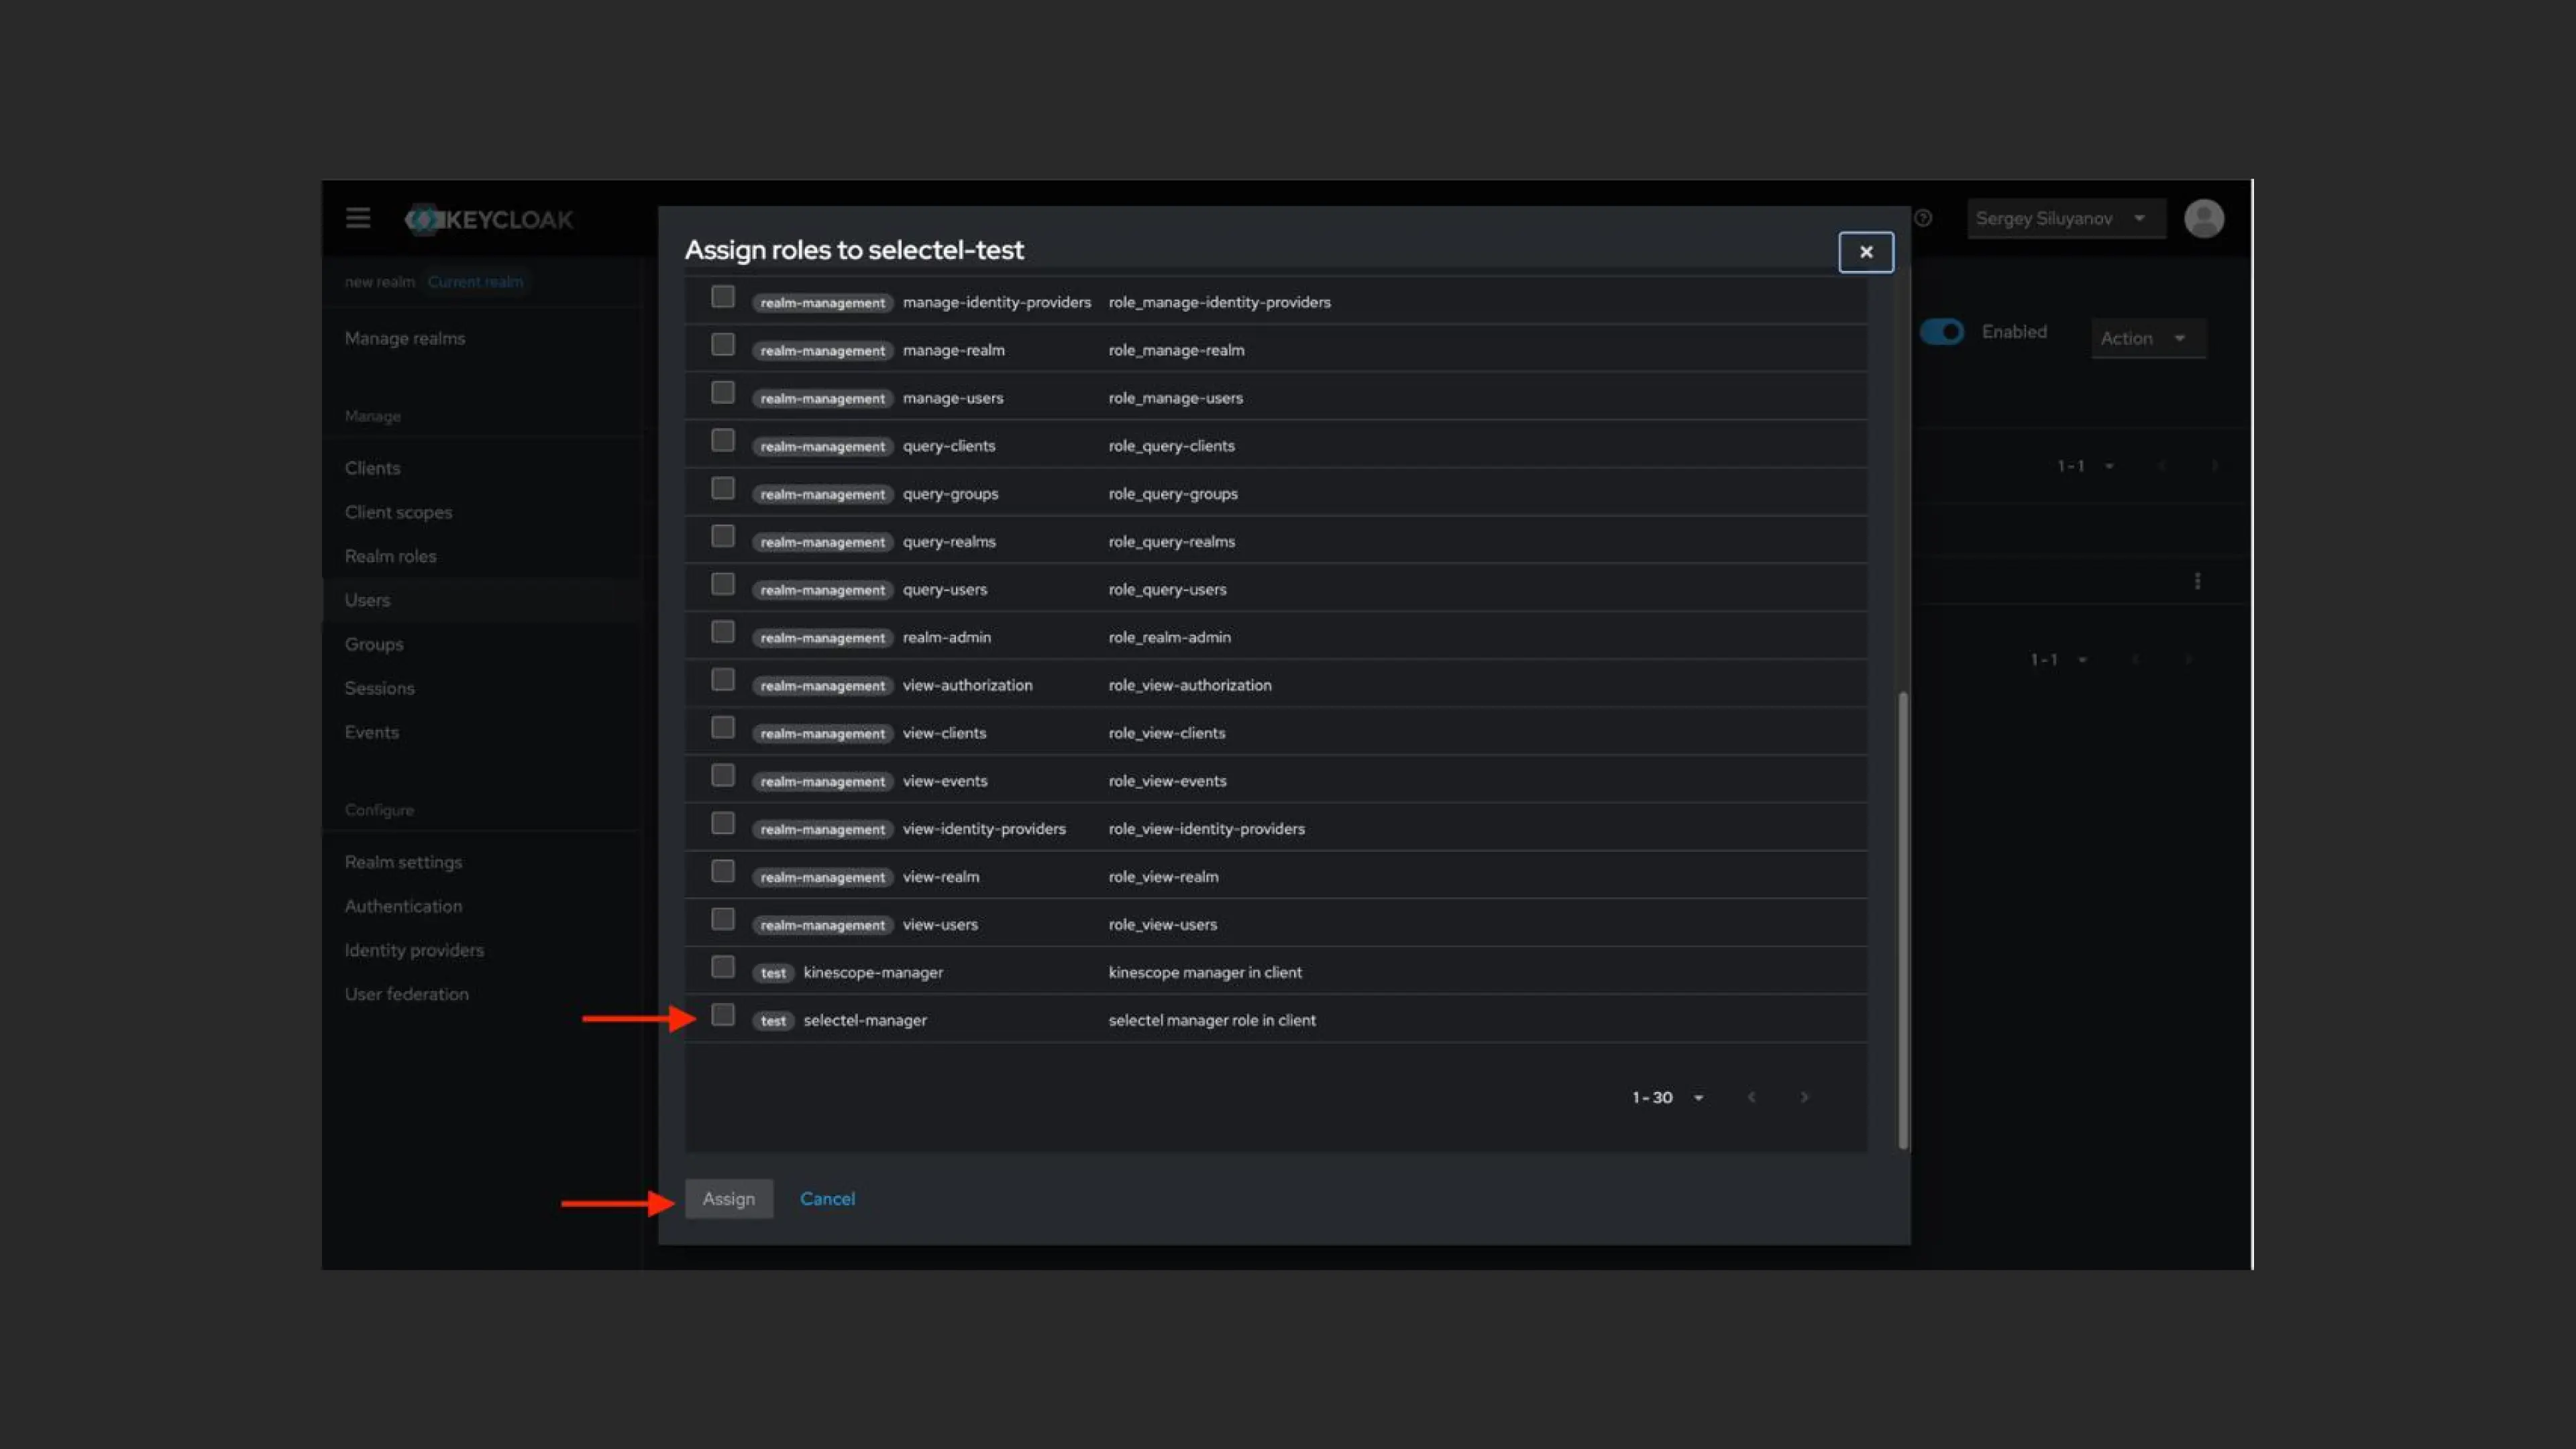
- Filter the list by clients and select the desired role in “Associated roles”. Click “Assign” to confirm the link.
Users with the selected role in the system will now be created in Kinescope with the “kinescope-manager” role.
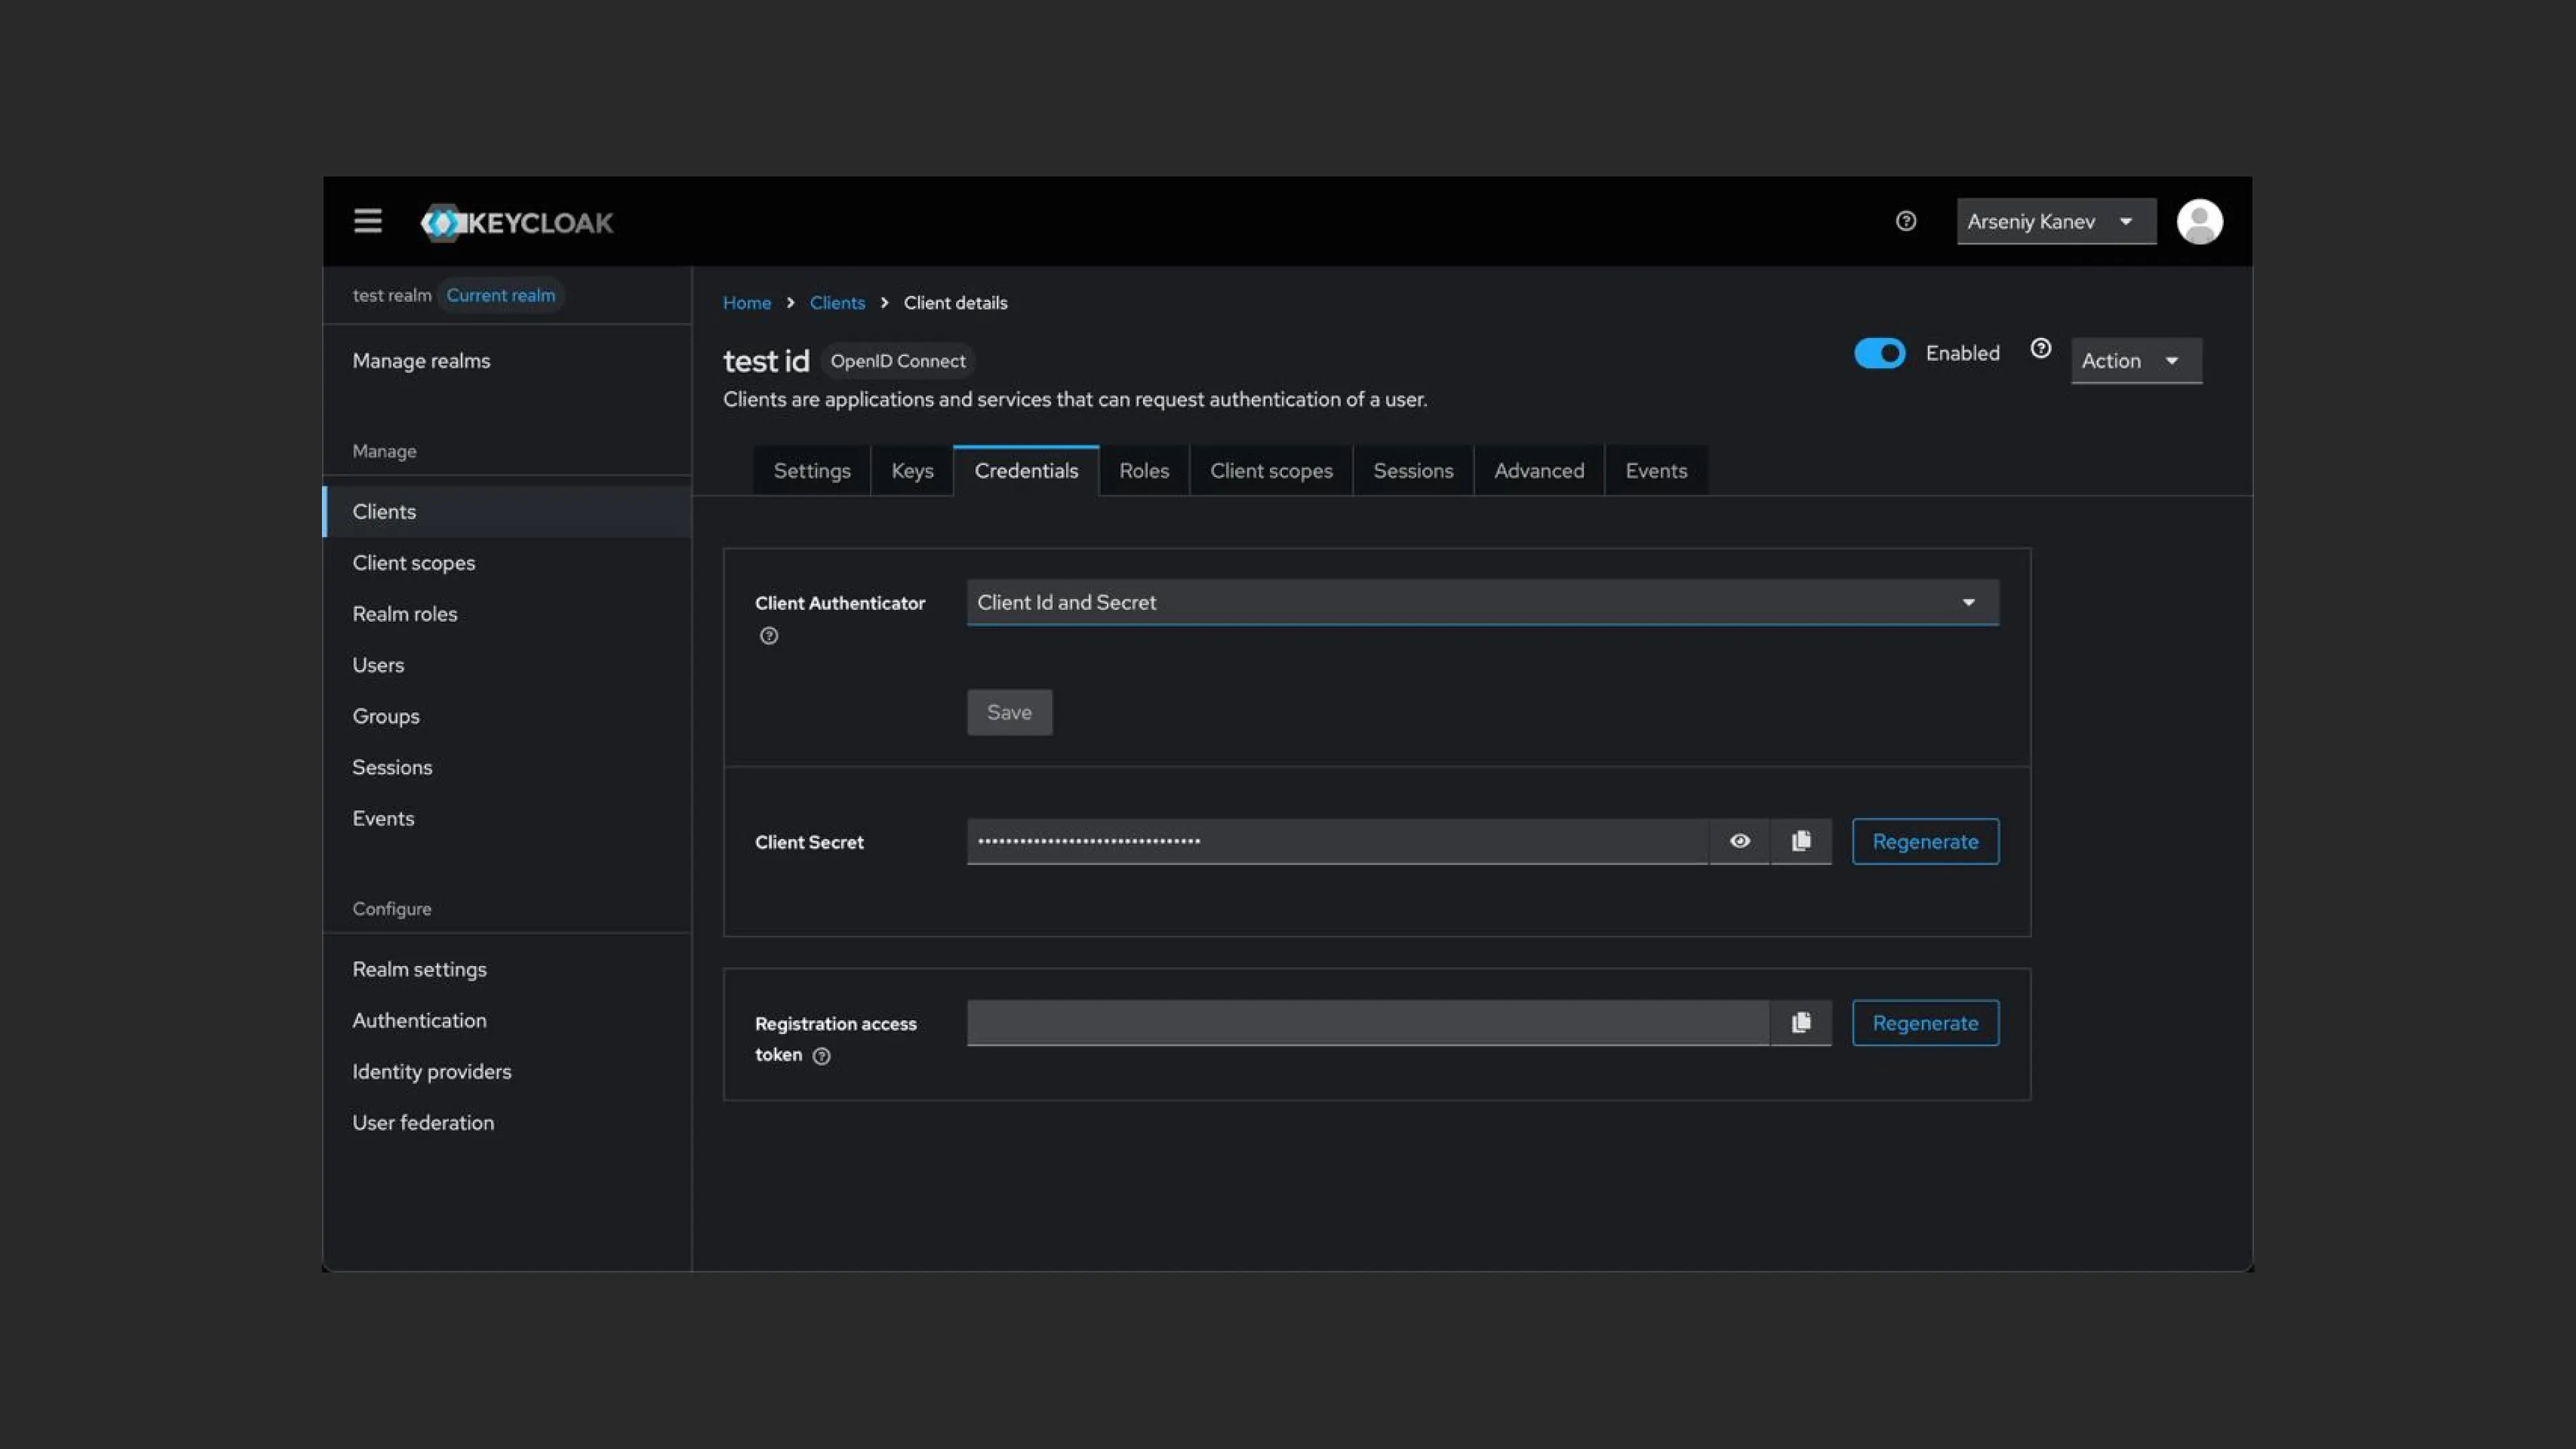
- To complete setup, provide Kinescope support with the parameters: client_id, client_secret, and provider_url in the format https://{{keycloak-domain}}/realms/{{some_realm}}
If you encounter an error during setup or need consultation — the support chat within the Kinescope interface.
Setting up AD FS for Kinescope
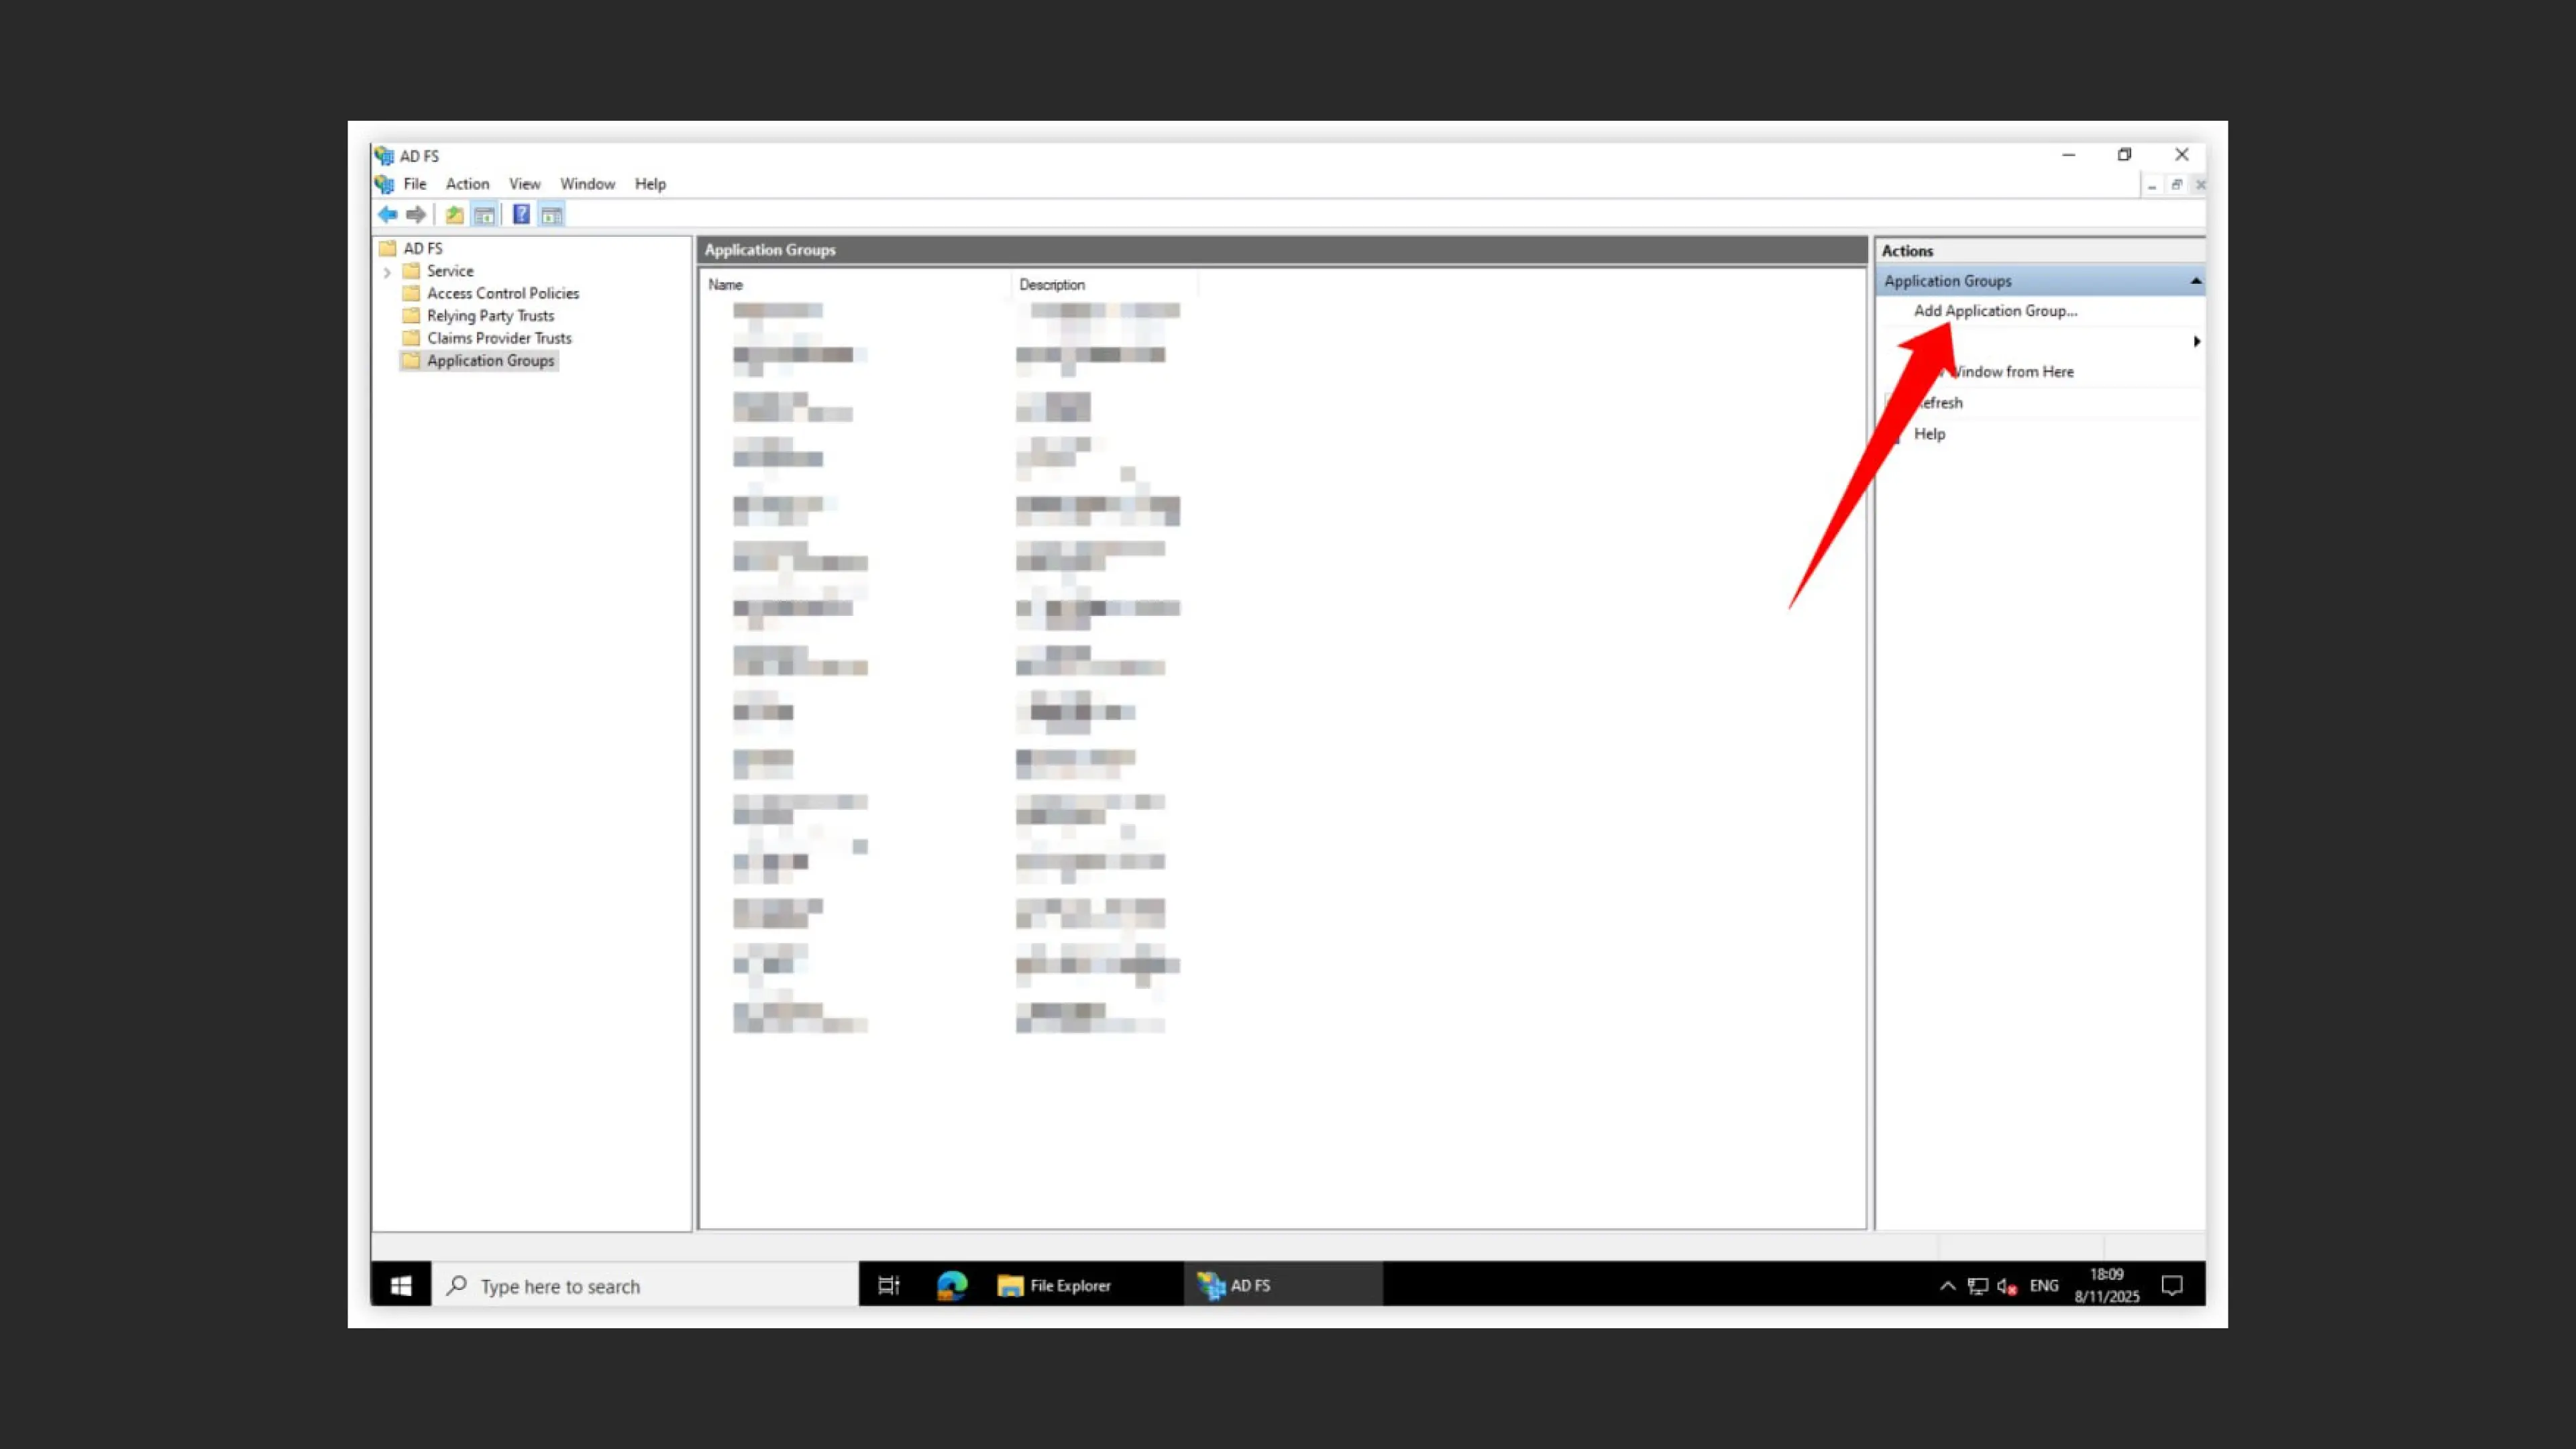
Step 1: Creating an Application Group
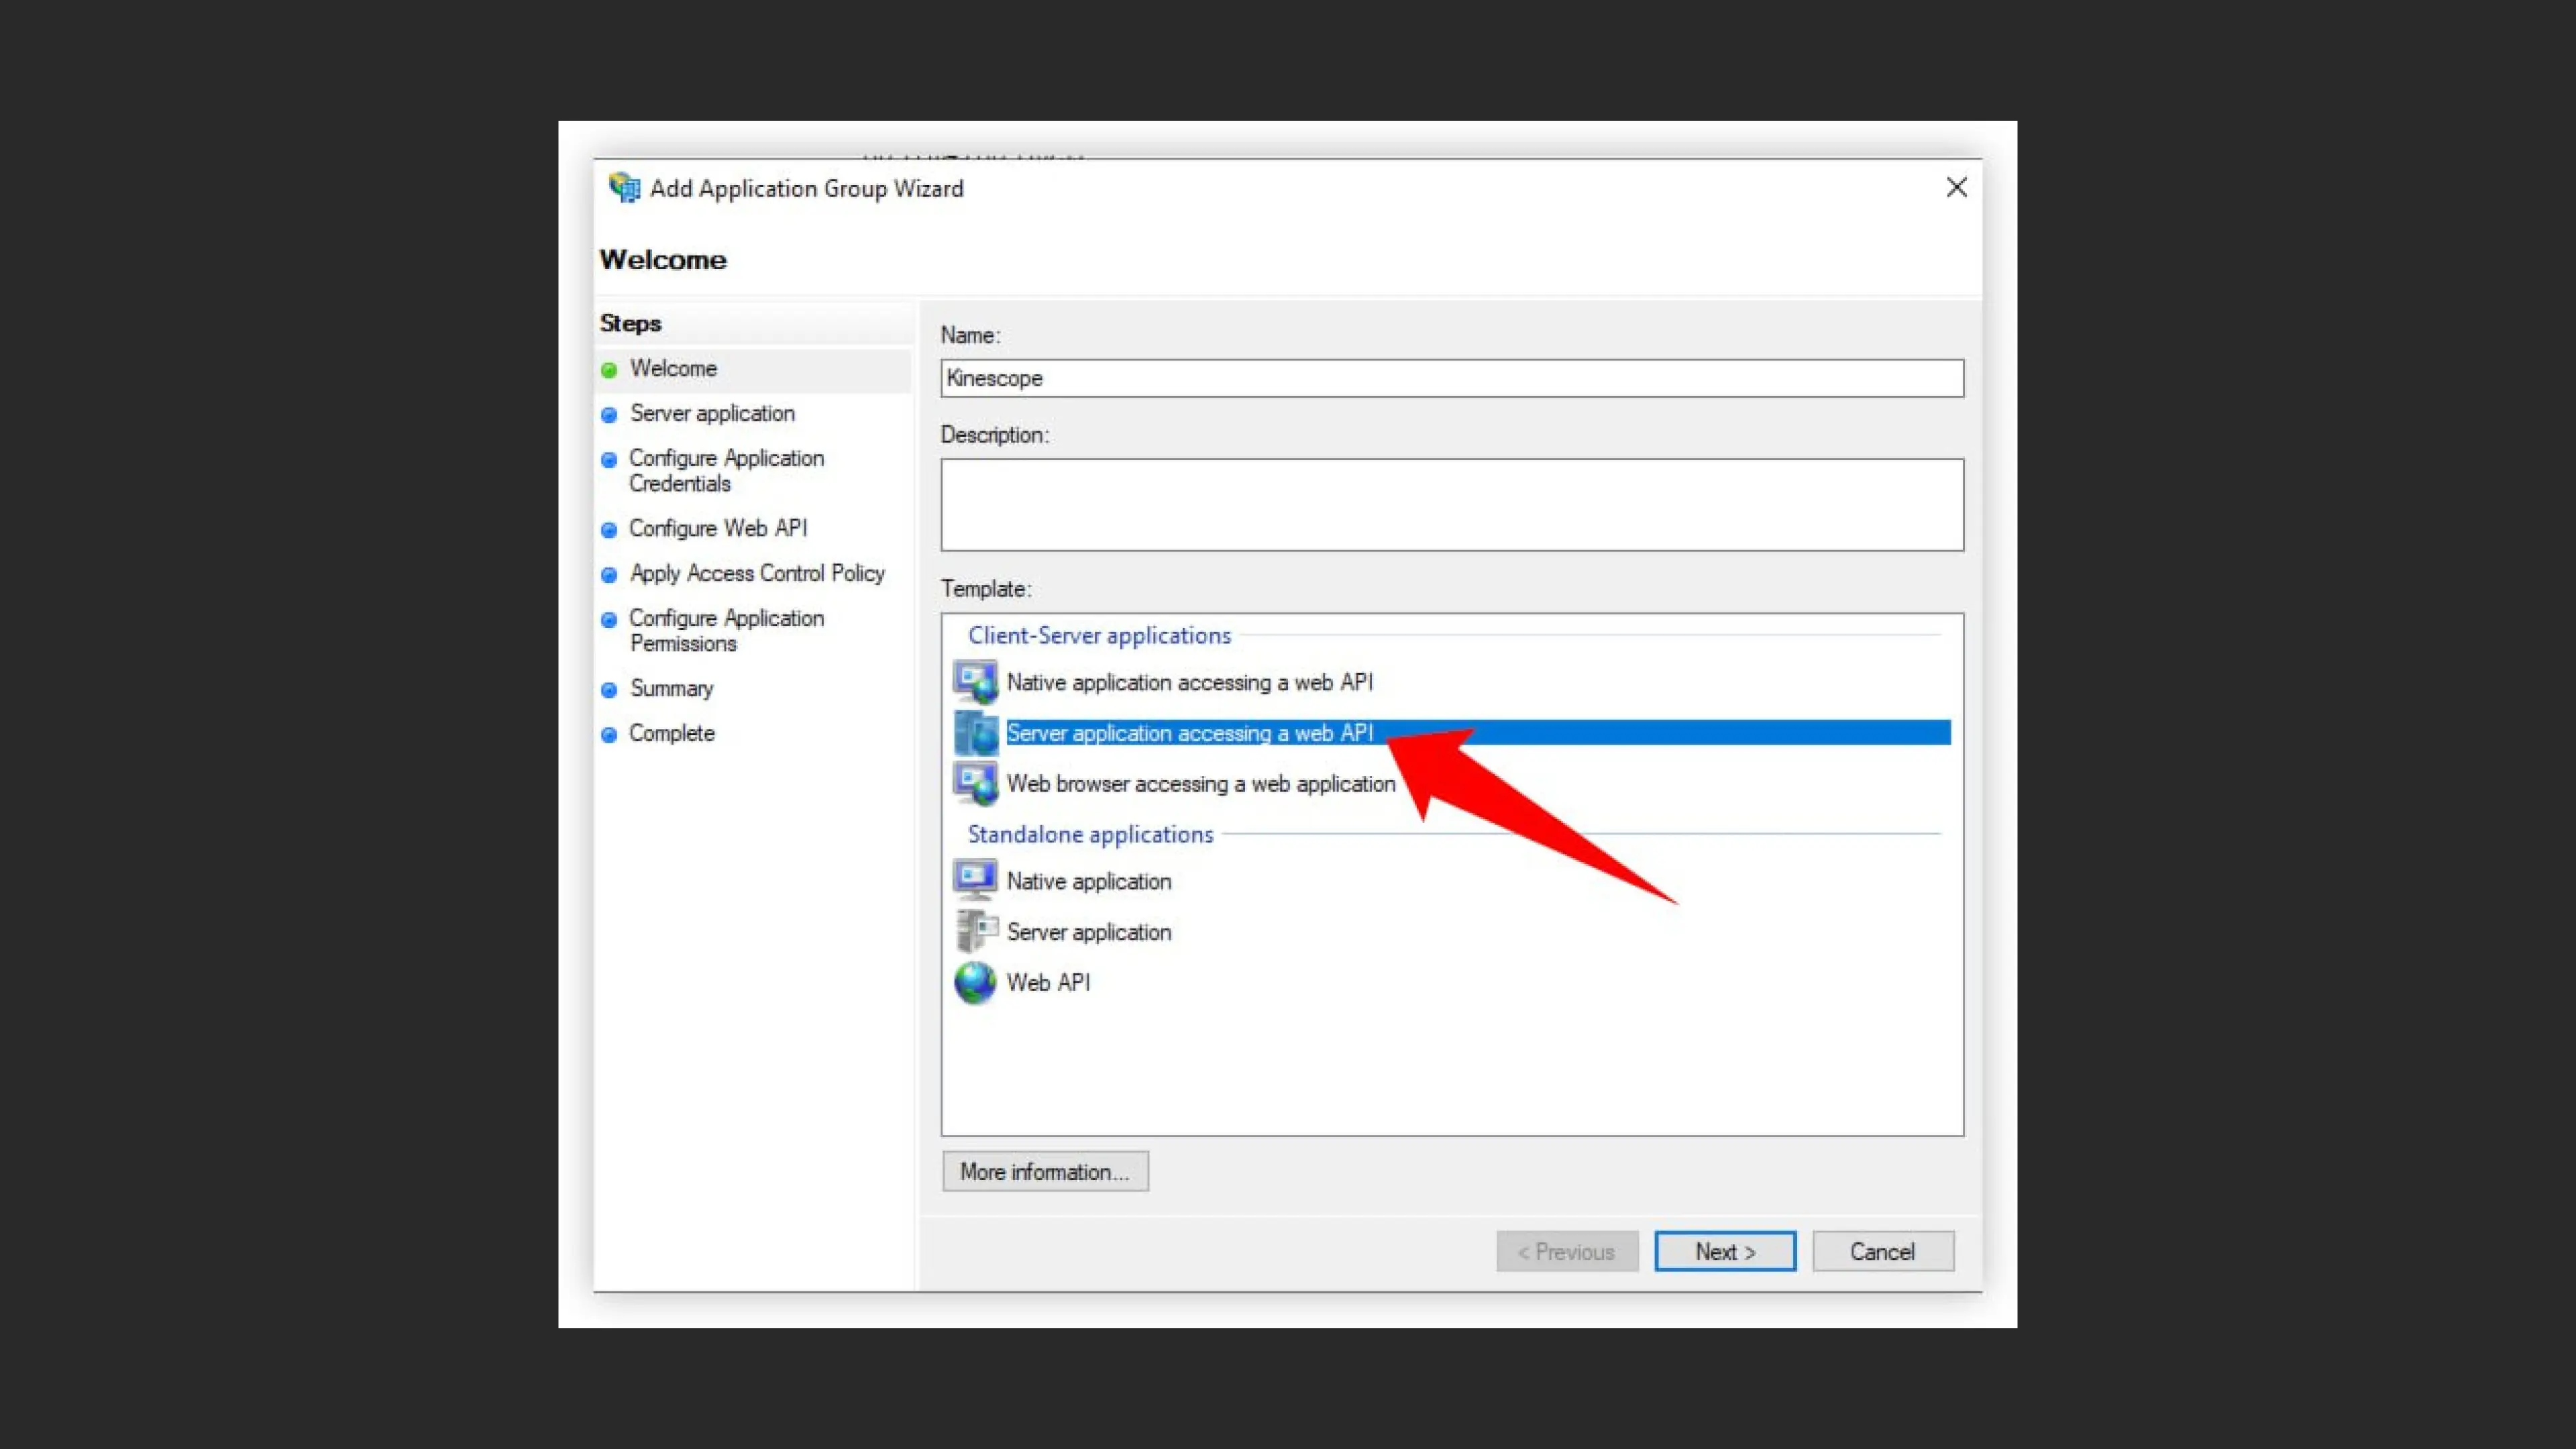
- Open the AD FS management console
- In “Application Groups”, select “Add Application Group…”
- In the Name field, enter a group name (e.g., “Kinescope”)
- In the Description field, add a description (optional)
- In the Template section, select “Server application accessing a web API” from the Client-Server applications list
- Click Next to continue
Step 2: Configuring Server Application
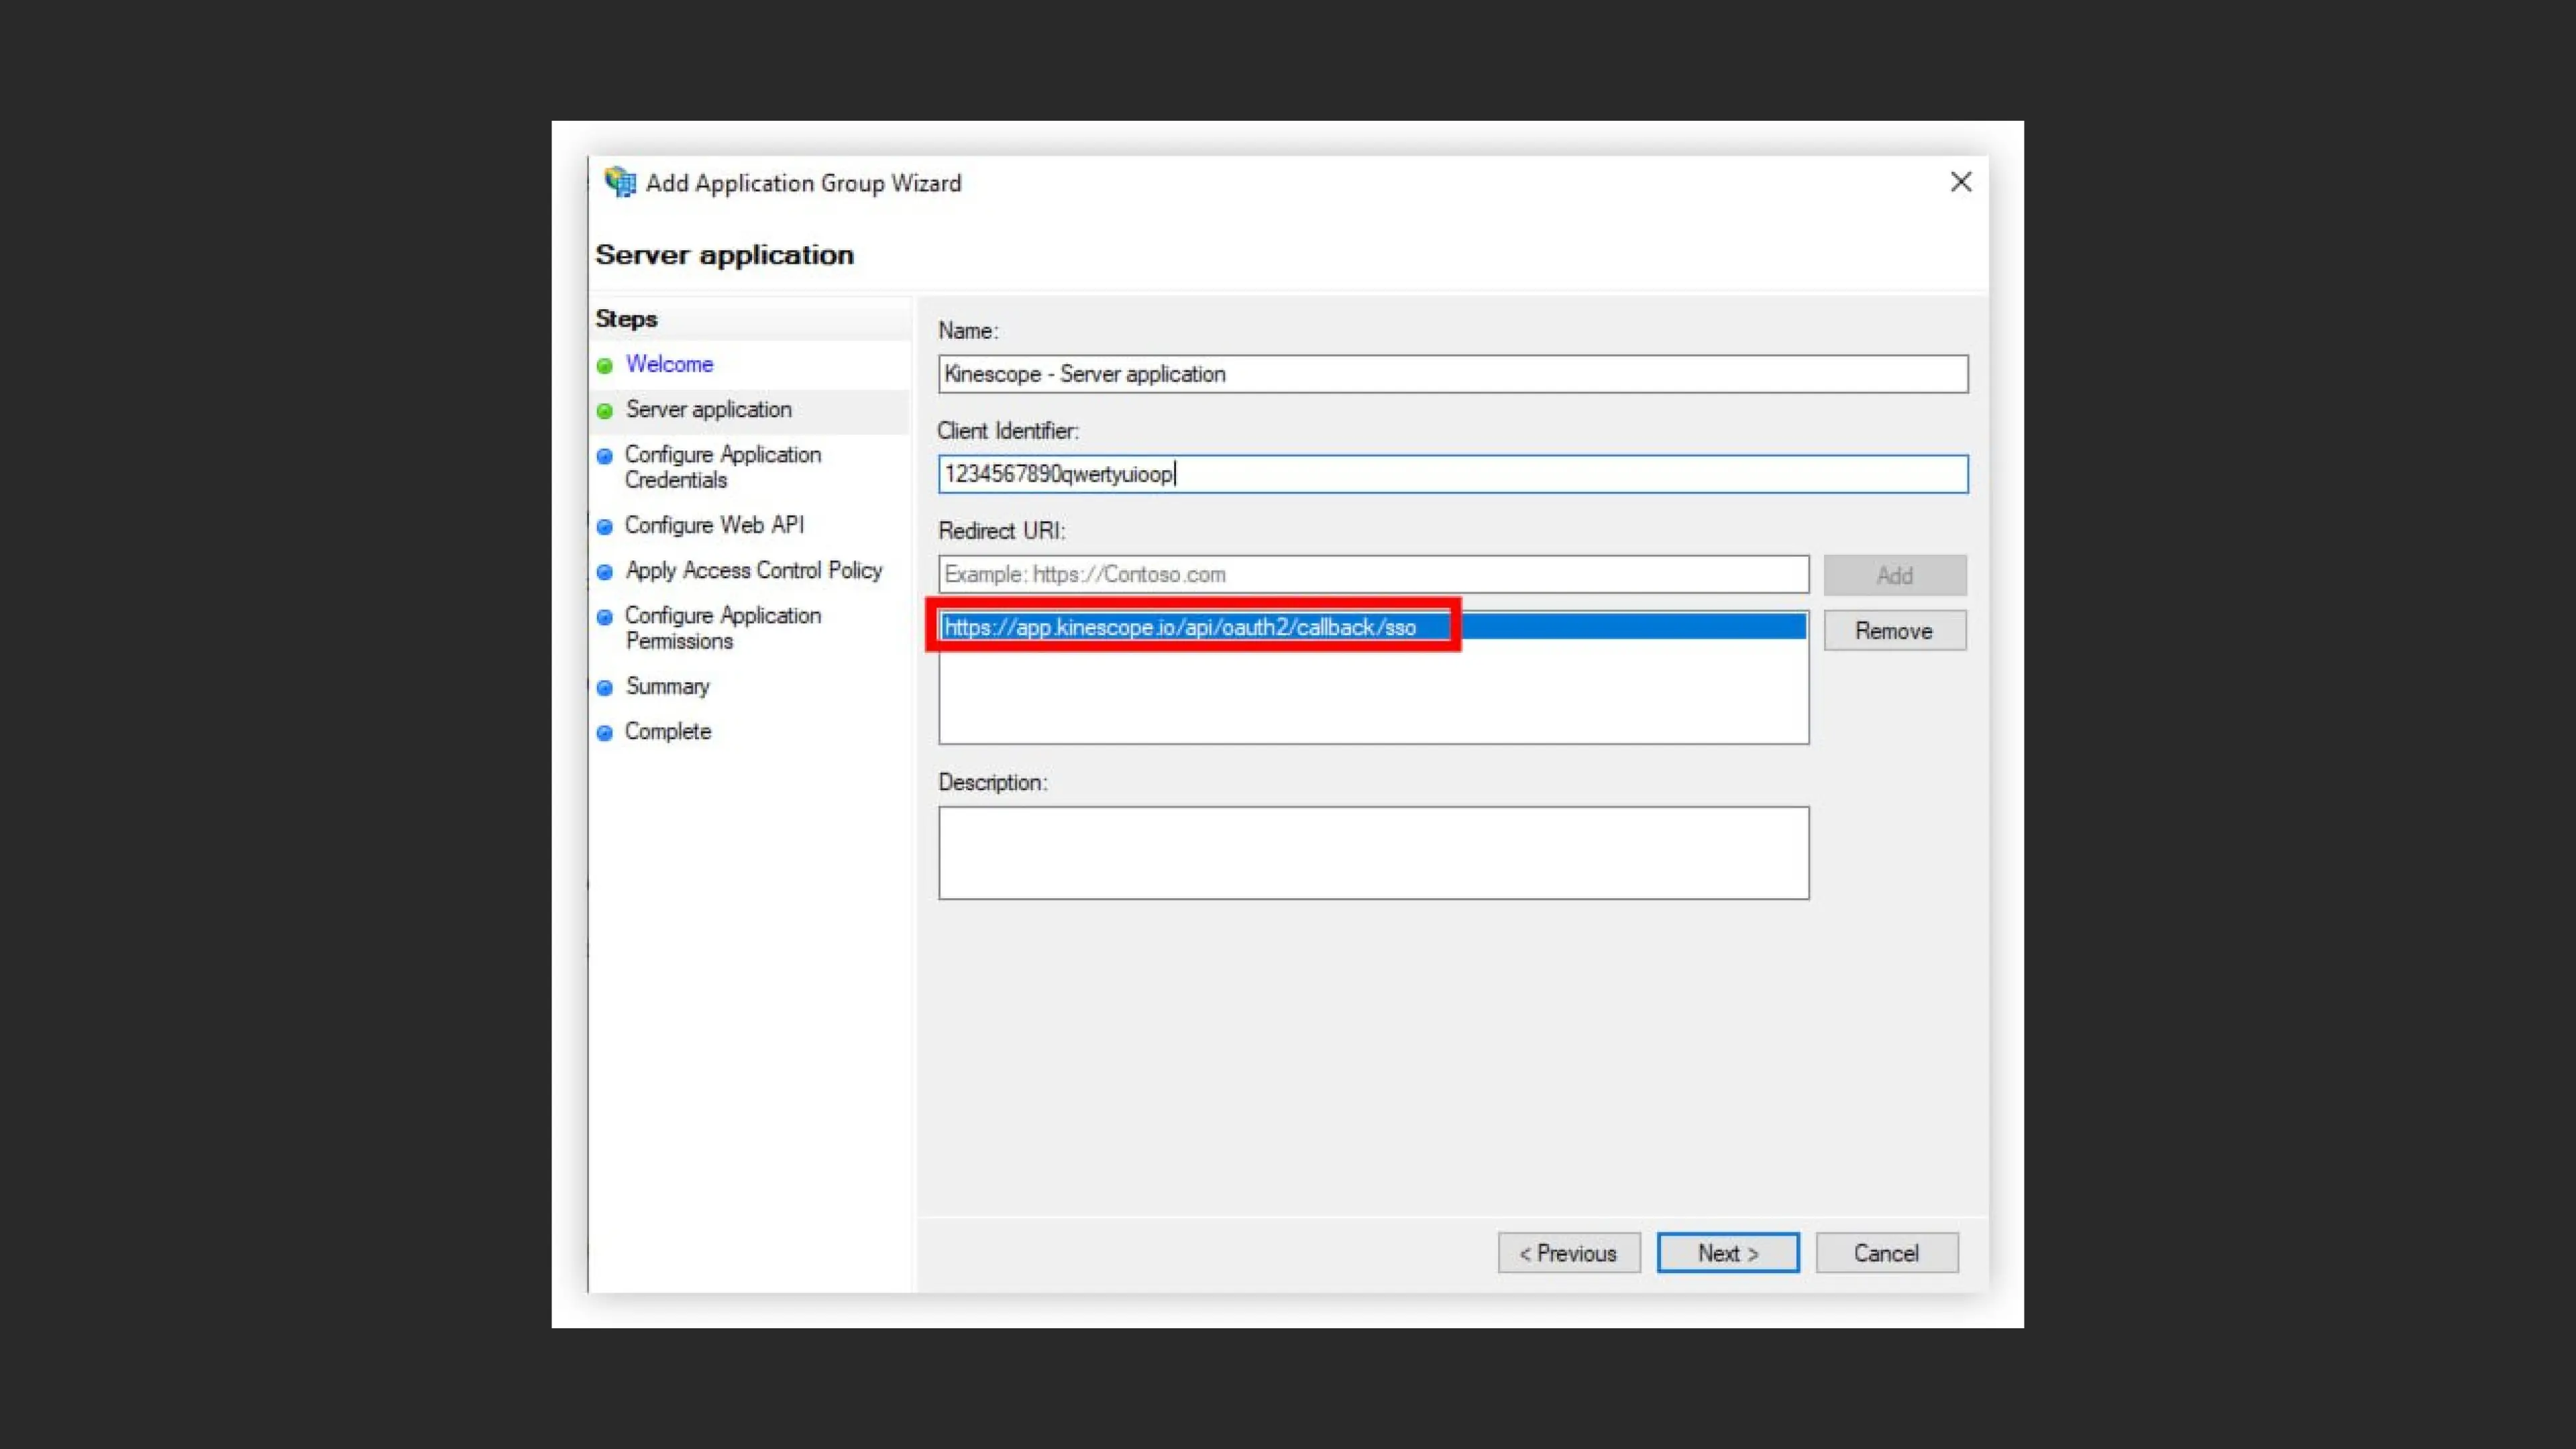
- Name will auto-fill as “Kinescope - Server application”
- Client Identifier will be generated automatically (e.g., “123456789qwertyuiop”)
- In the Redirect URI field, add the callback URL: https://app.kinescope.io/api/oauth2/callback/sso
- Click Add to add the URI to the list
- Click Next to continue
Step 3: Configuring credentials
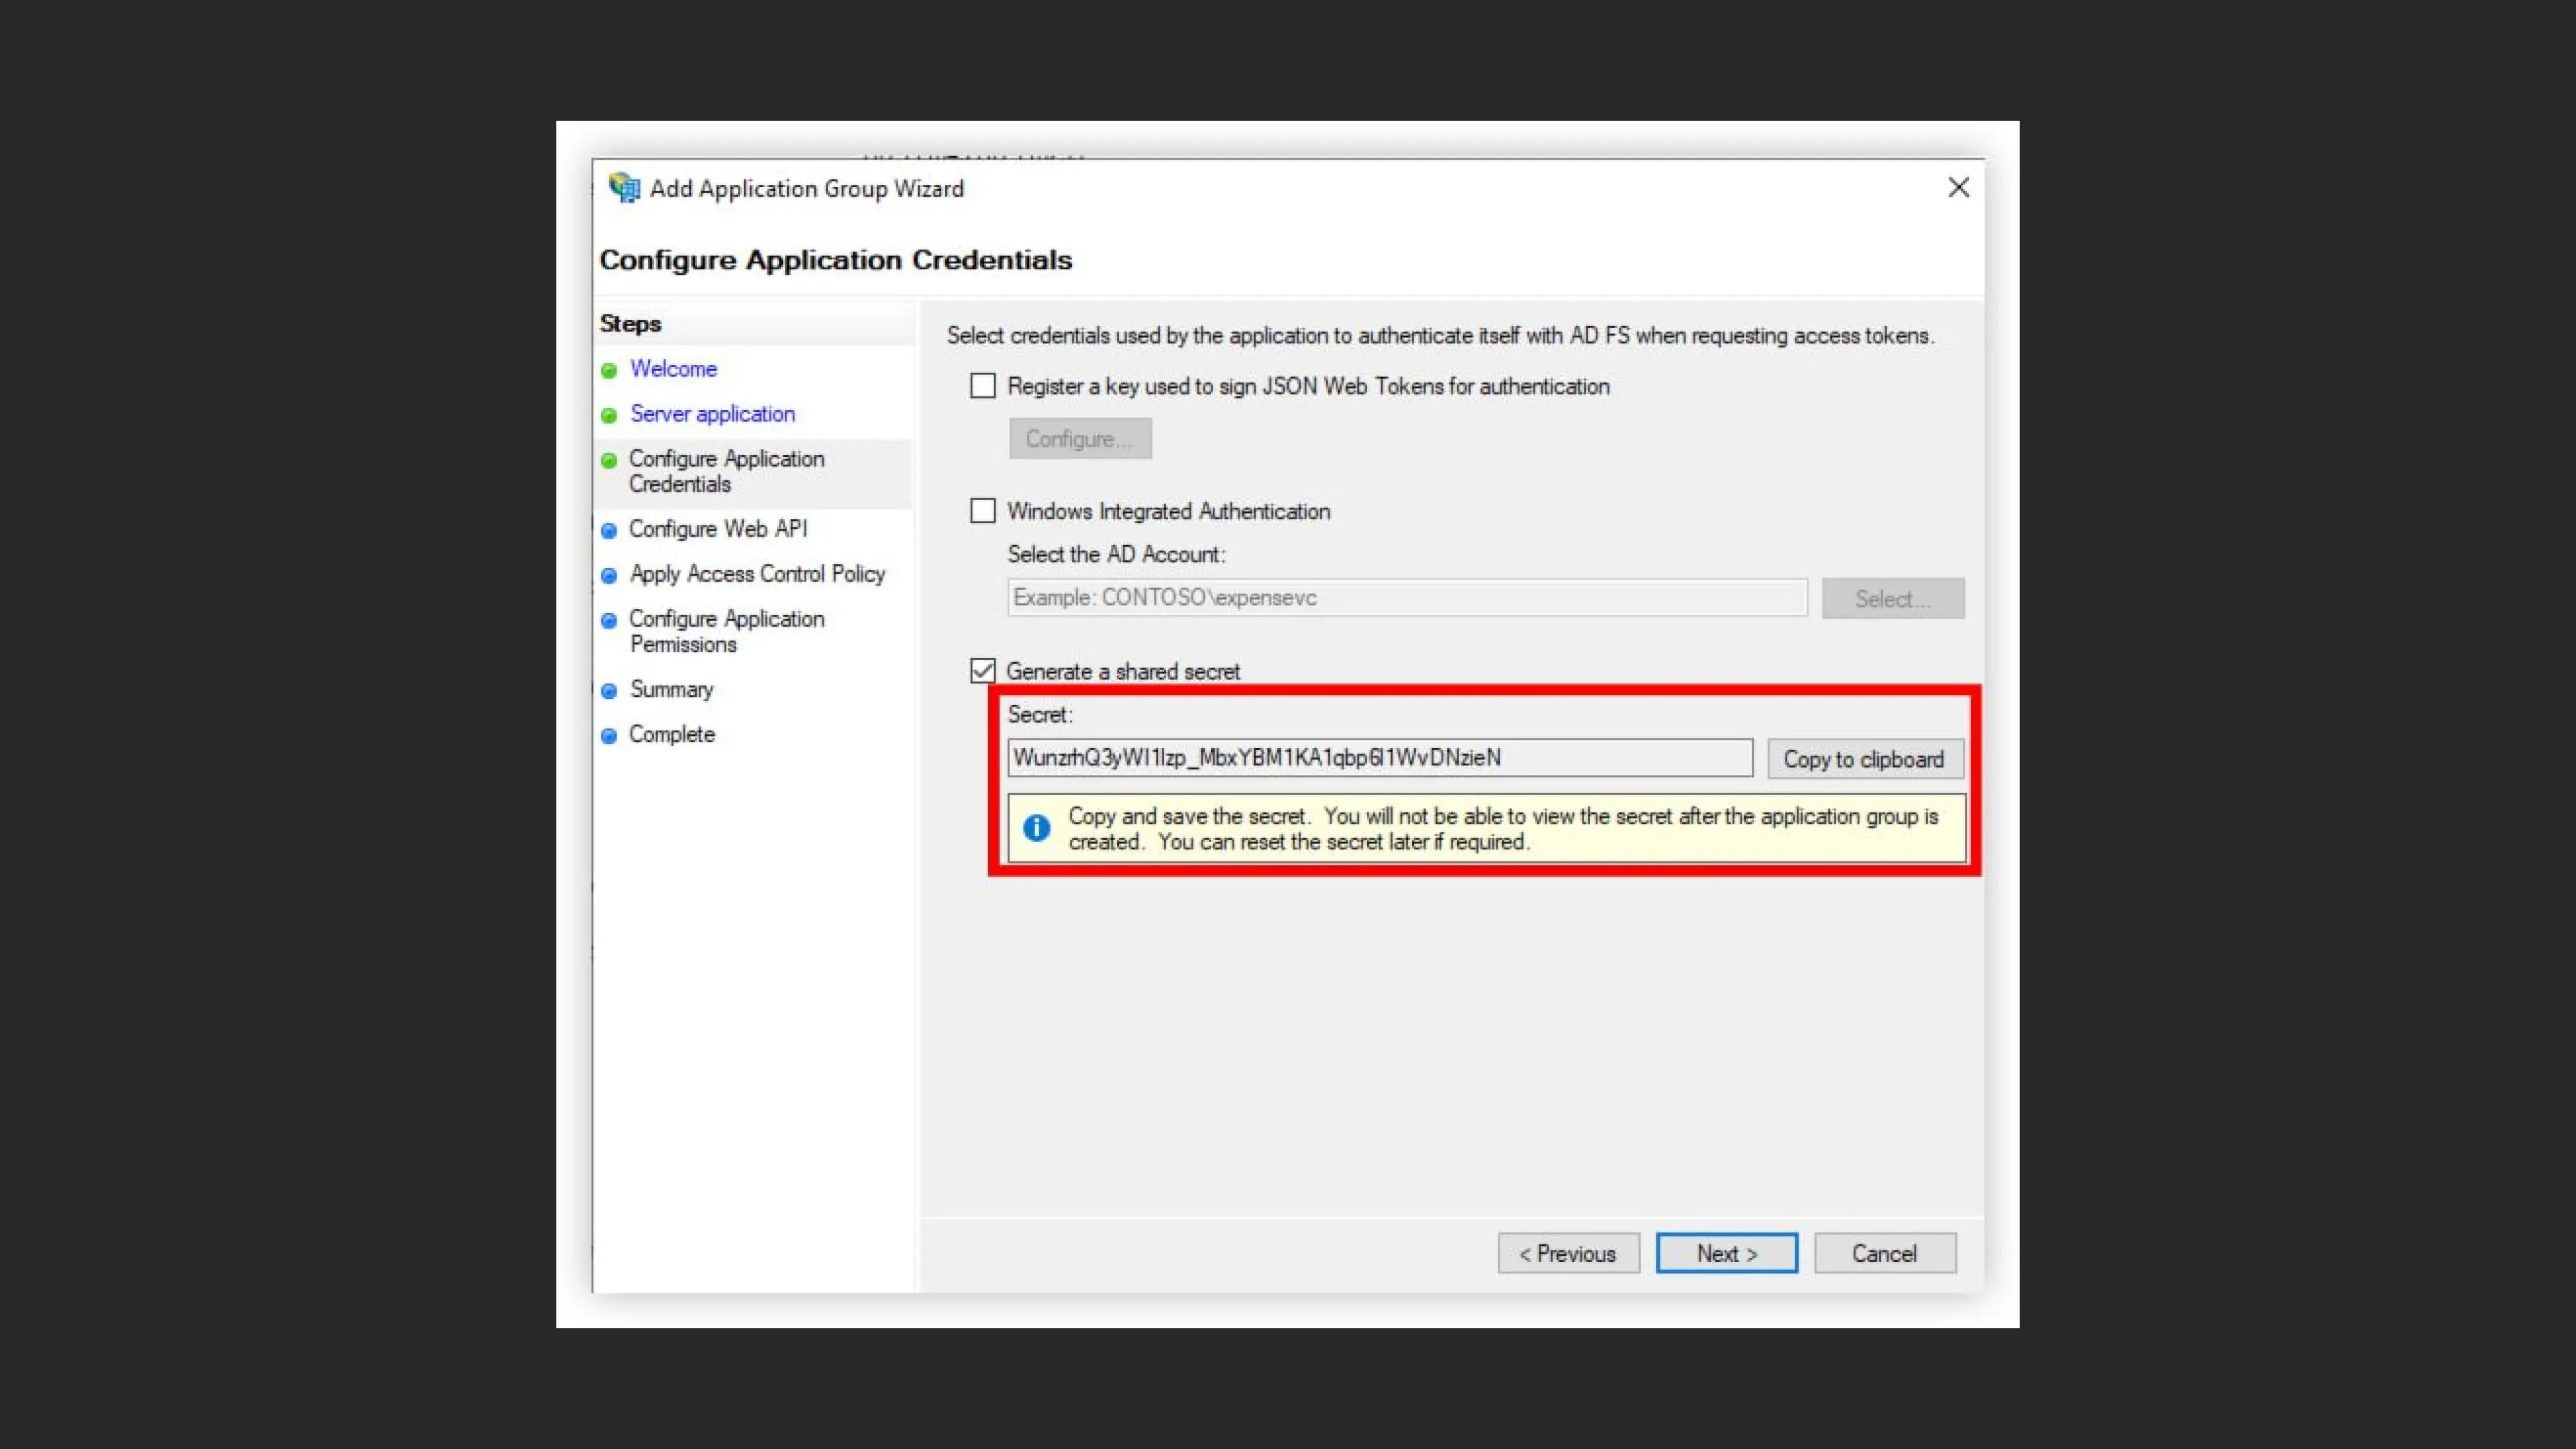
- Check the “Generate a shared secret” checkbox
- The system will automatically generate a secret key (e.g., “WuxzhQ3yW1lsp_MbxY6M1KA1qbp81WvDNzieN”)
Important: Click the “Copy to clipboard” button to copy the secret. Save this secret in a secure place — you’ll need it to configure the integration.
- Click Next
Step 4: Configuring Web API
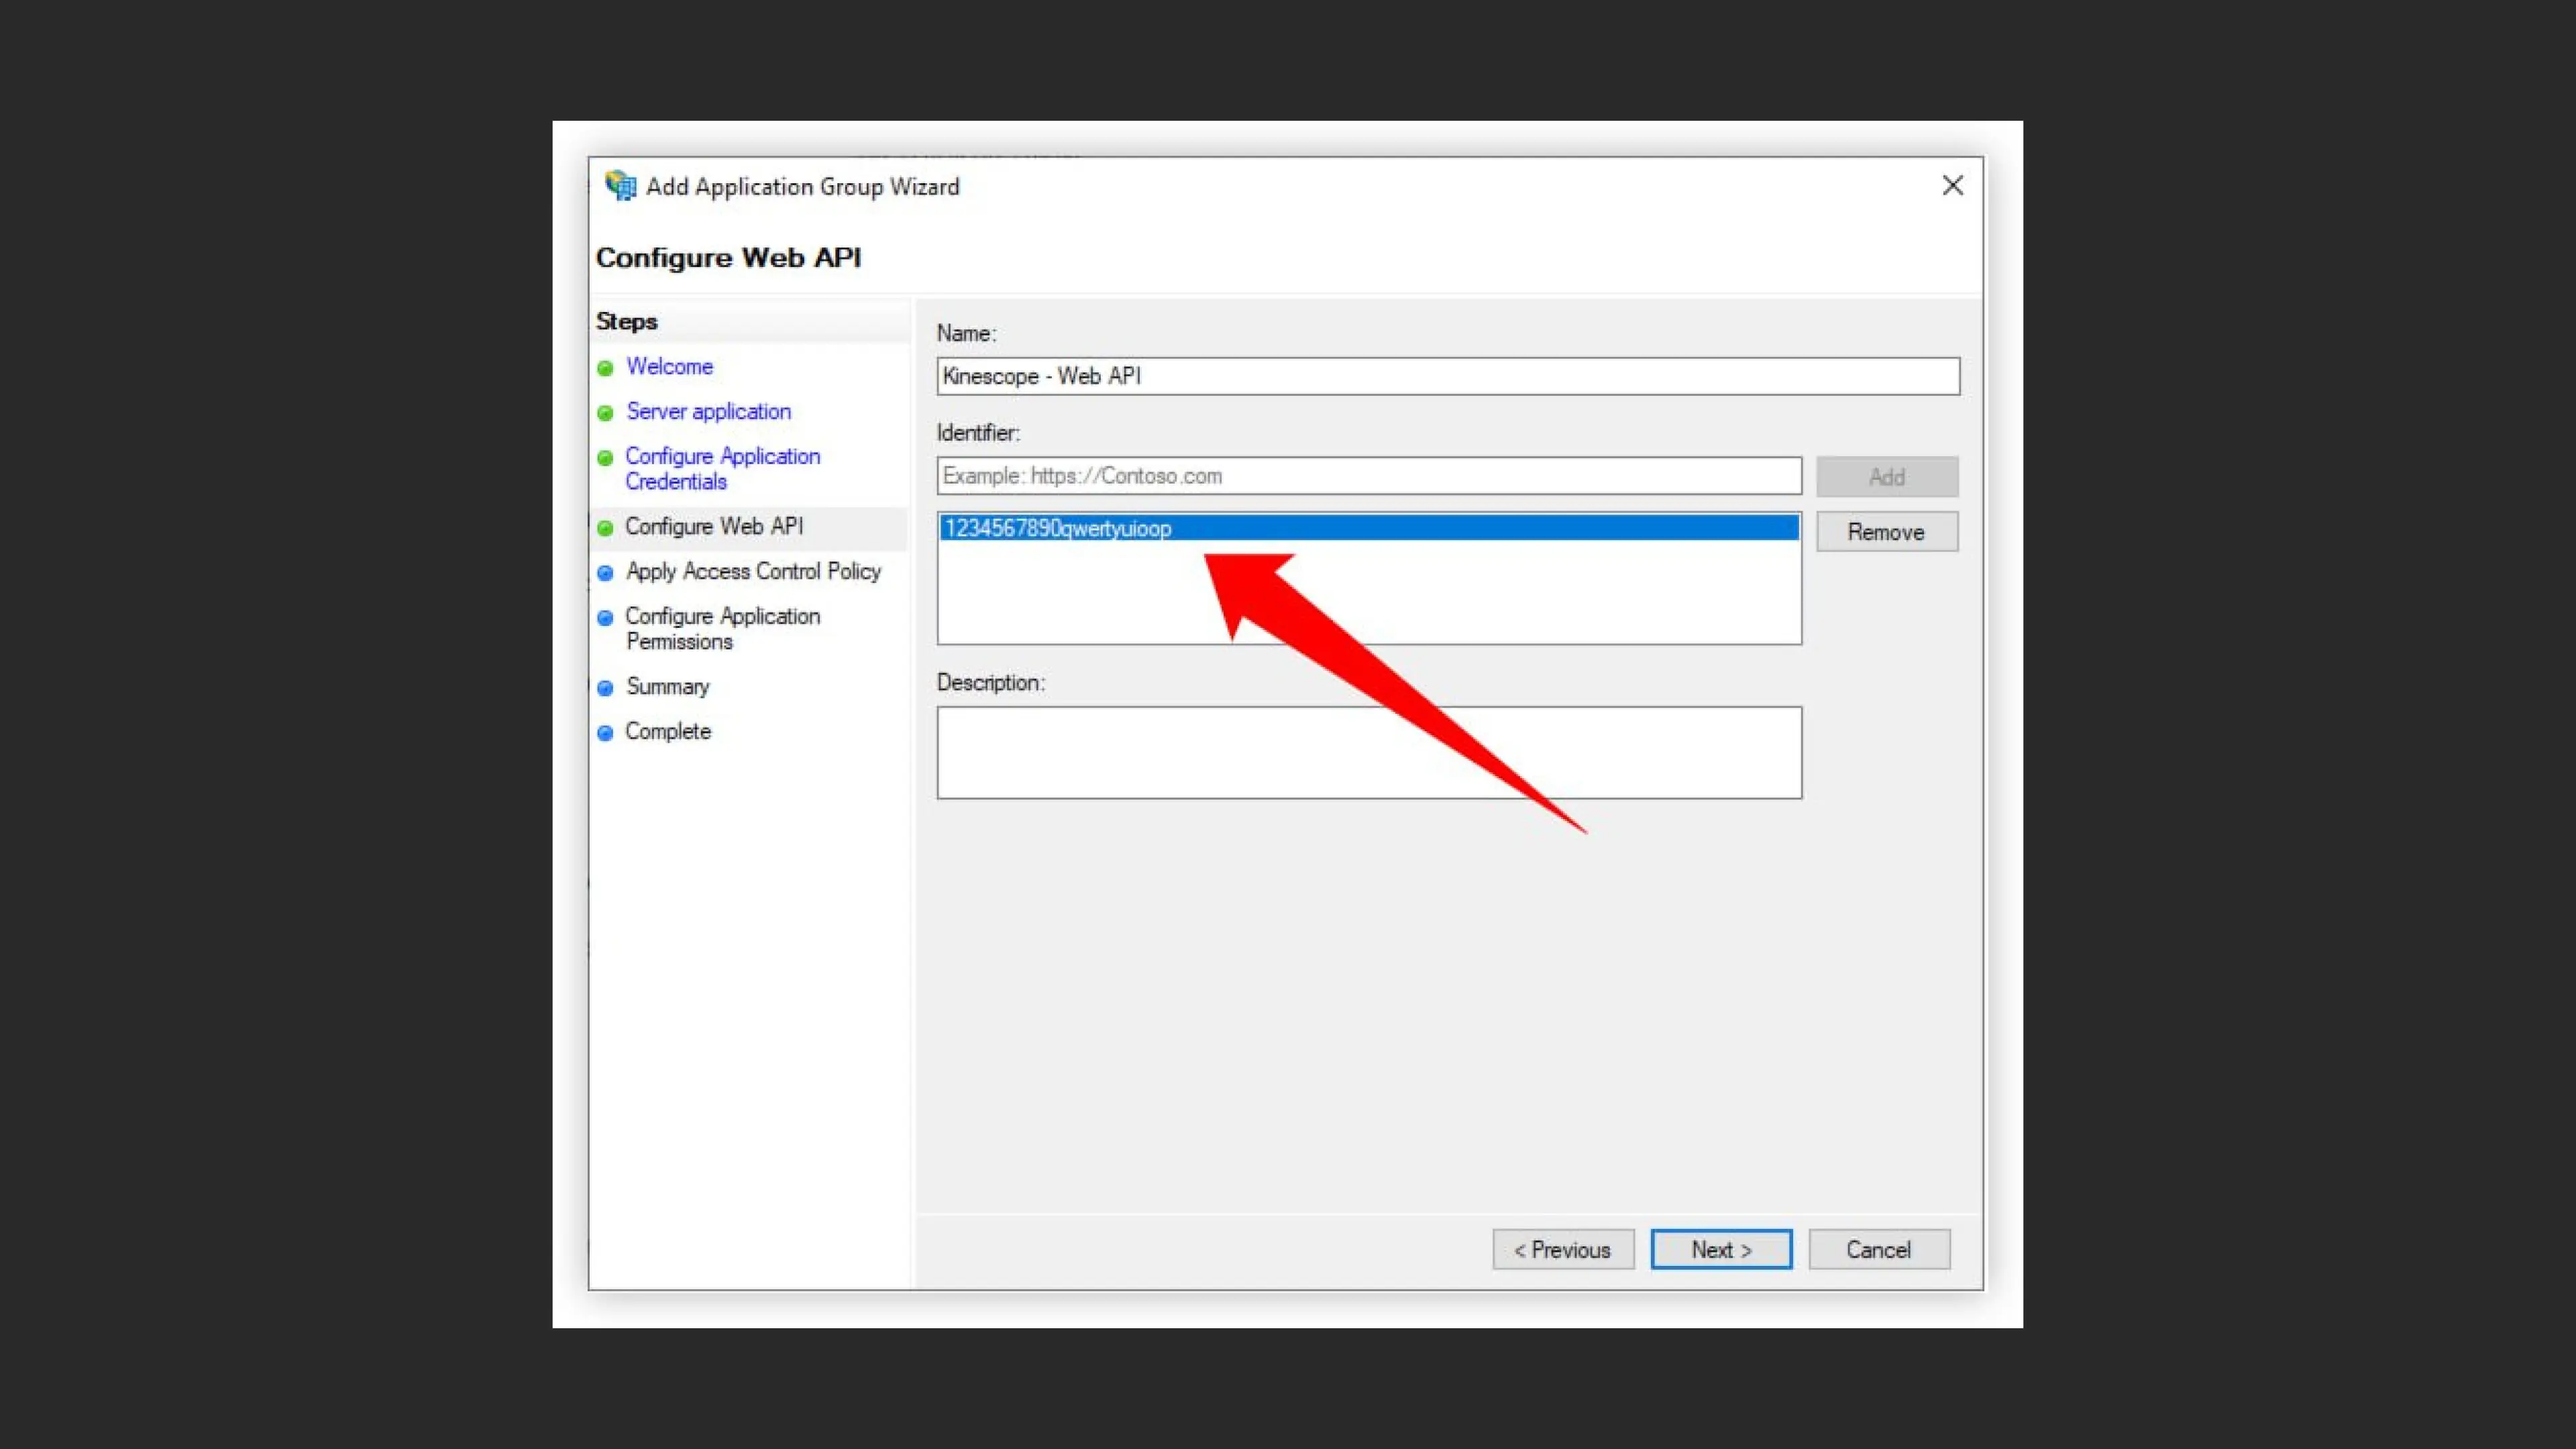
- Name will auto-fill as “Kinescope - Web API”
- In the Identifier field, add the identifier (from step 2 - “123456789qwertyuiop”)
- Click Add to add the identifier to the list
- Click Next
Step 5: Configuring permissions (Client Permissions)
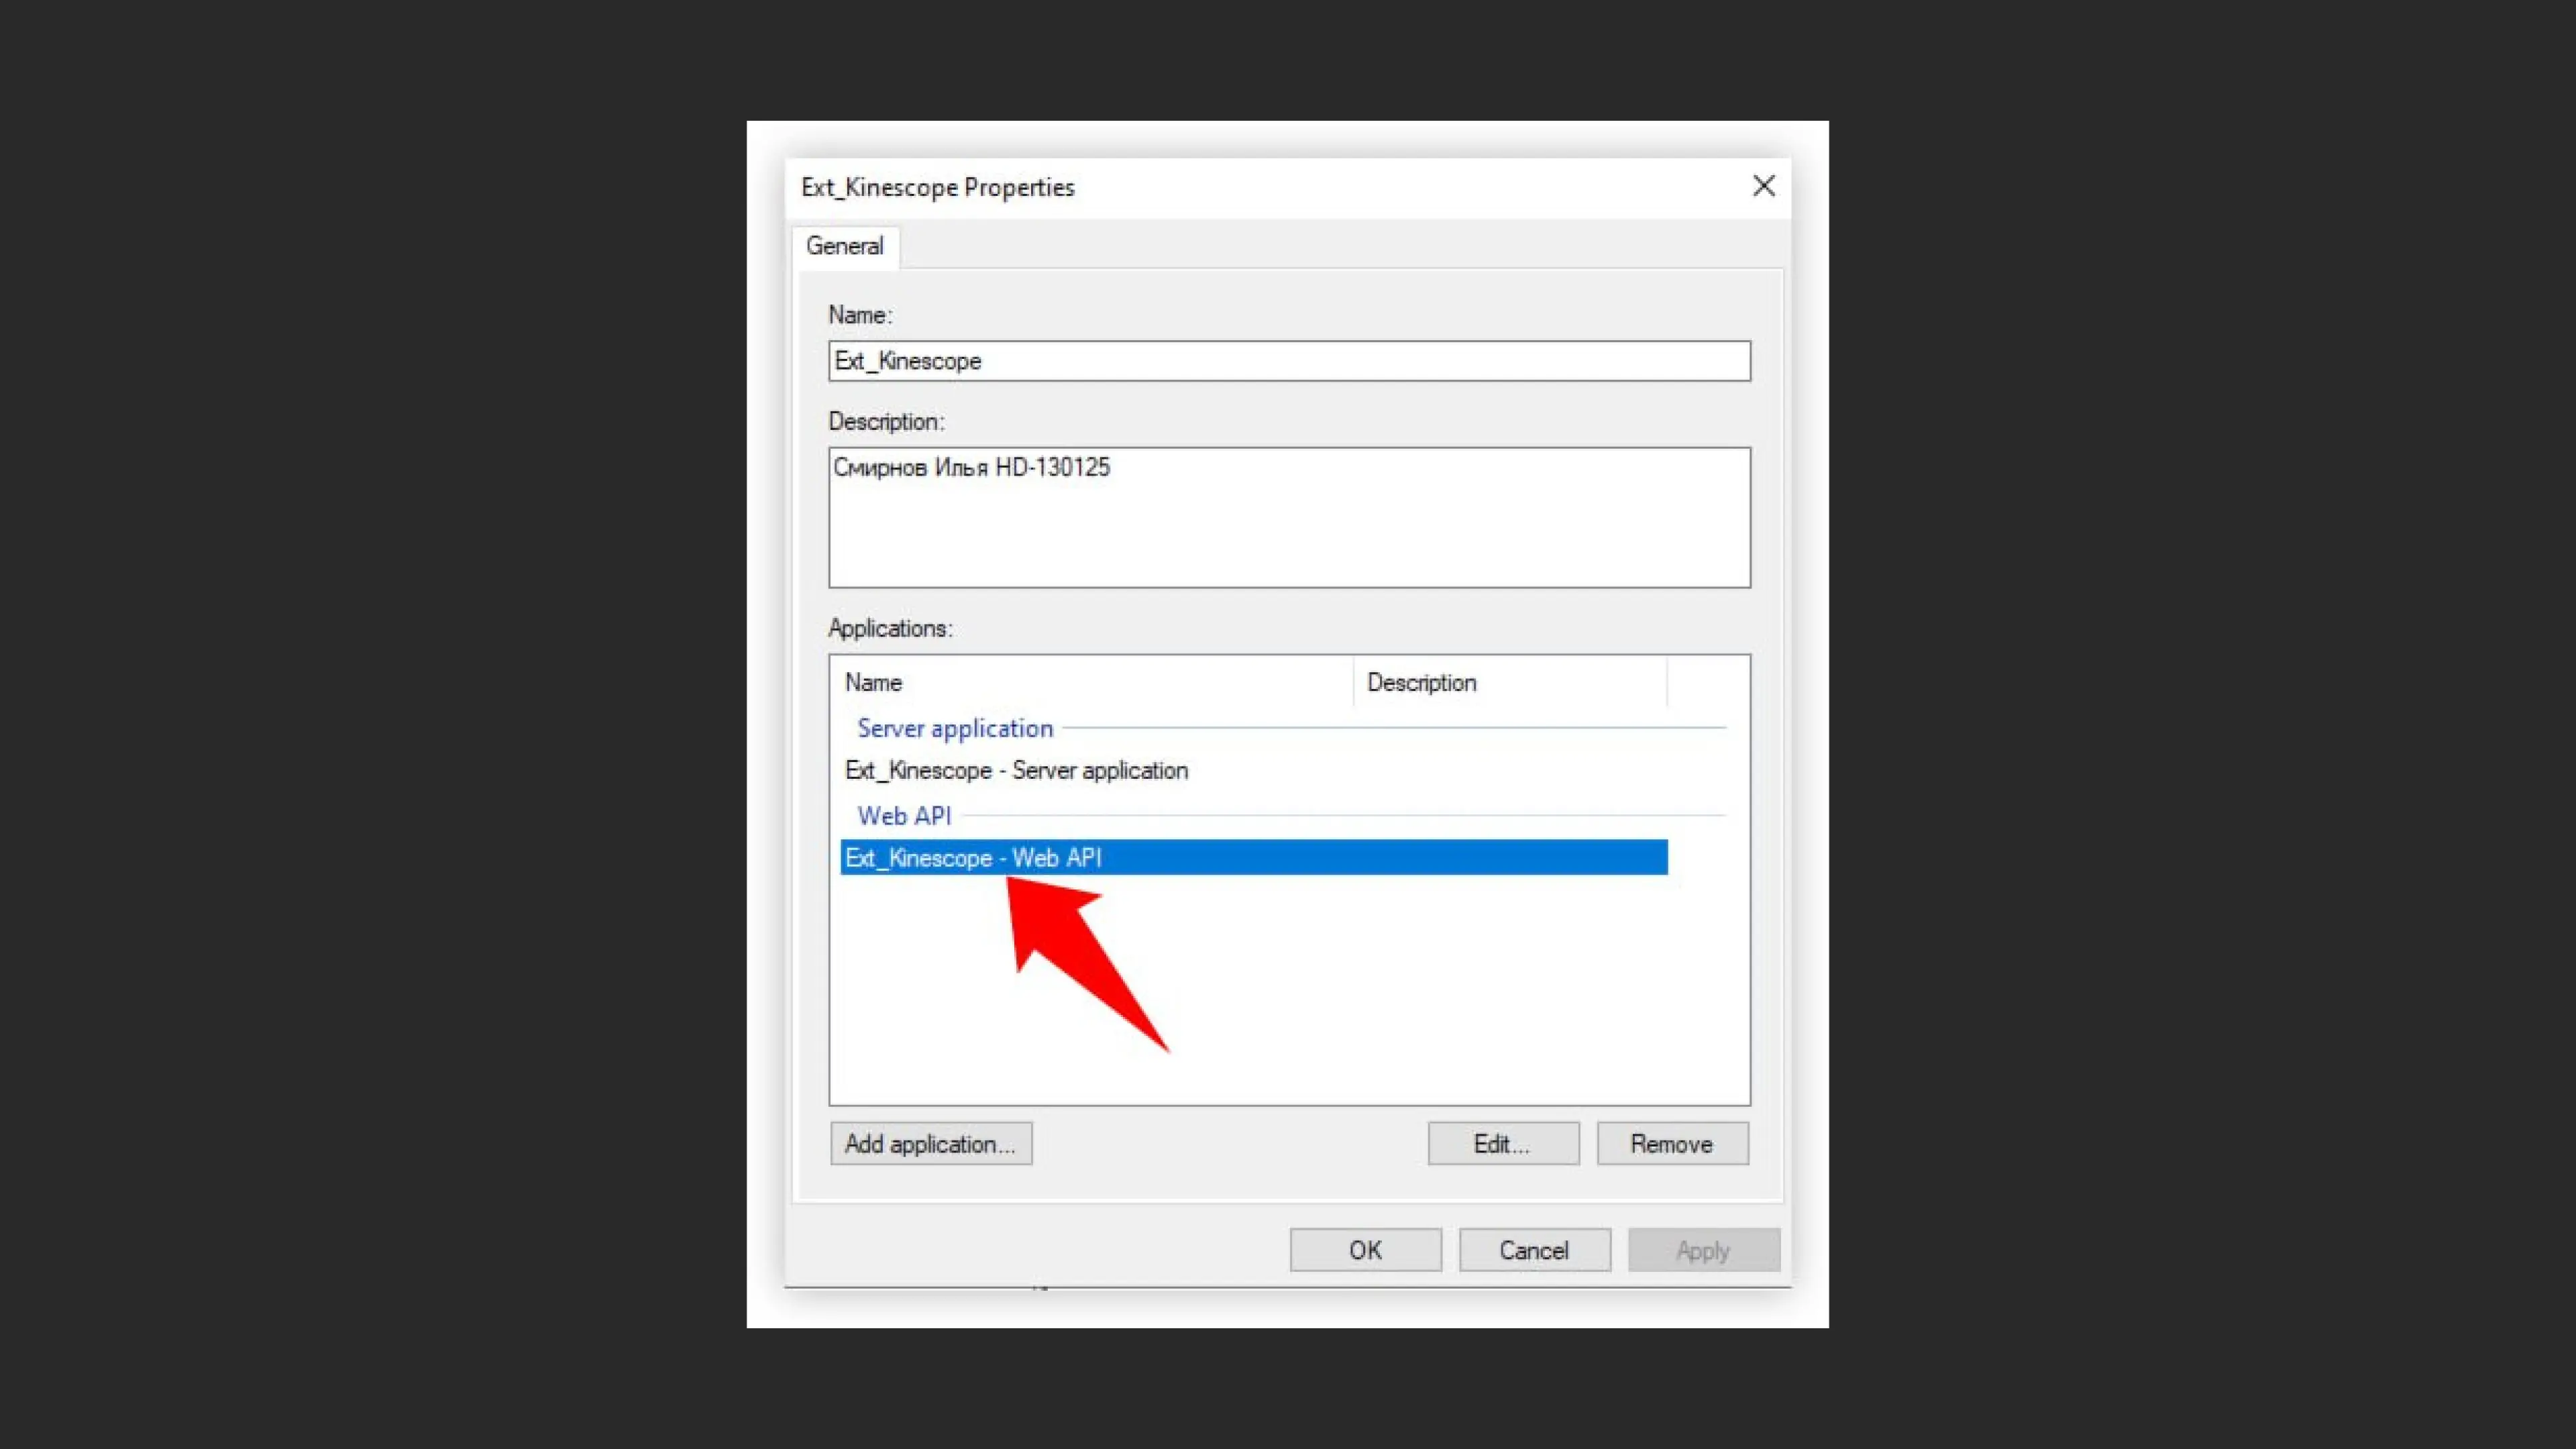
- In the Applications table you’ll see:
- Server application (Ext_Kinescope - Server application)
- Web API (Ext_Kinescope - Web API)
- Select Web API from the list
- Go to the Client Permissions tab
Step 6: Configuring permitted scopes
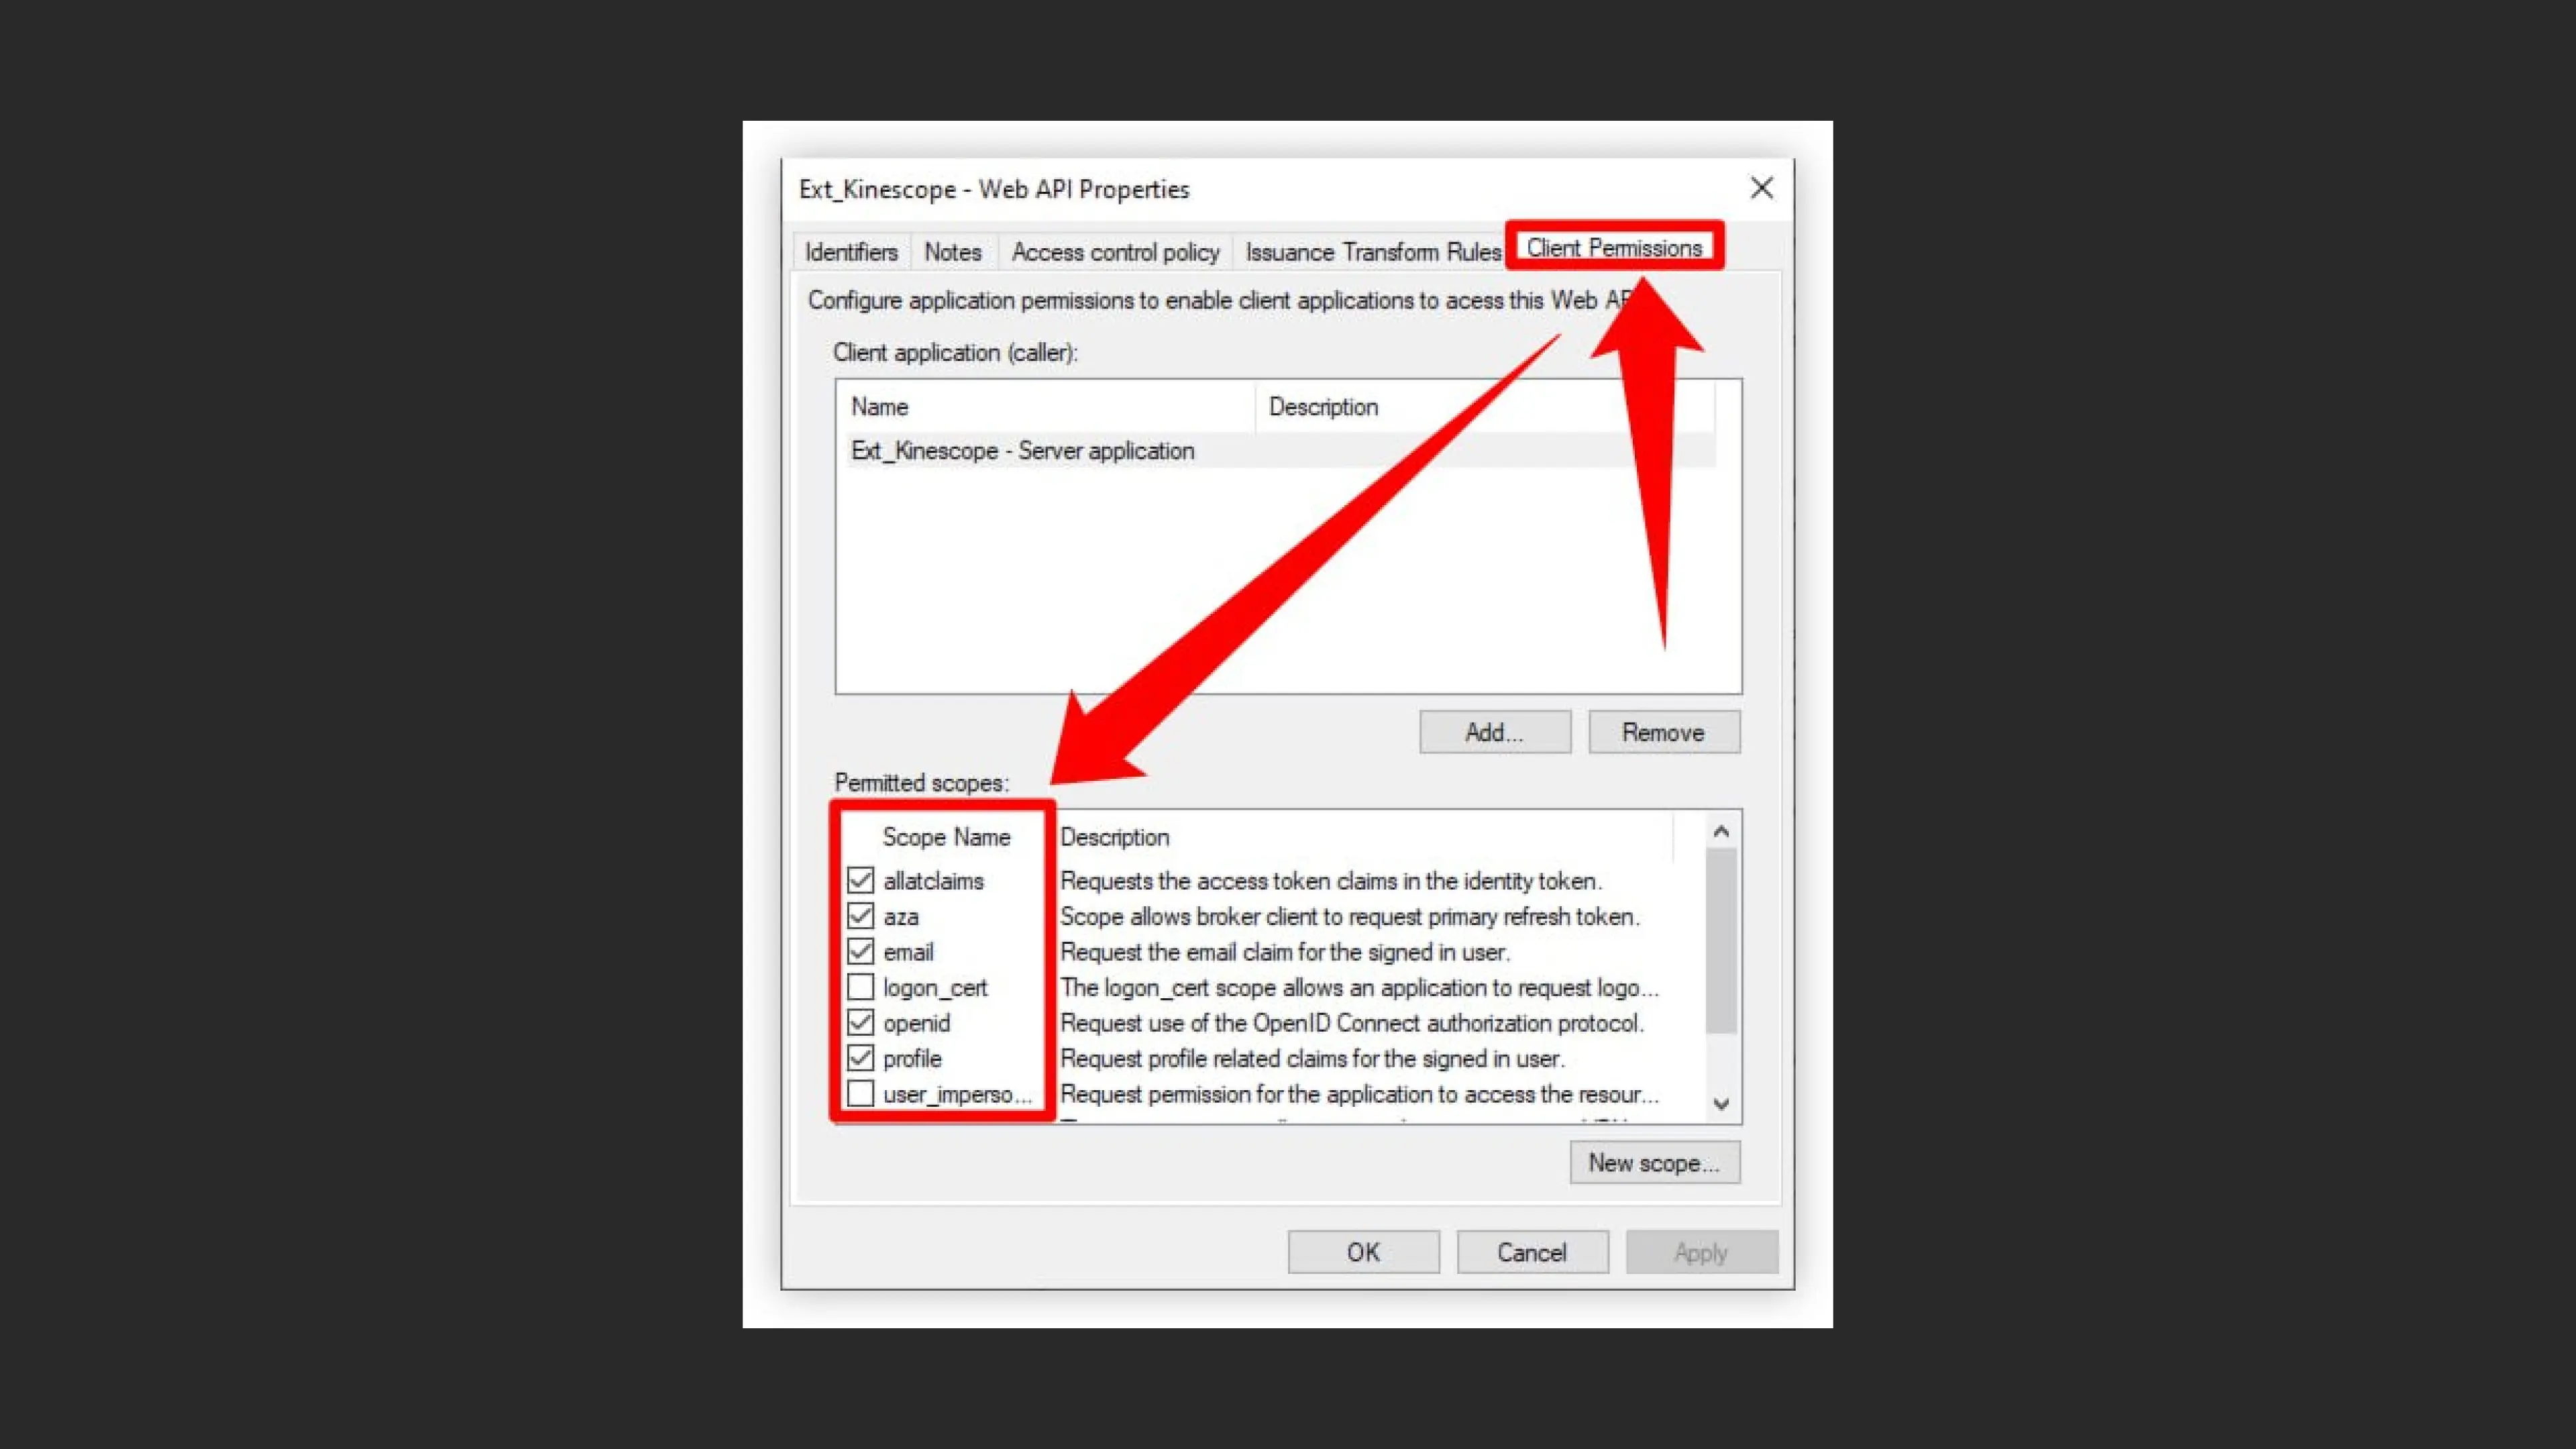
- The Client Permissions tab shows current permissions
- In Permitted scopes, checkboxes are set for required permissions:
- ✓ allatclaims
- ✓ aza
- ✓ openid
- ✓ profile
- To add new permissions, click Add Rule…
Step 7: Configuring Issuance Transform Rules
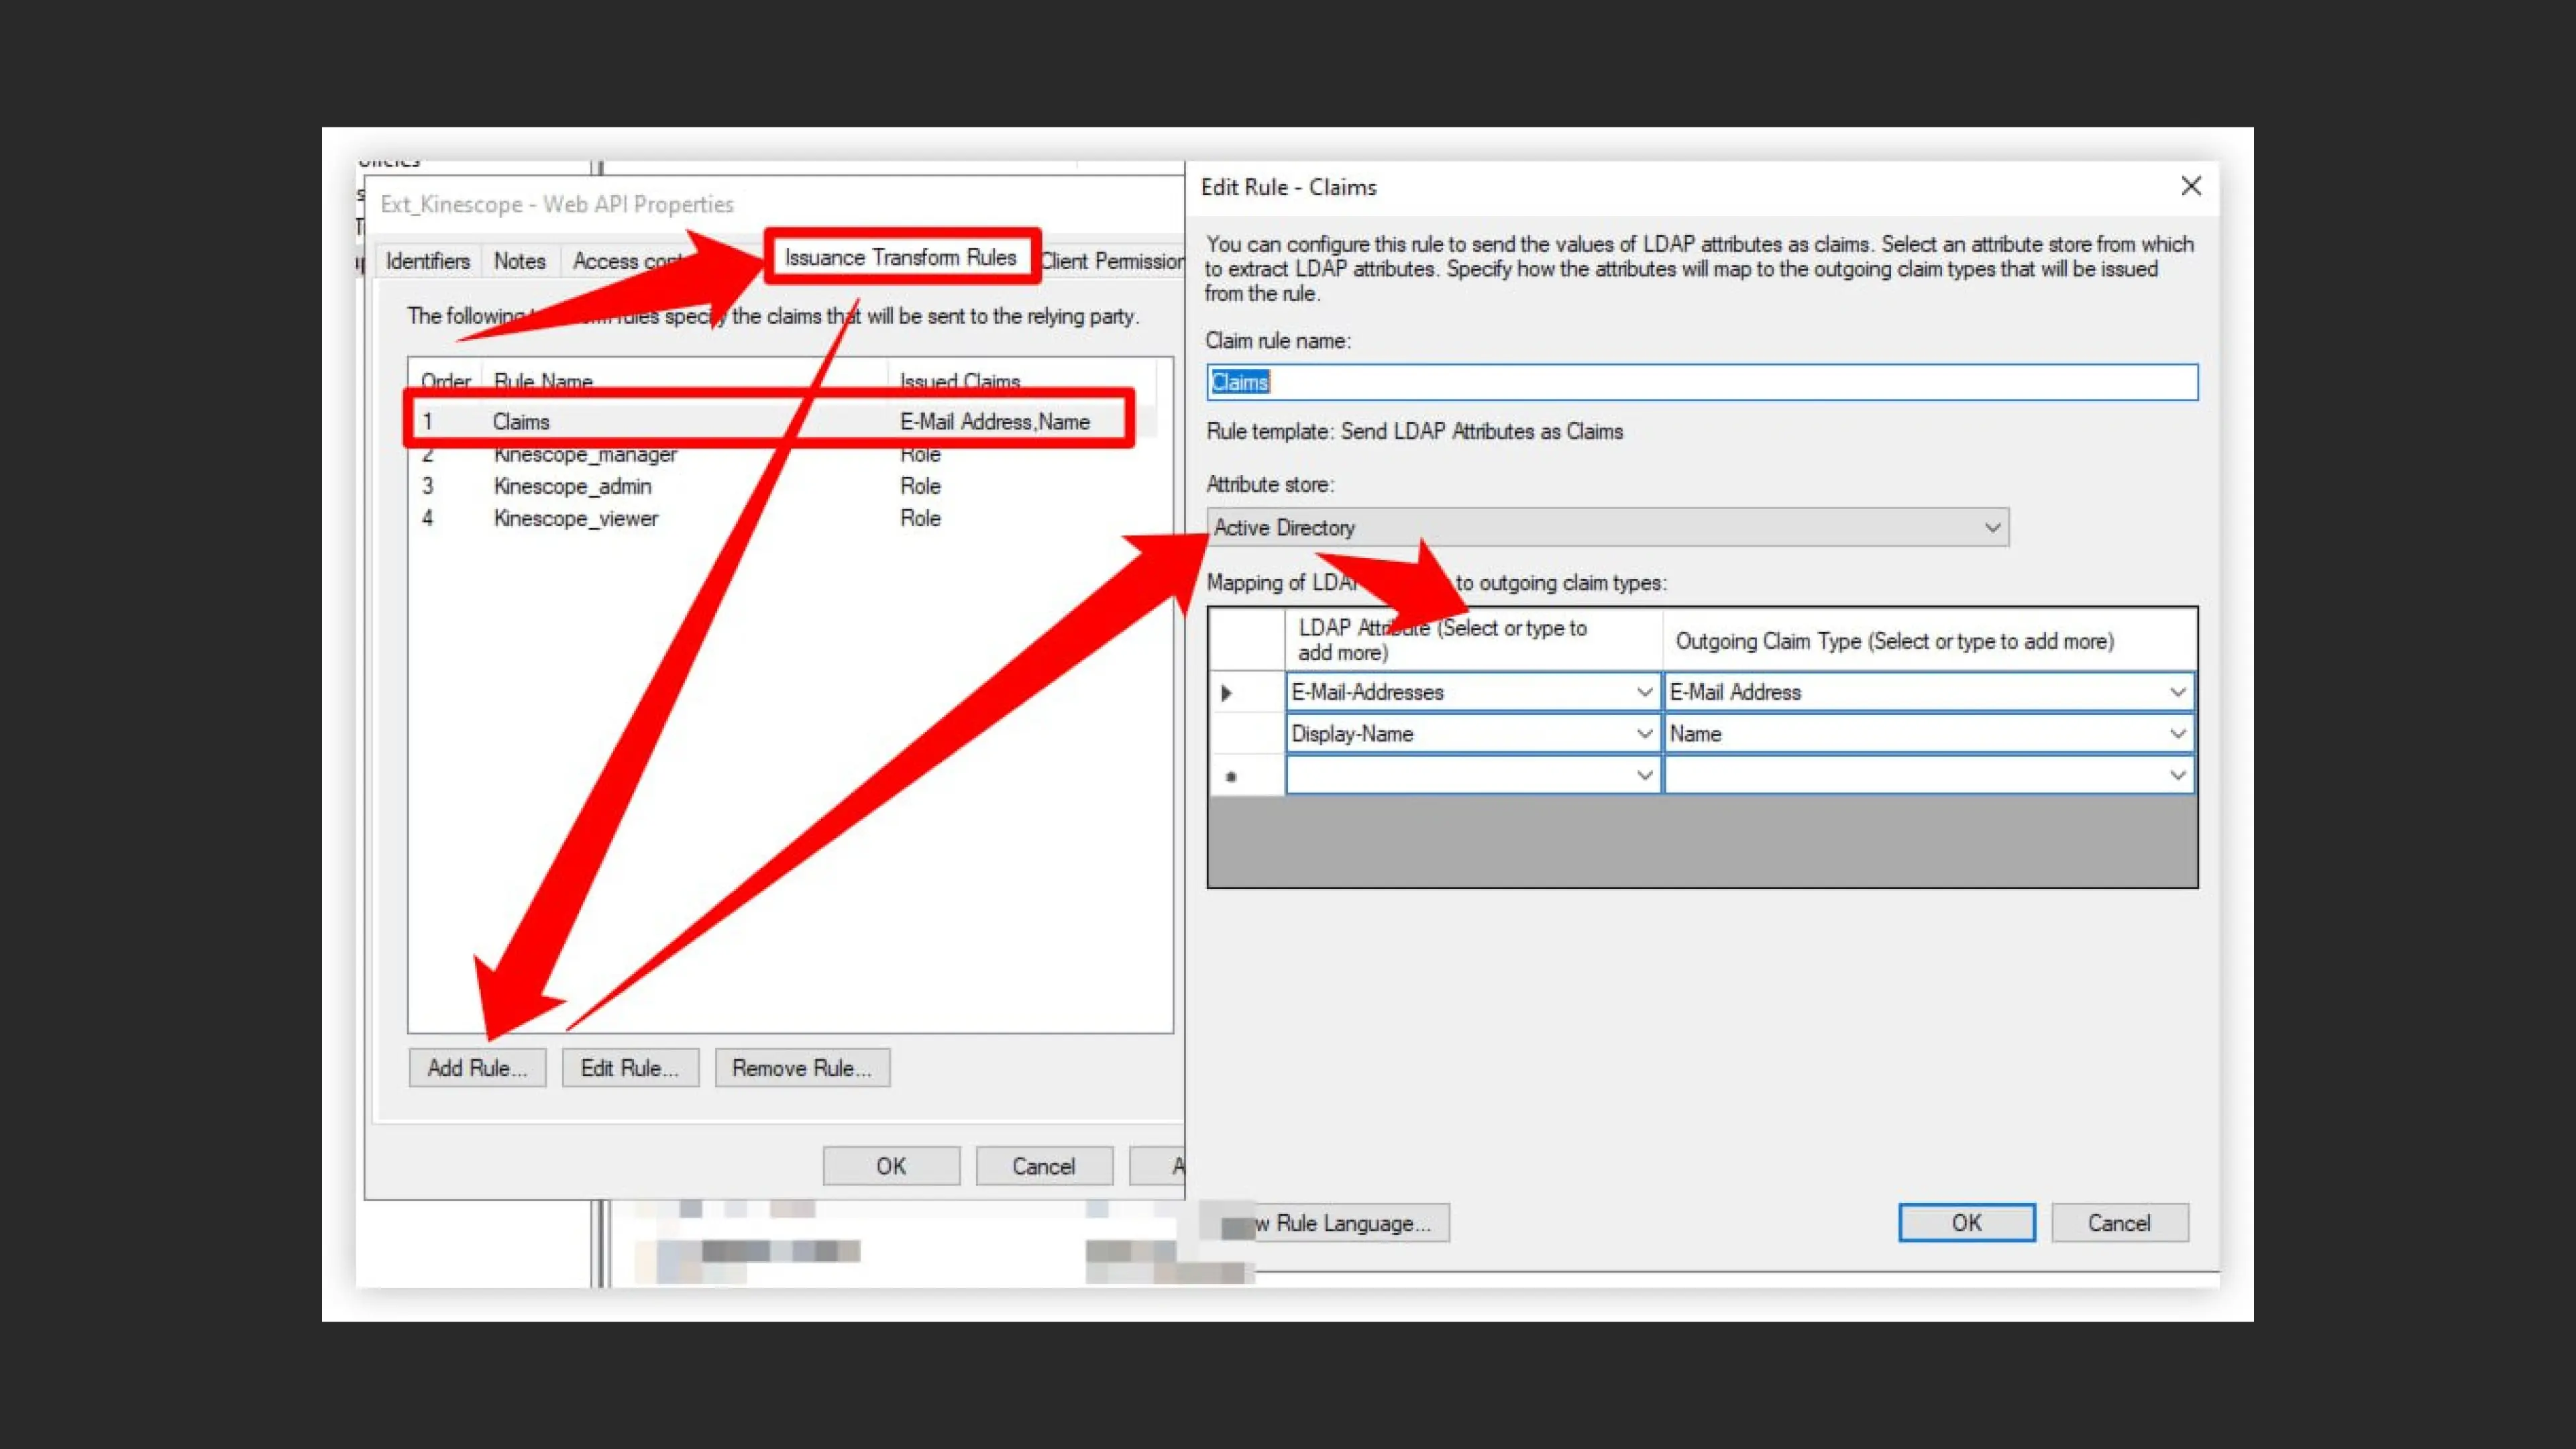
- Go to the Issuance Transform Rules tab
- The list shows existing rules:
- Claims
- Kinescope_manager (Role)
- Kinescope_admin (Role)
- Kinescope_viewer (Role)
- To add a new rule, click Add Rule…
- In the “Edit Rule - Claims” window that opens:
- Claim rule name: enter “Claims”
- Rule template: select “Send LDAP Attributes as Claims”
- Attribute store: select “Active Directory”
- Configure LDAP attribute mapping to outgoing claim types:
- E-Mail-Addresses → E-Mail Address
- Display-Name → Name
Step 8: Adding a rule for the manager role
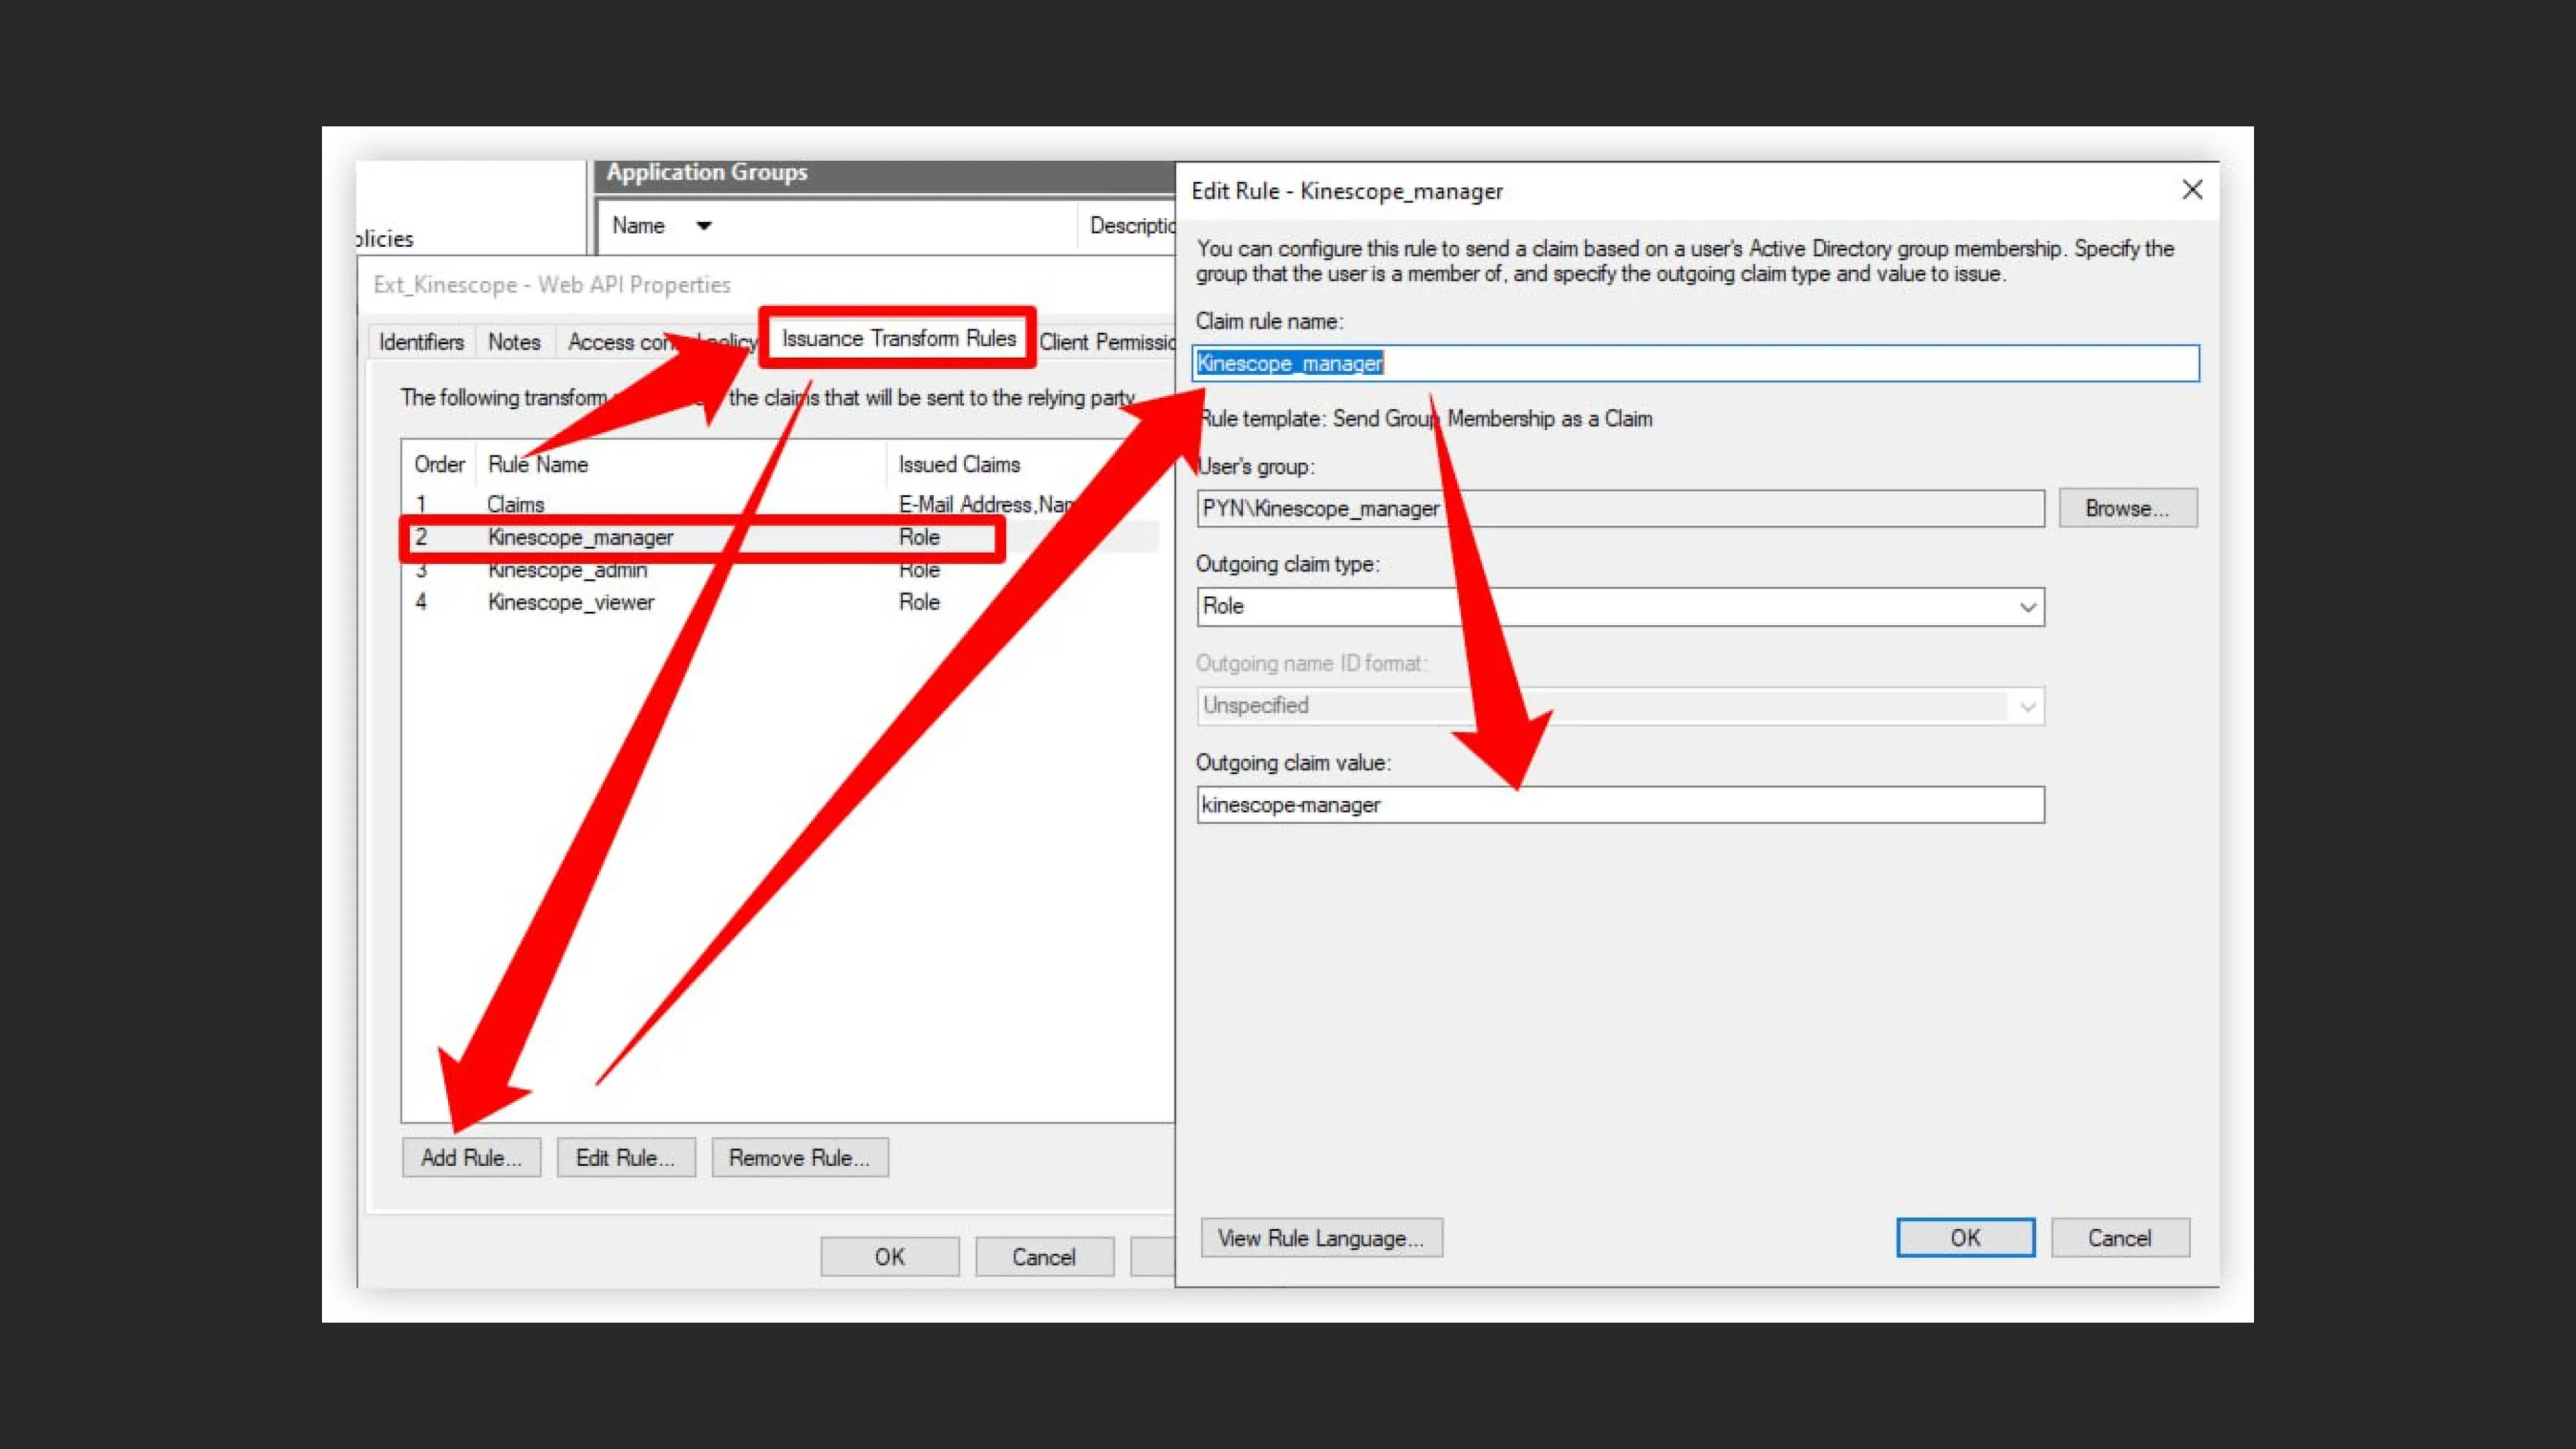
- Click Add Rule… on the Issuance Transform Rules tab
- Claim rule name: enter “Kinescope_manager”
- Rule template: select “Send Group Membership as a Claim”
- User’s group: specify the AD group “PYN\Kinescope_manager” (use Browse to search)
- Outgoing claim type: select “Role”
- Outgoing claim value: enter “kinescope-manager”
- Click OK to save the rule
Step 9: Completing the setup
- The Application Groups list shows the created group
- To make changes, right-click the group and select “Add Application Group…” or “Properties”
- Verify that all settings are saved correctly
- Make sure to save the Client Identifier and secret key — they’ll be needed to configure SSO in Kinescope
- The Redirect URI must exactly match the URL specified in the Kinescope settings
- Configure transformation rules for all required roles (viewer, admin, manager)
- After completing setup, test the integration with a test user
What’s next?
After setting up SSO, we recommend:
- Configure access rights — verify that user roles are configured correctly
- Profile and workspace settings — workspace management
- Organize your media library — create projects and folders to structure content
- Set up content protection — restrict video access by domain or password
Still have questions? Write to the support chat within the Kinescope interface — our specialists will help!