Dynamic and Static Watermarks
Watermarks help protect content, designate authorship, and reduce the risk of copying. Kinescope has two types of watermarks: dynamic and static. Dynamic watermarks show viewer data (email, name, ID) and help identify the source of a leak, while static watermarks are a permanent text or logo.
Who this article is for
- Course creators — need to protect educational materials from unauthorized copying
- Content owners — need to designate authorship and prevent leaks
- Developers — need to integrate dynamic watermarks via API
- Marketers — need to add a logo or branding to video
Use separate instructions if you want to add such marks to videos on sites in the Tilda website builder or on the GetCourse platform.
Dynamic watermarks
A dynamic watermark is text that randomly appears in different places on the screen during video playback. This can be user data (e.g., email or name) to make it easy to trace the source of a leak in case of unauthorized copying. Such marks are suitable for educational videos, private content, or corporate data.
To use dynamic watermarks, add a variable to the embed code:
<iframe
  src="https://kinescope.io/embed/pcFNnQGsD59CMKte2SQQaz?watermark=${user_data}"
  width="640"
  height="360"
  frameborder="0"
  allow="autoplay; fullscreen; picture-in-picture; encrypted-media;"
></iframe>
- Use a server or CMS to pass the authorized user’s data.
- In the
watermarkparameter, specify the variable containing the user’s data (e.g., their email or ID).
Static watermarks
A static watermark is text or a logo that is permanently displayed on screen during video playback. This type of watermark is most commonly used to designate authorship or indicate rights. Suitable for public videos, commercials, and widely distributed content.
To add a static watermark:
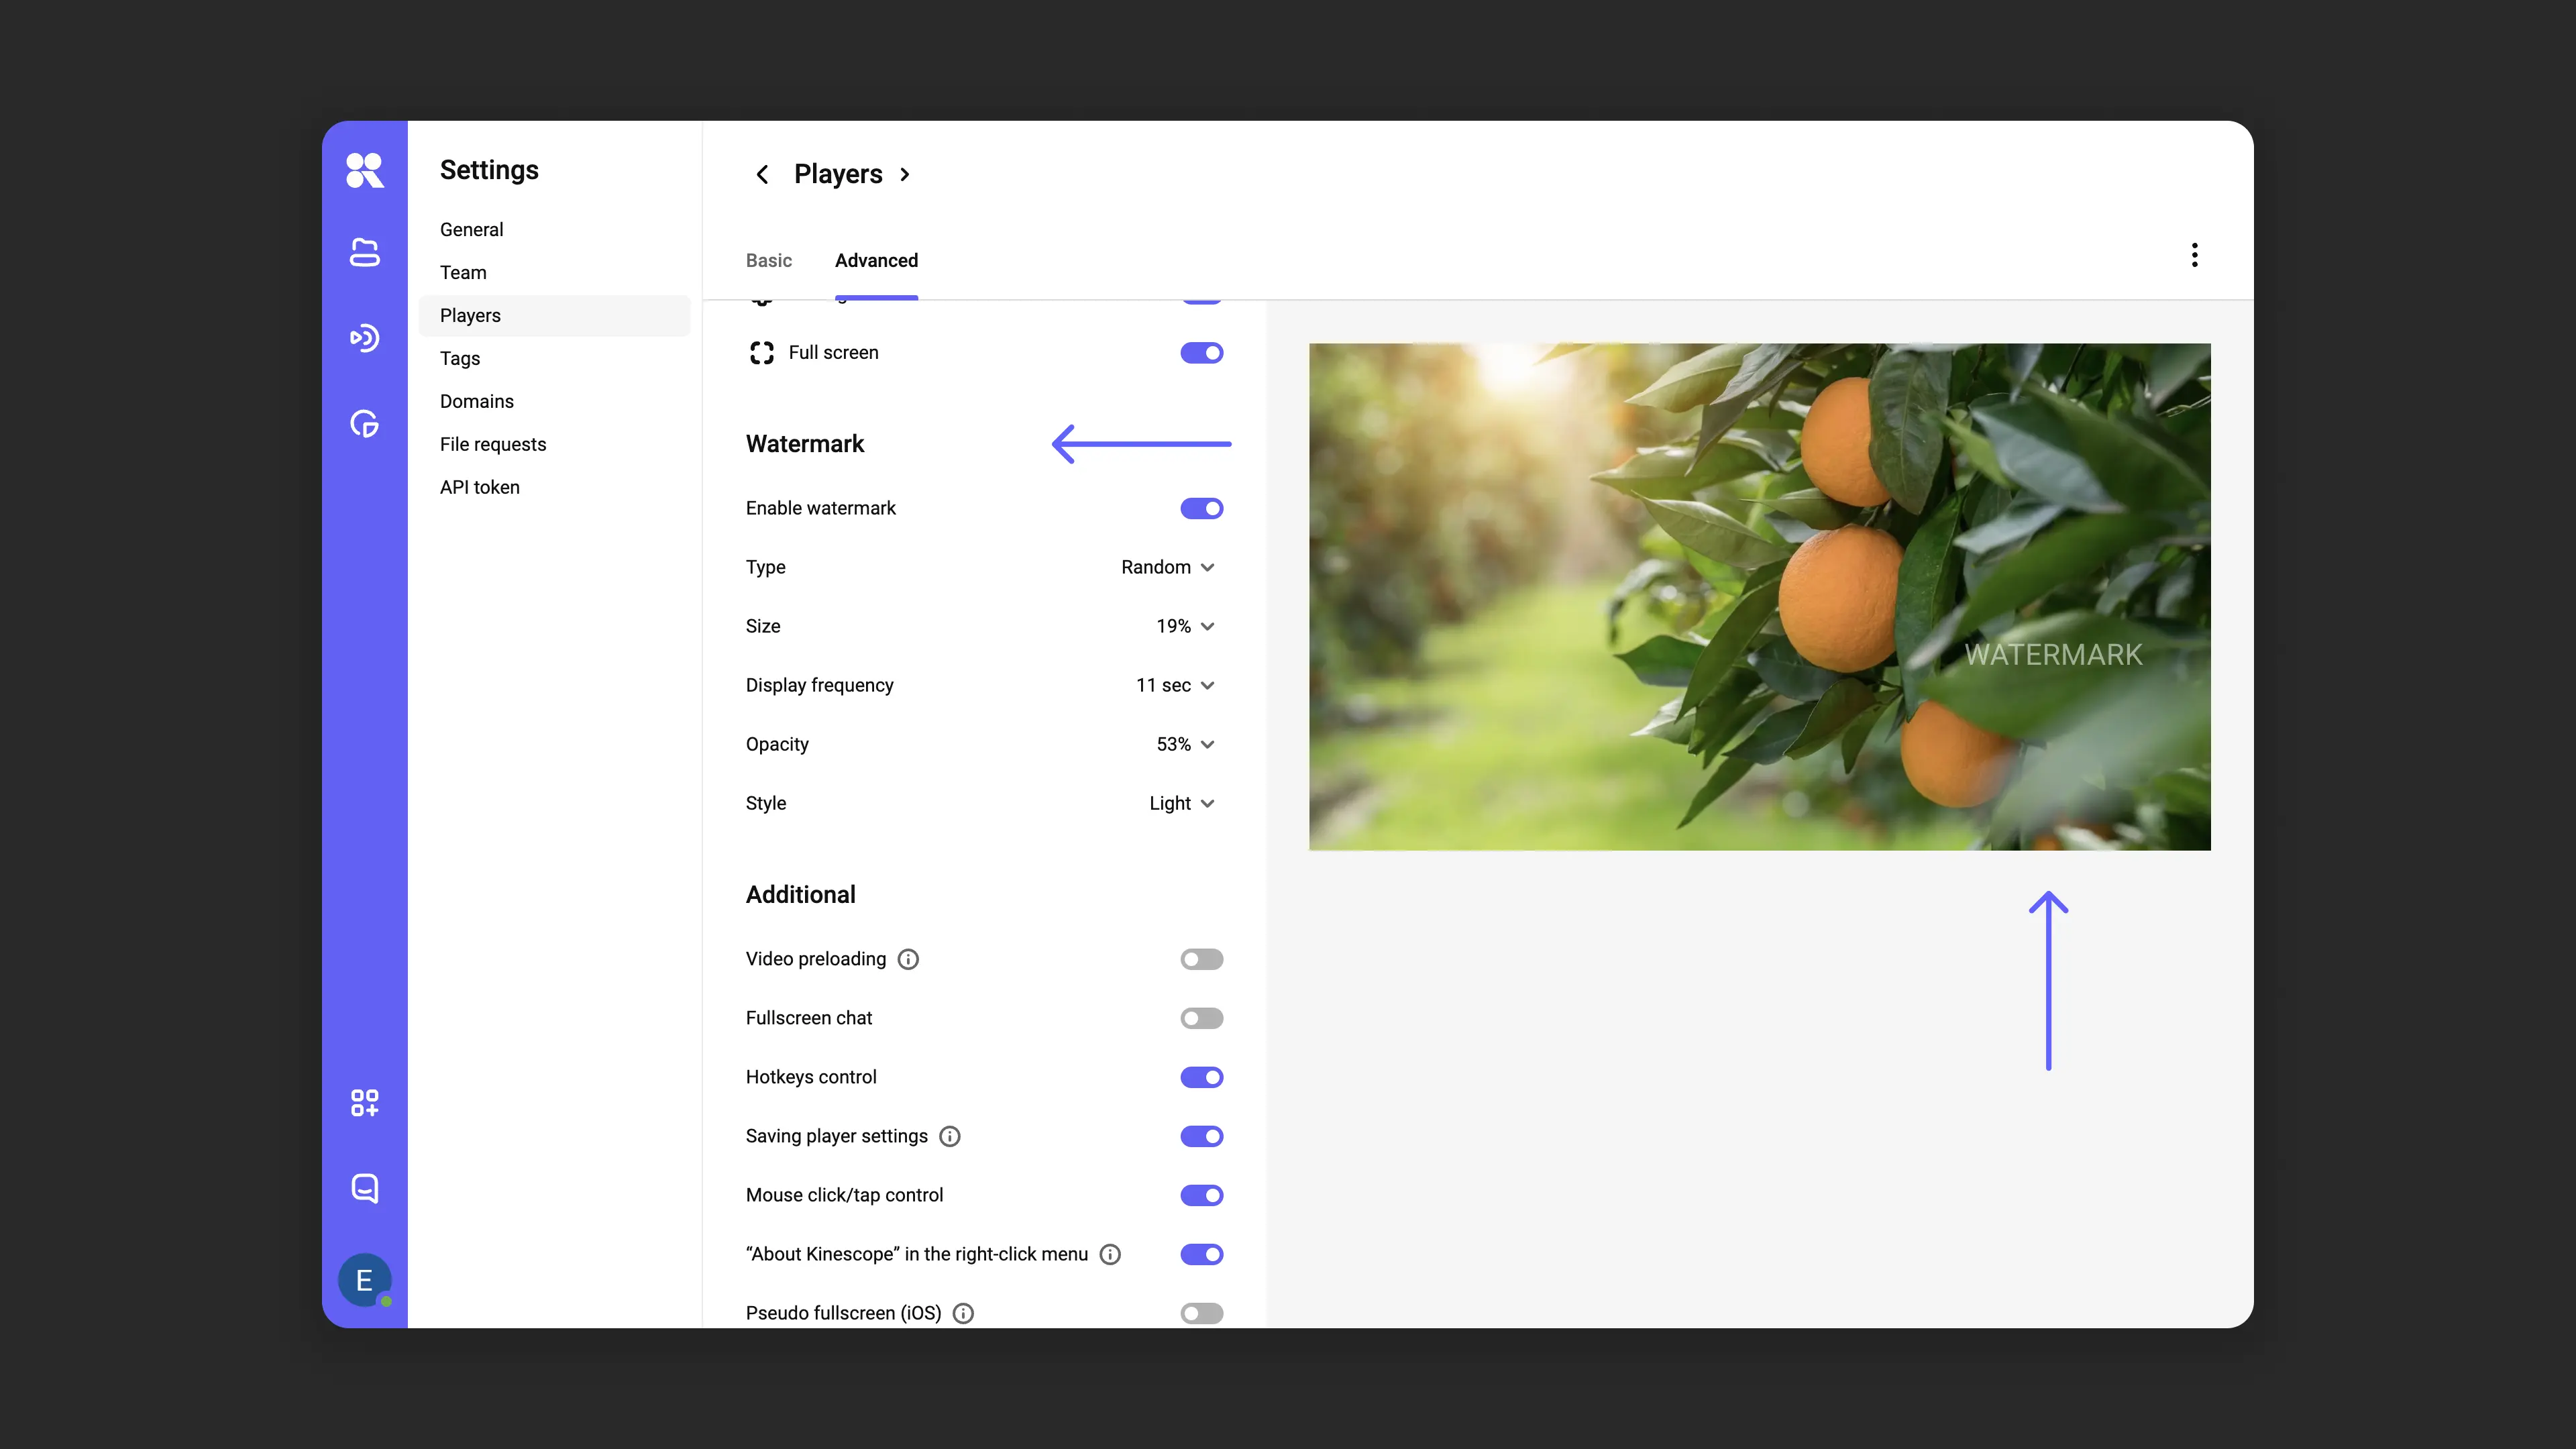
Enable watermarks in the Kinescope player settings:
- Go to Players → Player Templates.
- In the top settings panel, go to the Advanced section.
- Find the Watermark setting and enable it.
- Set the parameters and click Save. Check how watermarks work in the player on the right.
In the video embed code, specify the watermark text in the
watermarkparameter:
<iframe
 	src="https://kinescope.io/embed/pcFNnQGsD59CMKte2SQQaz?watermark=Your_text"
  	width="640"
  	height="360"
  	frameborder="0"
allow="autoplay; fullscreen; picture-in-picture; encrypted-media;"
></iframe>
You can also use a logo as a watermark. To do this, configure the logo in the Kinescope player settings:
- Go to Players → Player Templates.
- In the settings, select Add logo.
- Upload an image and configure its position on screen.
![]()
What’s next?
- Embedding — adding watermarks when embedding
- Media file settings — configuring privacy and access
- Restrict access by domain — allow embedding only on certain sites
- Set up DRM encryption — protect video from downloading and screen recording
- Set up authorization backend — control video access by your own rules
If you still have questions, write to the support chat within the Kinescope interface — specialists will help you set up watermarks and understand the code.