Organizing Your Media Library in Kinescope
The Kinescope media library lets you organize your videos, recordings, and other materials into projects and folders, making collaboration, content management, and file search easier. The interface resembles a familiar file system, so it’s easy to manage.
Who this article is for
- Content managers — need to organize a large media library and quickly find files
- Project administrators — need to create a catalog structure for different work areas
- Teams — need to organize collaborative work on video content
- Course creators — need to structure learning materials by lessons and modules
Projects
Projects are the primary level of media library organization. They are separate content groups you can use to separate by topic, client, or area of work.
How to create a project
- Go to the “Catalog” section in the dashboard.
- Click the “New project” button in the upper-left corner.
- Enter a project name and, if needed, add a description.
- Click “Create”.
Alternative: via the projects tab in the right panel of the dashboard.

Managing projects
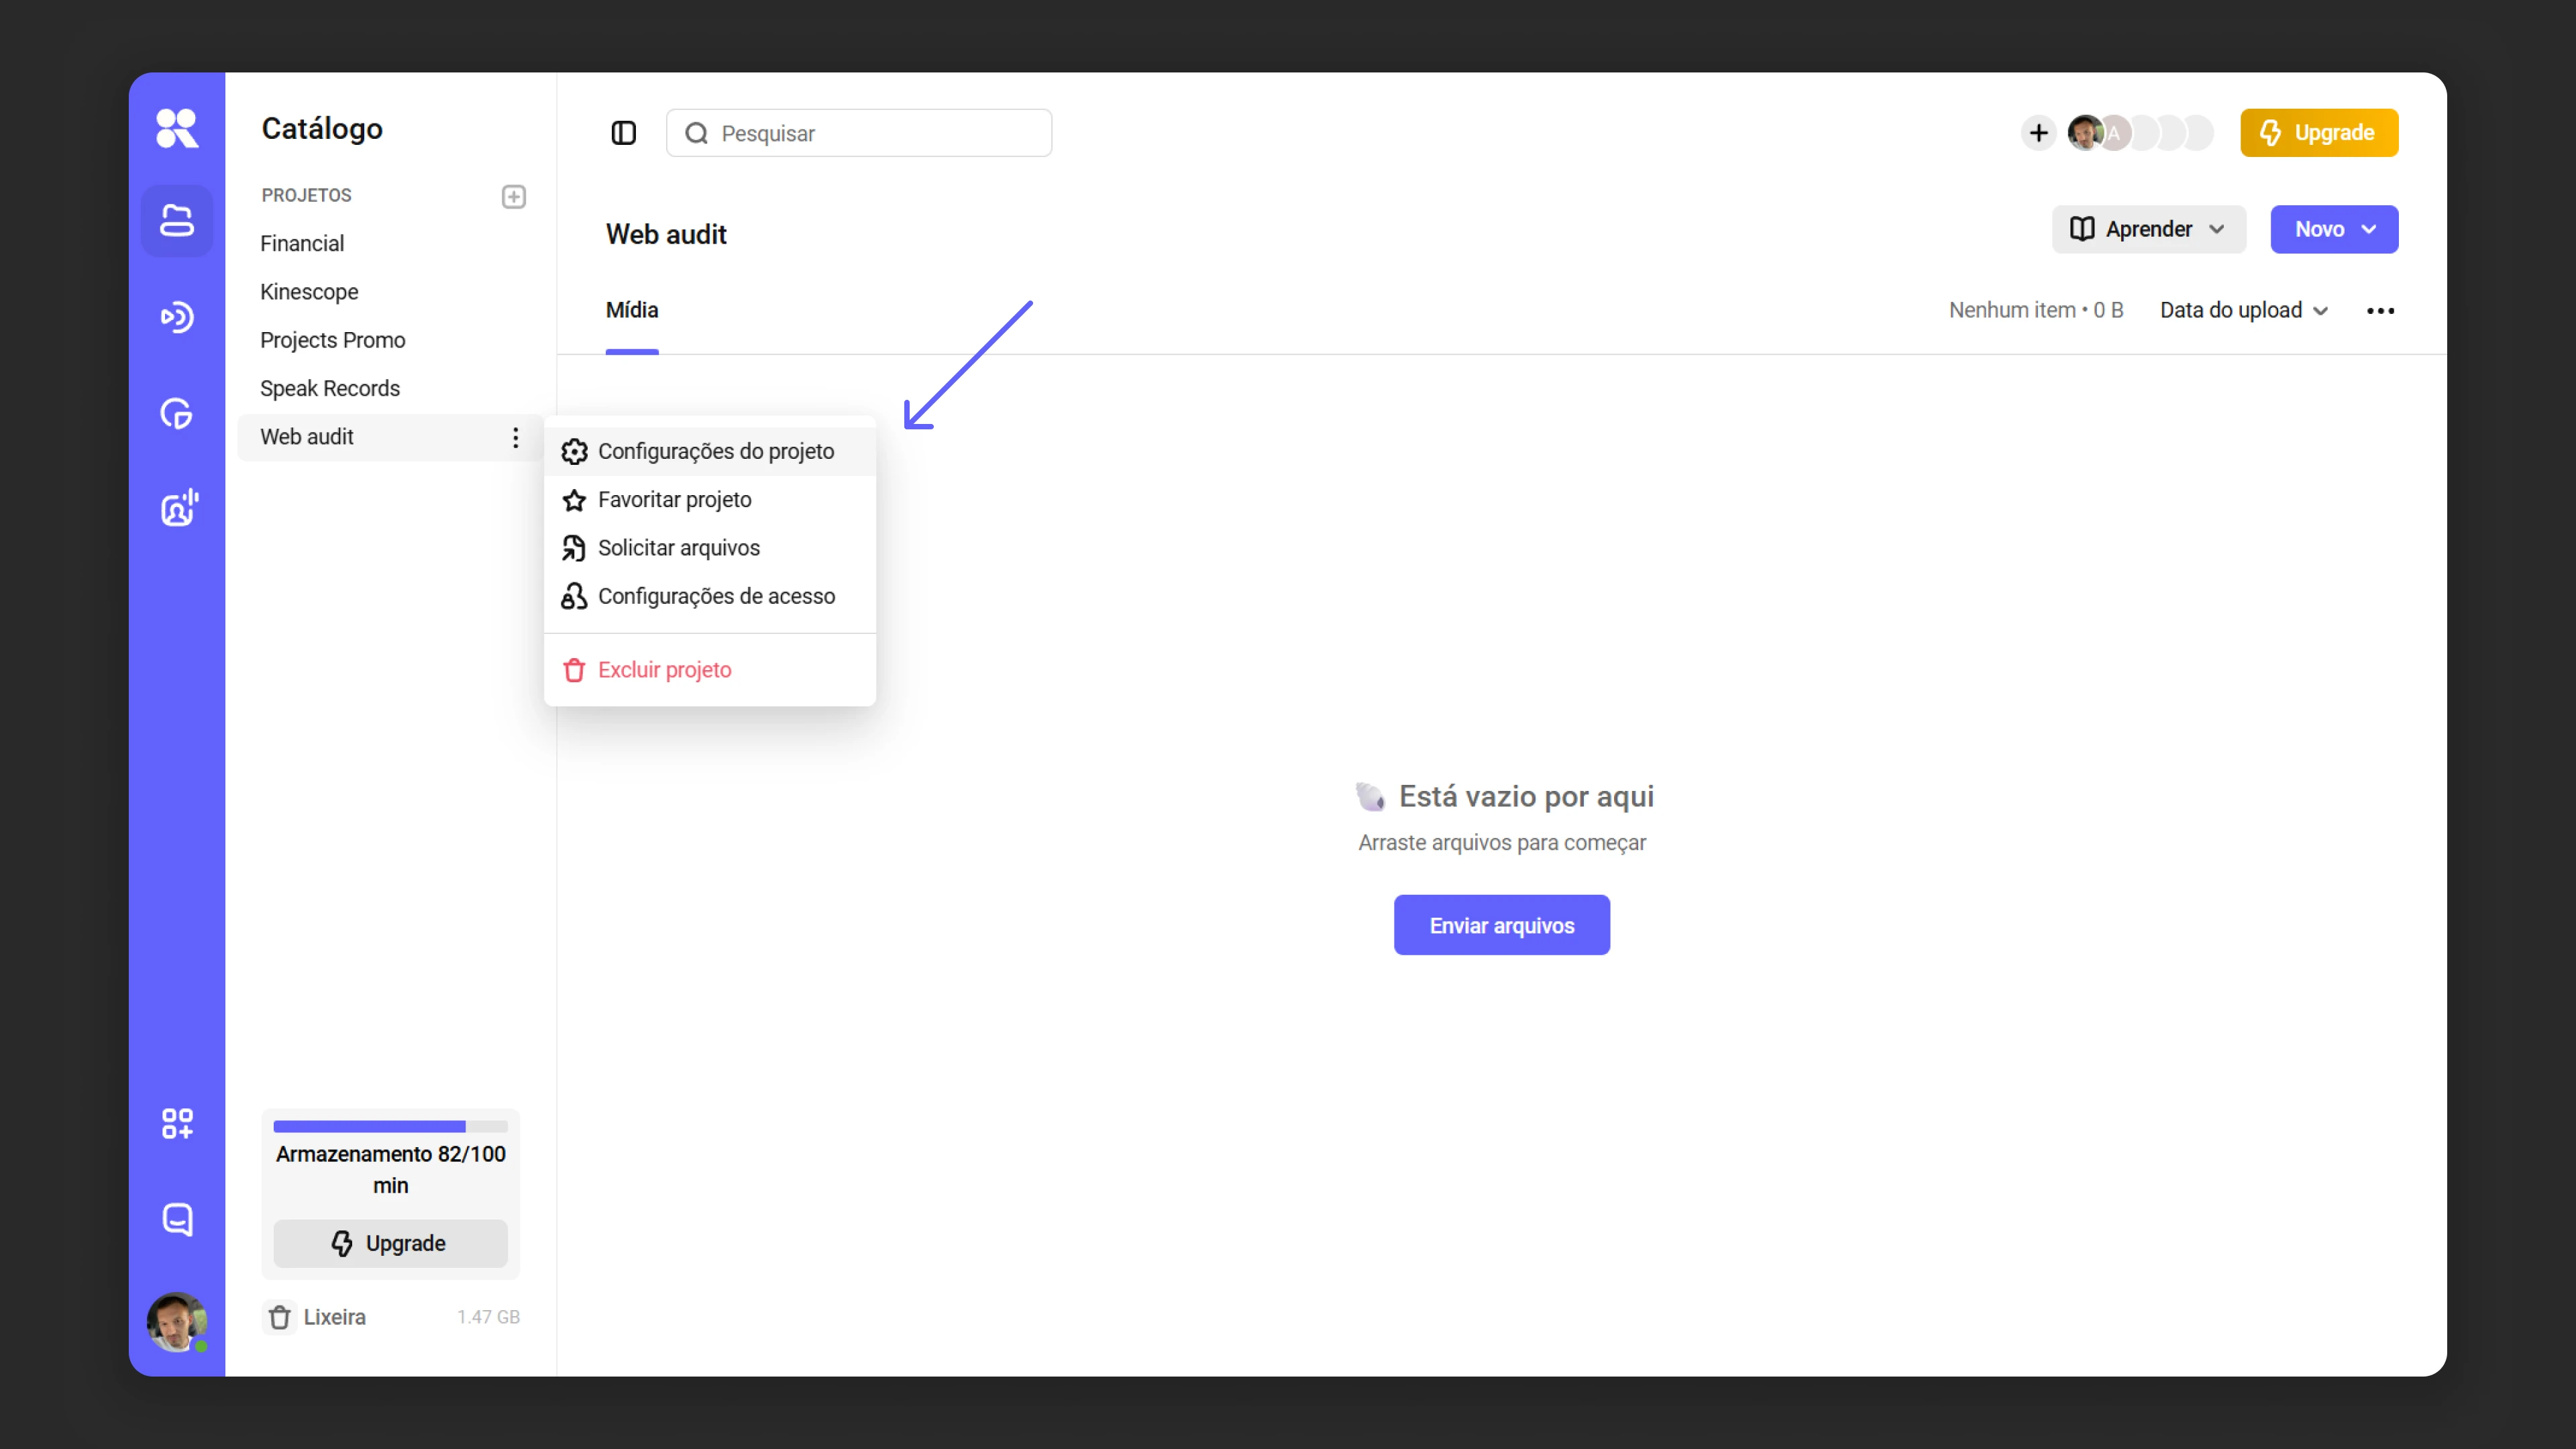
- You can rename a project via the context menu (three dots next to the project name).
- You can enable or disable encryption, set privacy settings, and configure other project parameters in the “Project settings” section.
Searching the project list
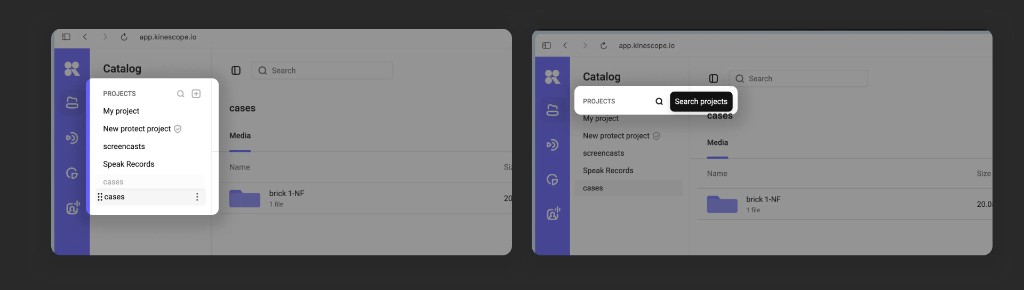
When there are many projects in your workspace, scrolling through the left-hand list becomes inconvenient. To quickly open the project you need without leaving the catalog:
- Hover over the project list and click the search icon that appears in the list header.
- Type part of the project name into the search field — the list narrows down as you type.
- Press Esc or the clear icon in the field to exit the search and bring back the full list.
How the search works
- One character — only projects whose name starts with that character are shown.
- Two or more characters — the search looks for the substring anywhere in the name.
- Case and spaces: the search is case-insensitive, and leading and trailing spaces are ignored.
- Match highlighting: the matched part of the name is shown in bold in the results.
- No matches — the list shows the “Nothing found” message.
Example: the query Mar returns the projects “Marketing Plan” and “My march trip”; the query M returns only projects that start with the letter “M”, such as “Mobile App”.
Clearing the query
The clear icon becomes active as soon as there is at least one character in the field. Clicking it empties the field, the list shows all projects again, and the focus stays in the search field — so you can immediately start a new query.
Project order in the catalog
The order of projects in the left-hand list is set manually by drag-and-drop. This is convenient when several people work with the list and you want to keep the projects you return to most often at the top.
- Hover over a project — a drag handle (six dots) appears to the left of the name.
- Hold the handle and drag the project to its new position in the list.
- Release the mouse button — the order is saved automatically and is visible to everyone in the workspace.
Reordering works separately within two list groups:
- Pinned projects — reorder among themselves in the upper group.
- Other projects — reorder among themselves in the lower group.
You cannot move a project from one group to the other by dragging — to do that, pin or unpin the project via the context menu (⁝).
Folders
Folders help structure content within a project. This is especially useful when working with large volumes of material. For example, in an “Employee Training” project, folders could be named “Introduction”, “Case Studies”, “Practice”.
How to create a folder
- Open the project where you want to create a folder.
- Click the “New folder” button.
- Enter the folder name.
- Click “Create”.
Notes on working with folders
- Folders can be moved between projects.
- You can rename or delete a folder via the context menu.
Files
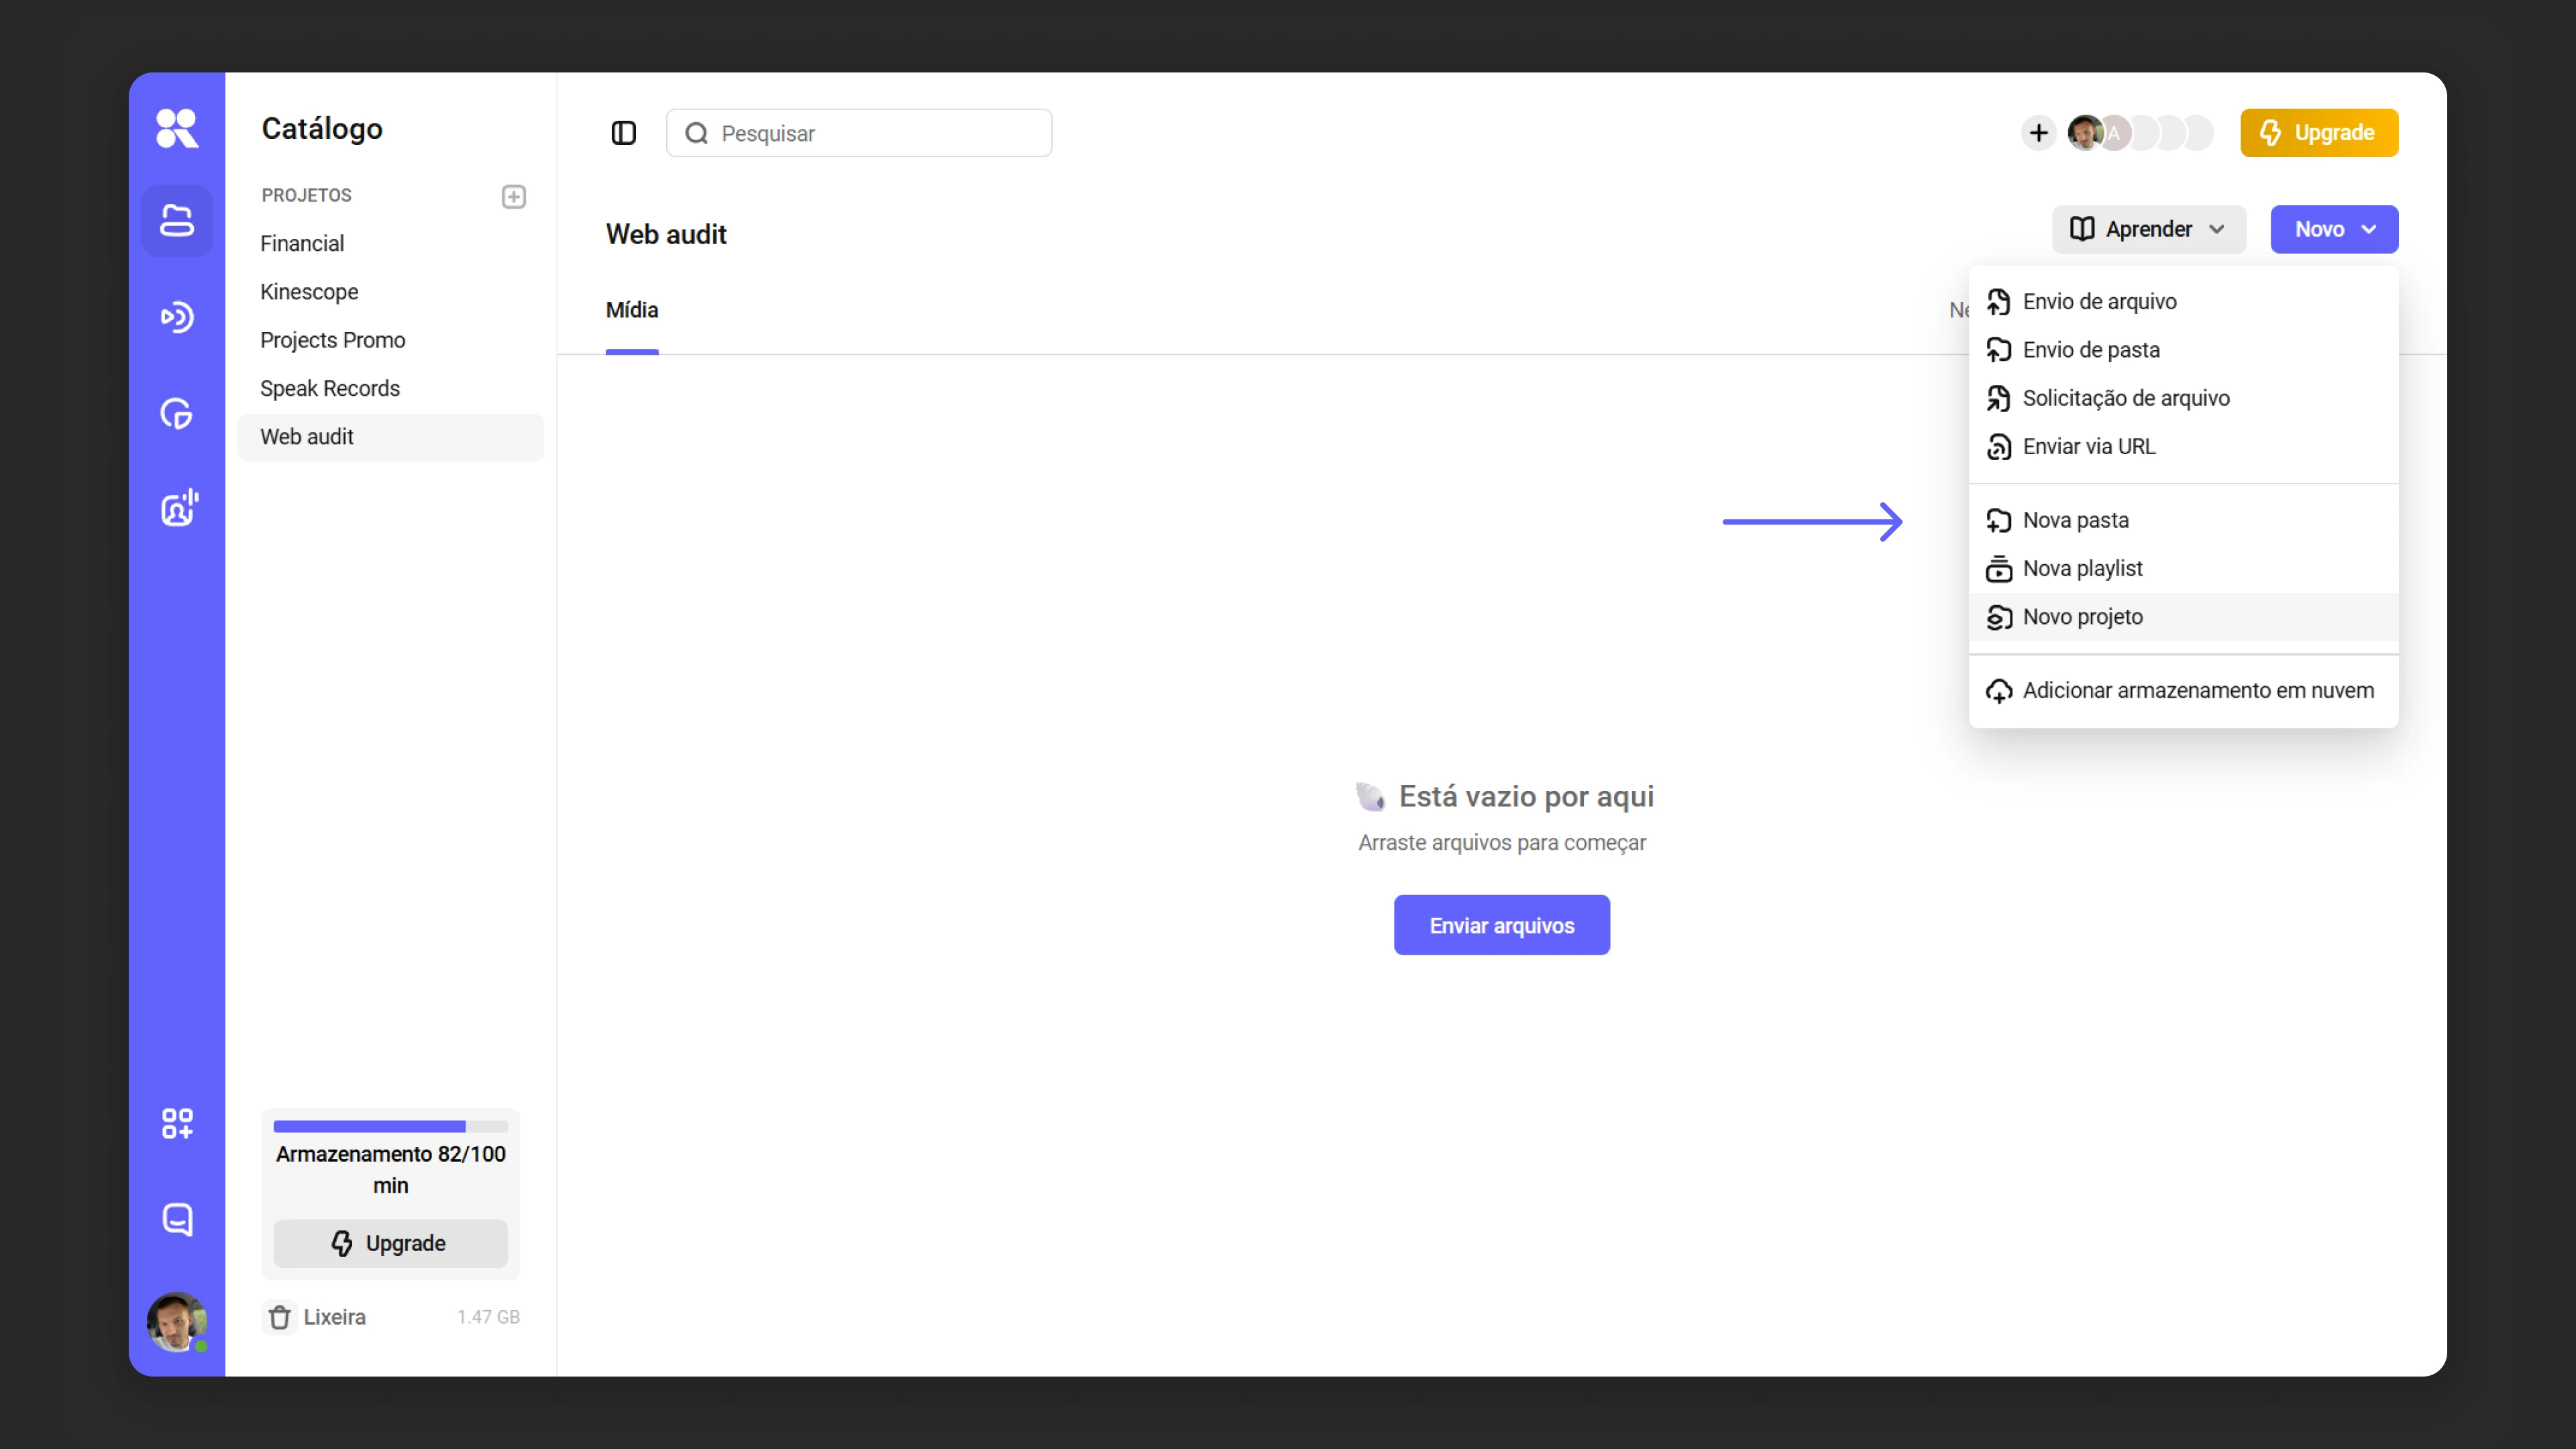
To add videos or other materials to a project:
- Go to the desired project or folder.
- Click “Upload files” and select videos from your device.
Learn more about advanced file upload .
Managing files
- Files can be moved between folders and projects.
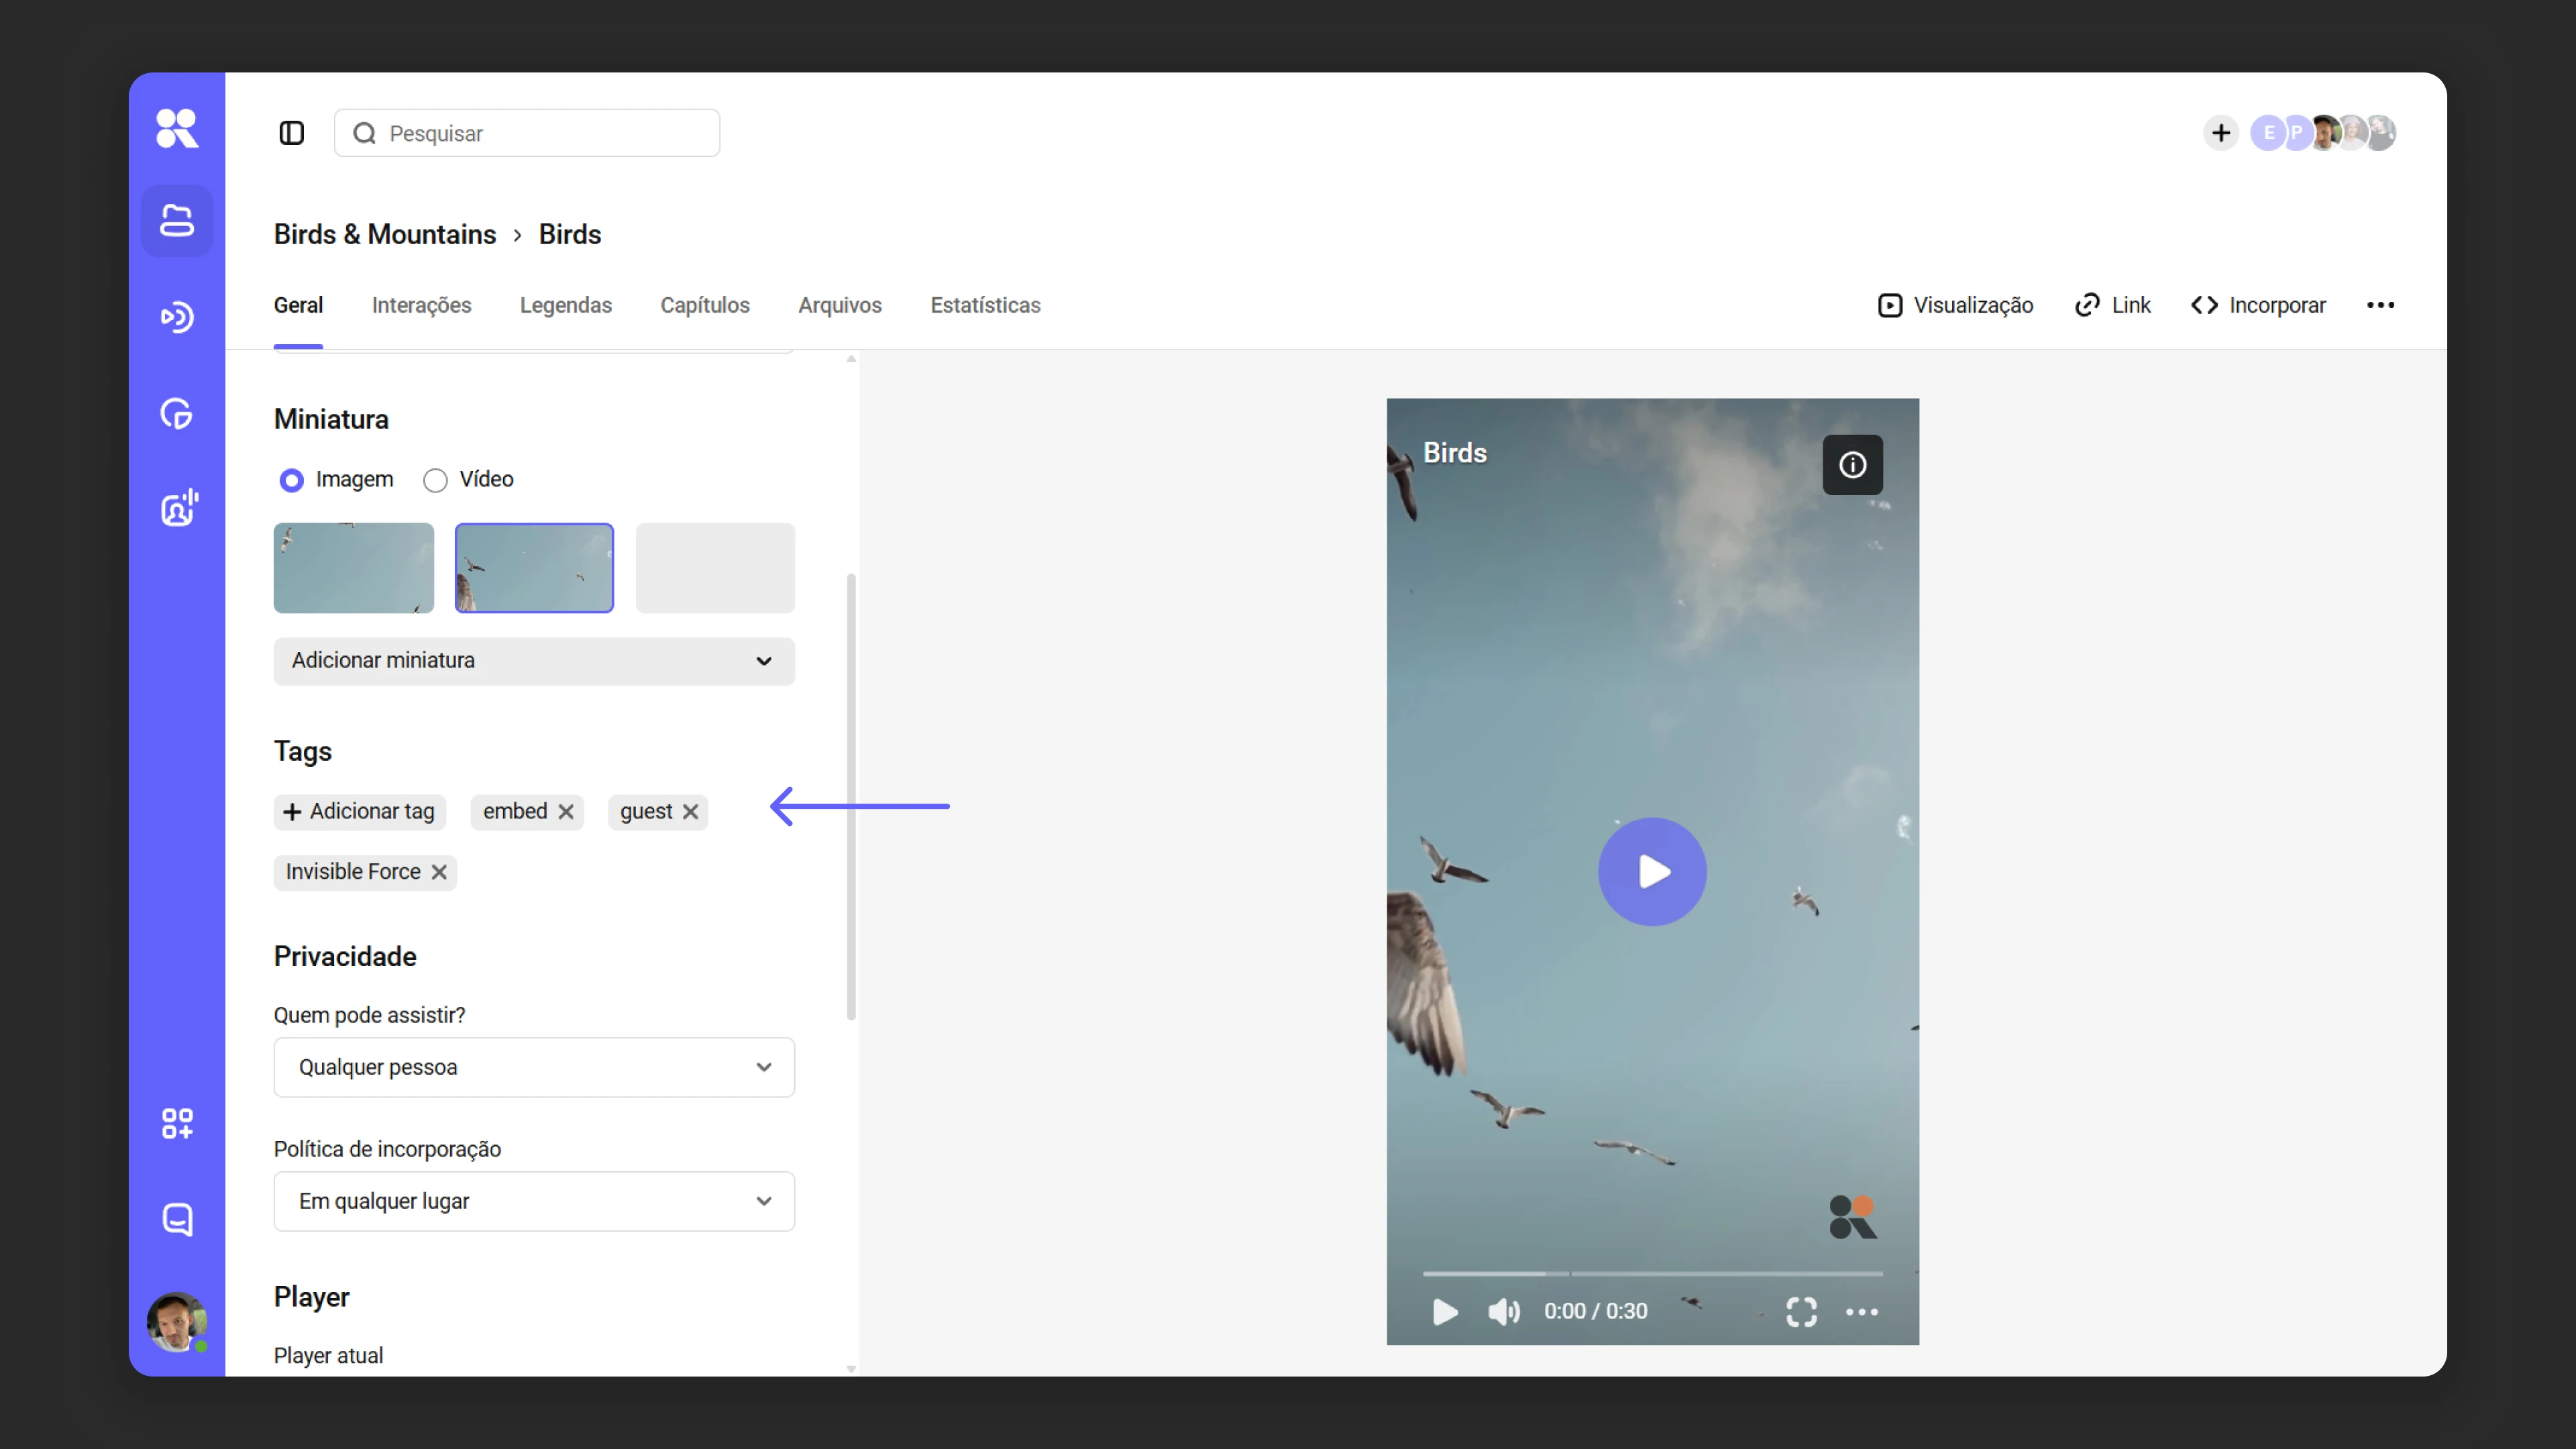
- To change video settings (such as privacy, access, or encryption), go to the “File settings” section.
- Use tags for easy cataloging and quick search.
The article Media file settings describes all media file settings.
Deleting files
Deleted files go to the recycle bin and are stored there for the configured period. They continue to occupy storage space until the bin is fully emptied.
Using tags
Tags are keywords you can assign to projects, folders, and files for quick search. To add tags:
- In the media file settings, find the “Tags” field and click “Add tag”.
- In the dialog that appears, enter tags one by one, pressing Enter after each one. You can also click “Create new tag”.
- If a tag you enter already exists, it will be suggested in a list. Click the relevant option to add it.
- When your tag list is complete, click “Add” → “Save” to confirm.
There’s more to tags — learn about all their capabilities in the article Media file settings .
Playlists
Playlists can be created within projects and folders. To add a video, simply drag it into the playlist. Playlists can be embedded on a website just like individual videos.
We cover playlist capabilities in detail in the article Playlists .
Recycle bin
Any project, folder, or file can be deleted via the right-click context menu. After deletion, items go to the recycle bin and are stored there for 30 days by default. The retention period can be changed. Learn how in the article Recycle bin .
Tips for organizing your library
- Group content logically. Create separate projects for each task, and organize files into folders within projects.
- Use clear names. Project, folder, and file names should be intuitive for all team members.
- Add descriptions. This makes it easier to find the content you need.
- Use the search bar, and sort folders and files in projects to refine results. You can sort files using the general filter or by clicking the column headers in the table.
- Any project or folder can be marked as a favorite. Just hover over it, click the context menu (…) → “Favorite”.
What’s next?
After organizing your media library, we recommend:
- Media file settings — configure privacy, tags, and other parameters
- Set up catalog search — use filters and sorting to quickly find files
- Create playlists — combine videos into sequential collections
- Configure access rights — add team members and configure their permissions
Still have questions? Write to the support chat within the Kinescope interface — our specialists will help!