Advanced File Upload
Uploading media files is the first and most important step in working with Kinescope. The platform supports several upload methods: drag-and-drop, upload by link, cloud storage integration, and others. Files are placed in projects that act as media libraries and allow applying bulk settings.
Who this article is for
- Content managers — need to upload a large number of files using different methods
- Project administrators — need to organize file uploads from external users
- Developers — need to automate uploads via API
- Teams — need to upload files from cloud storage or by links
Creating a project
To start working with files, you need to create a project:
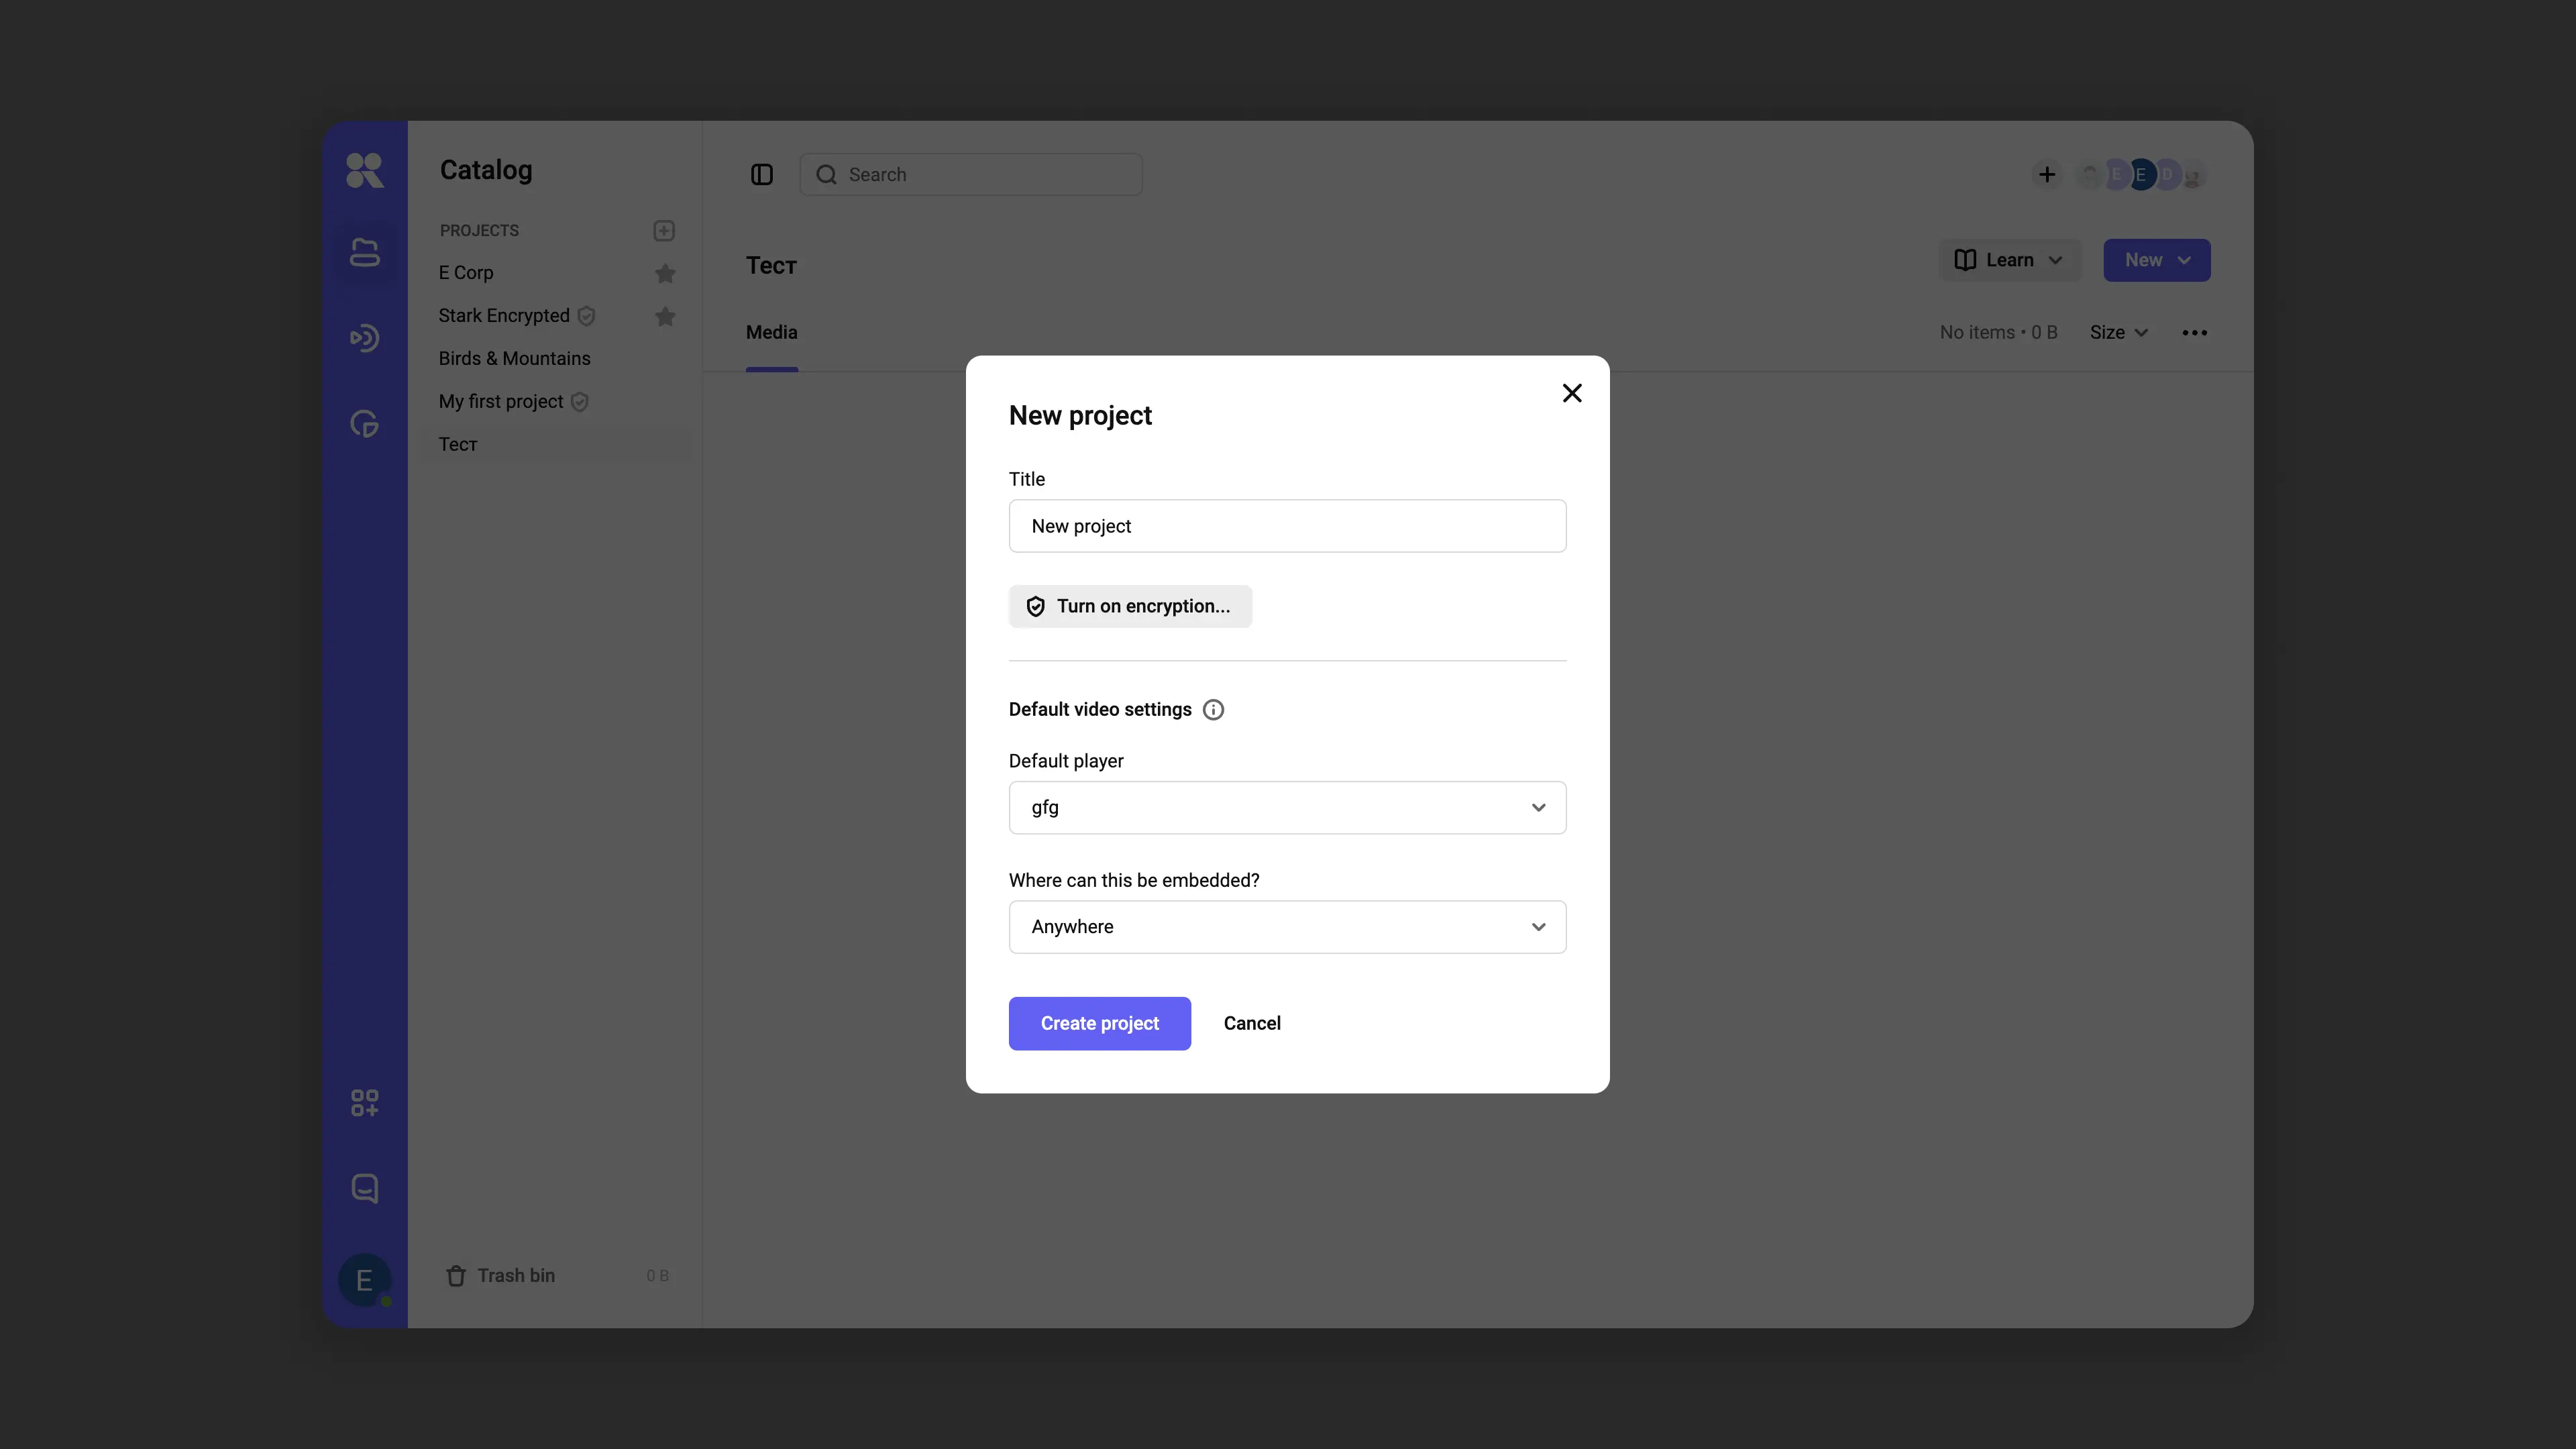
Click the “New project” button in the left menu of the “Catalog” section.

Creating a new project In the dialog box that opens, enter a project name and configure parameters:
Enable encryption to protect files from downloading.
Specify default settings: player template and allowed domains for video embedding.
Click “Create”.
Upload options
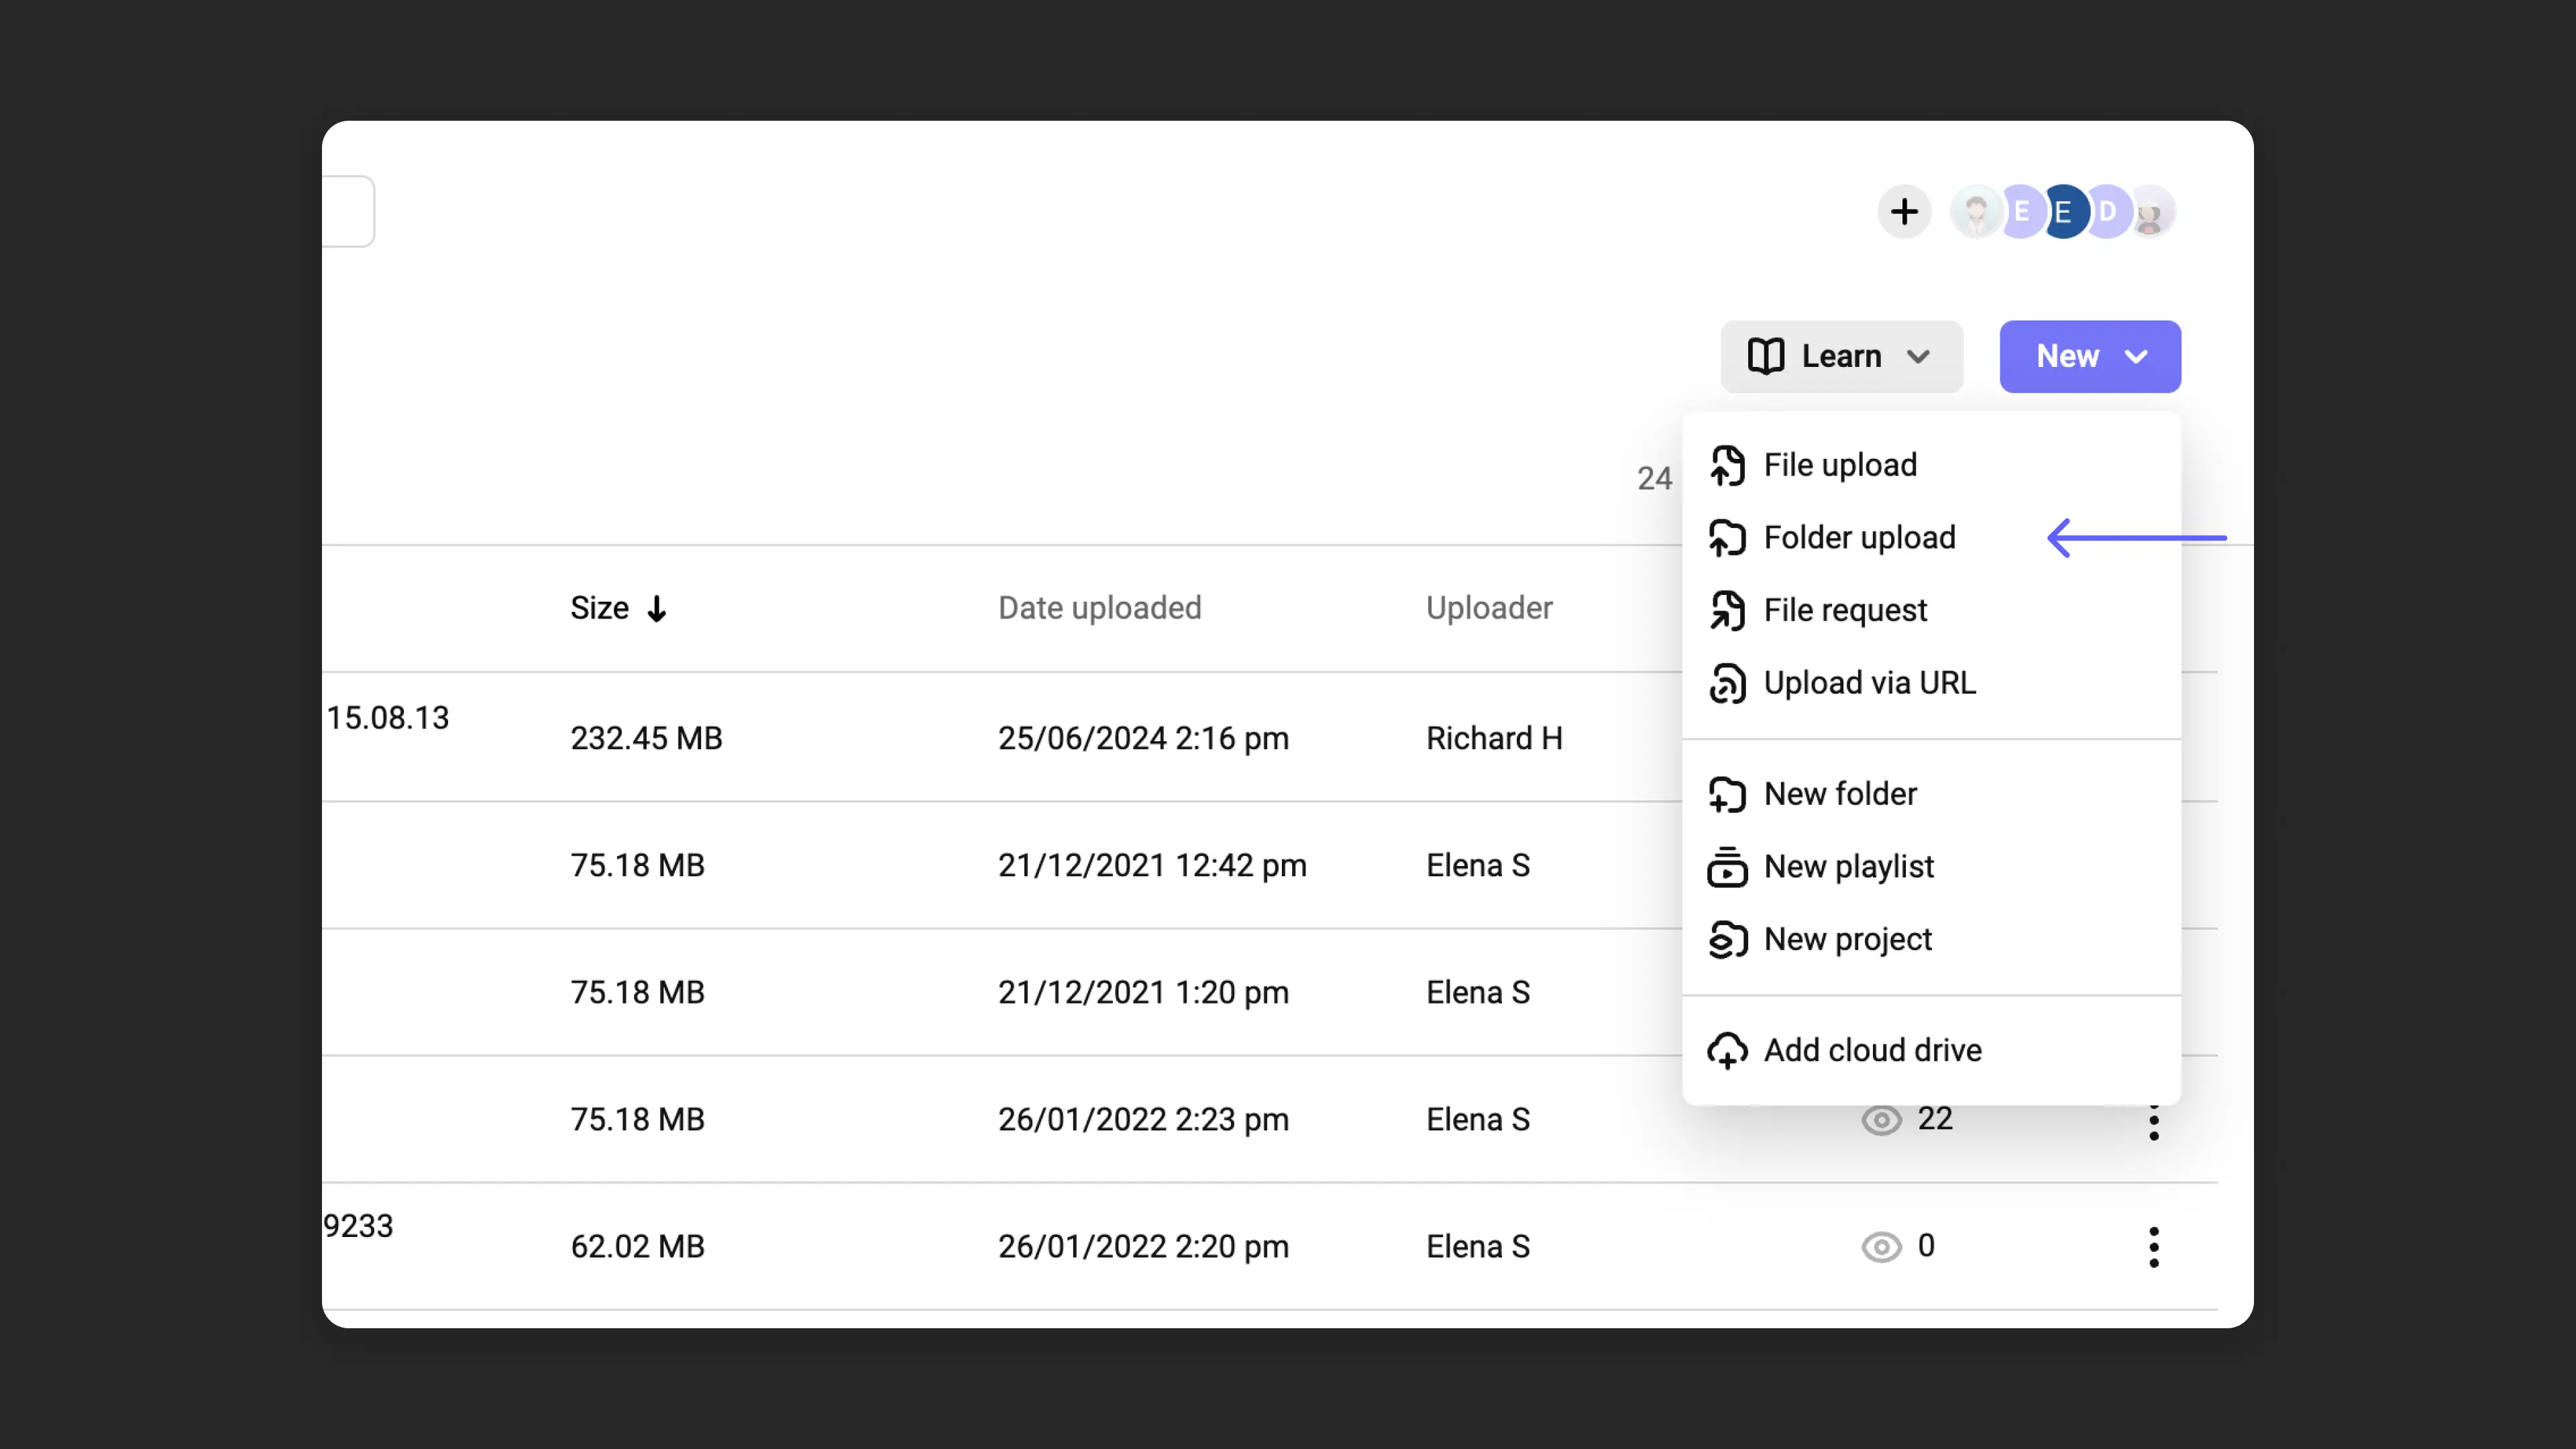
Kinescope supports six upload methods:
Uploading one or multiple files
Drag files from your desktop to the project area, or select “New” → “Upload file”. Multiple files can be uploaded at the same time.
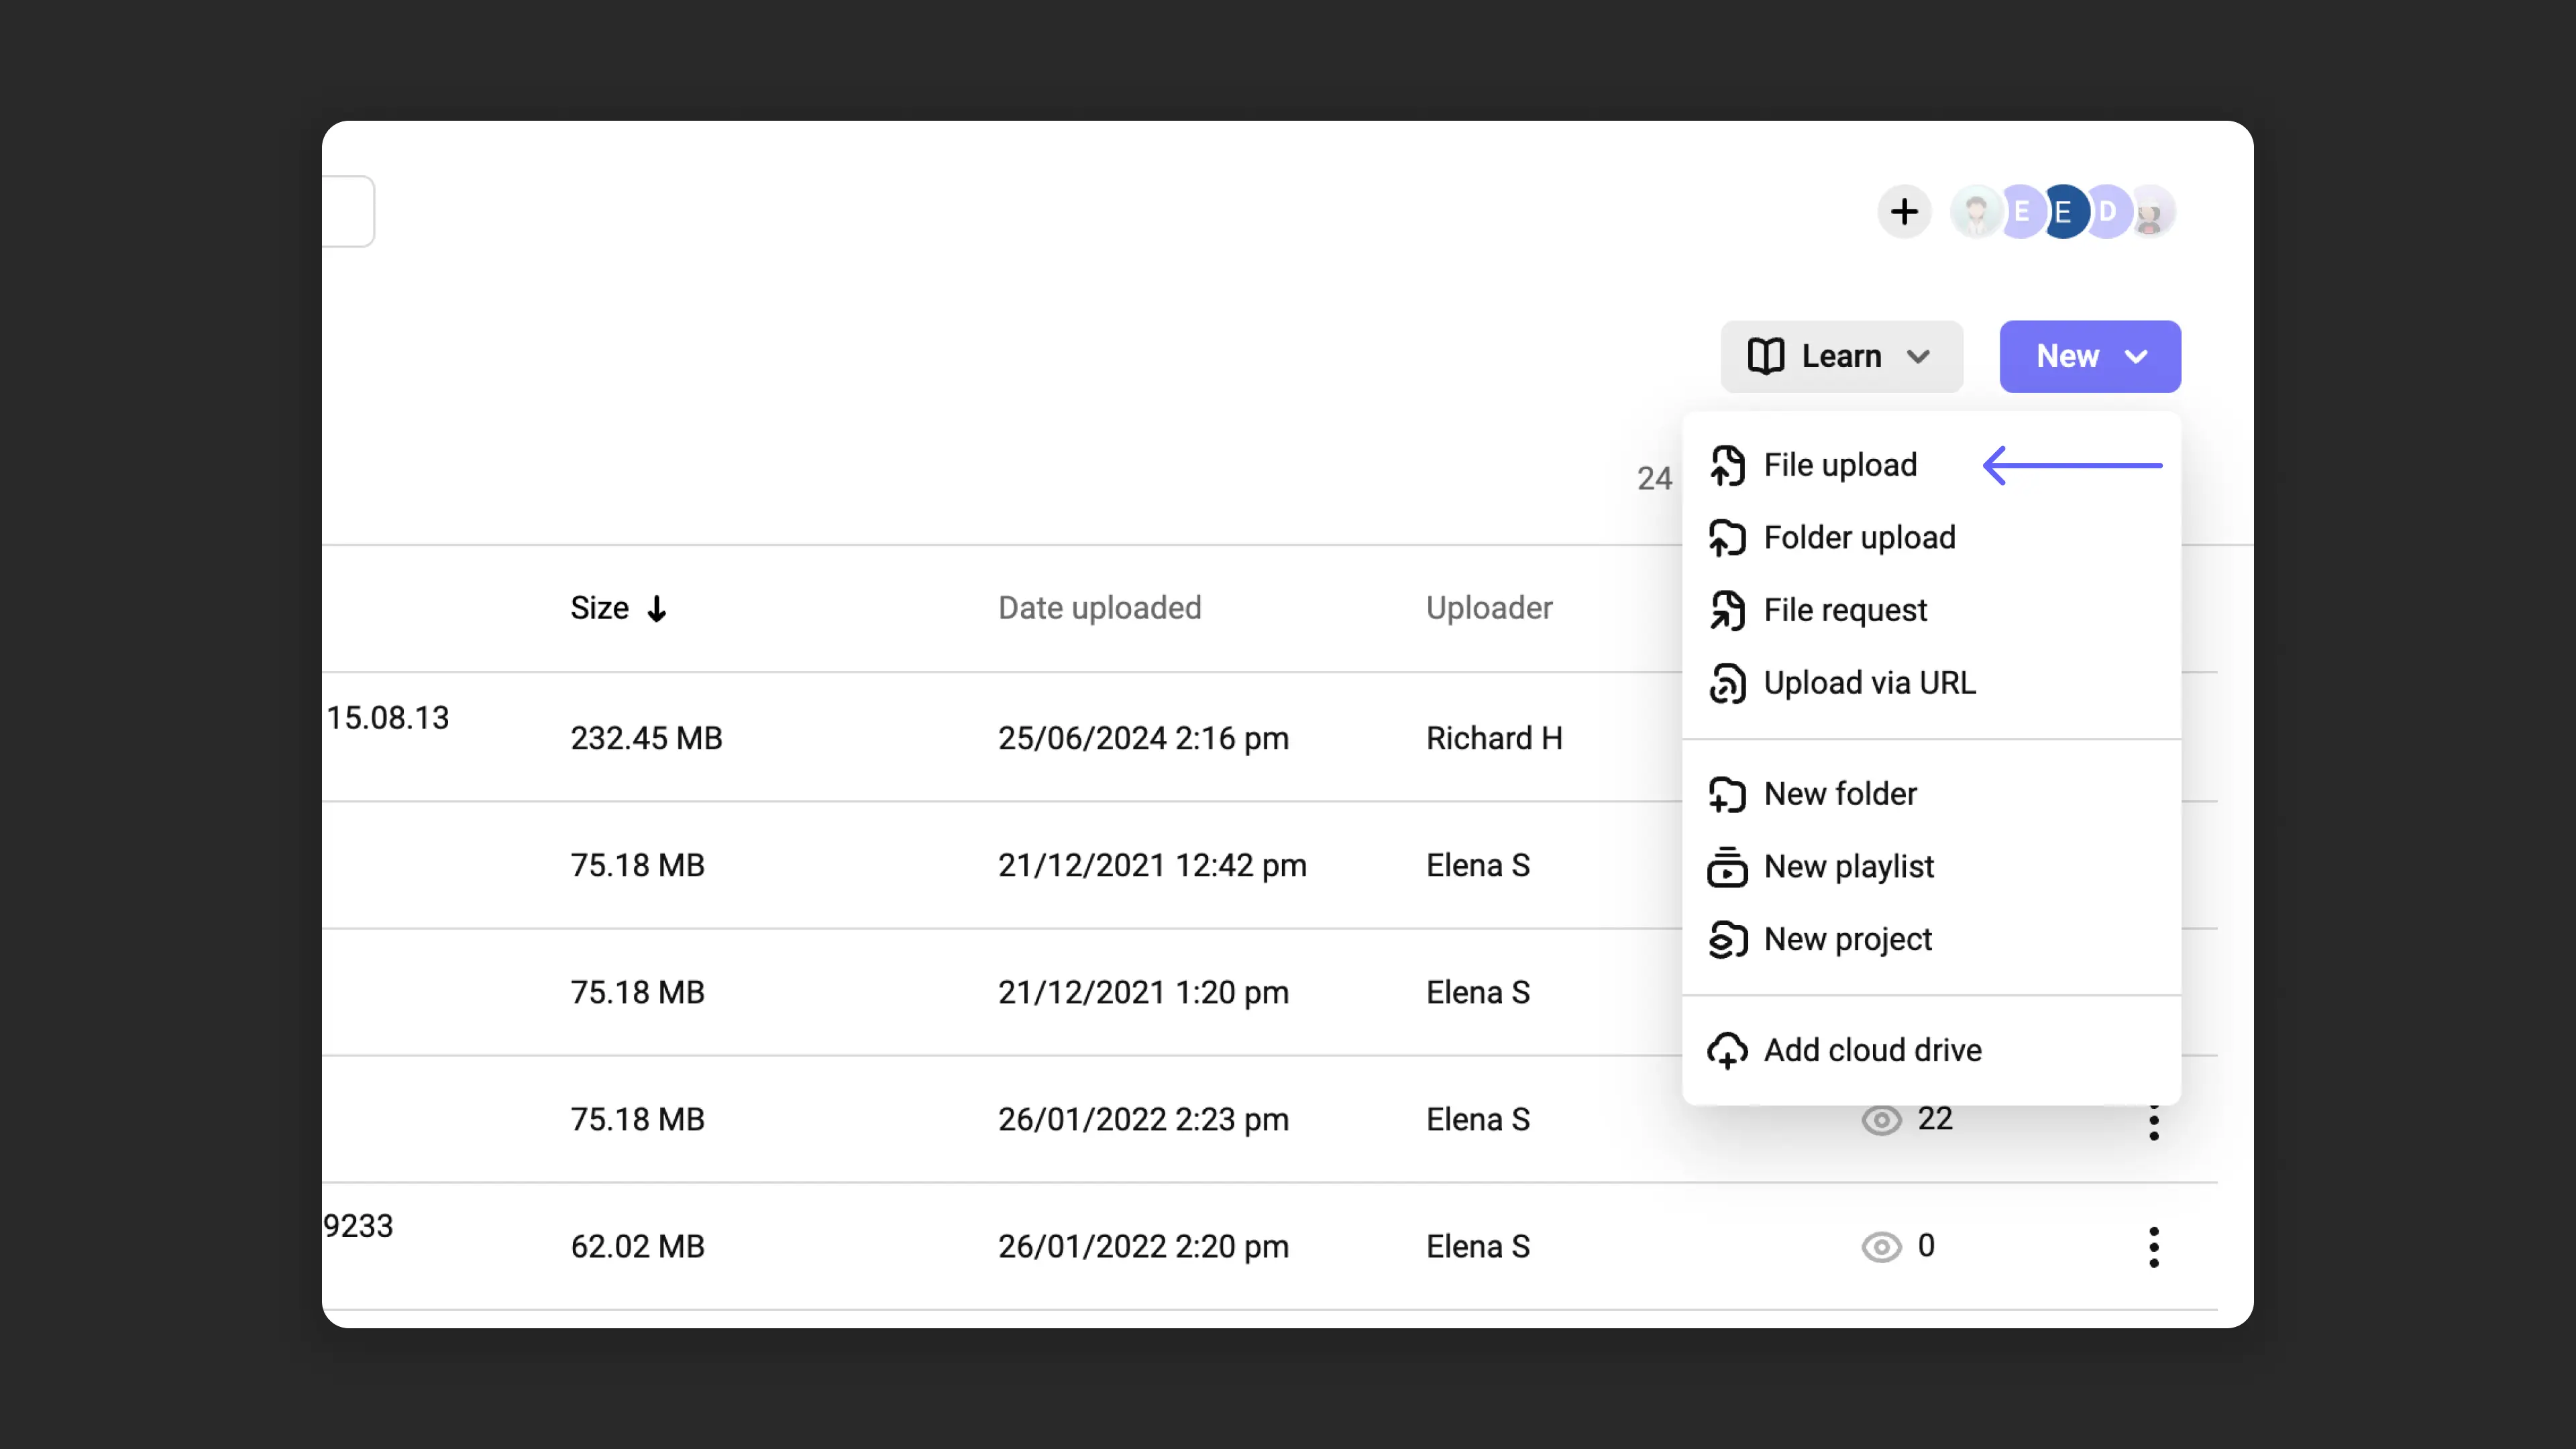
Uploading folders
To upload an entire folder, drag it to the project area or select “New” → “Upload folder”.
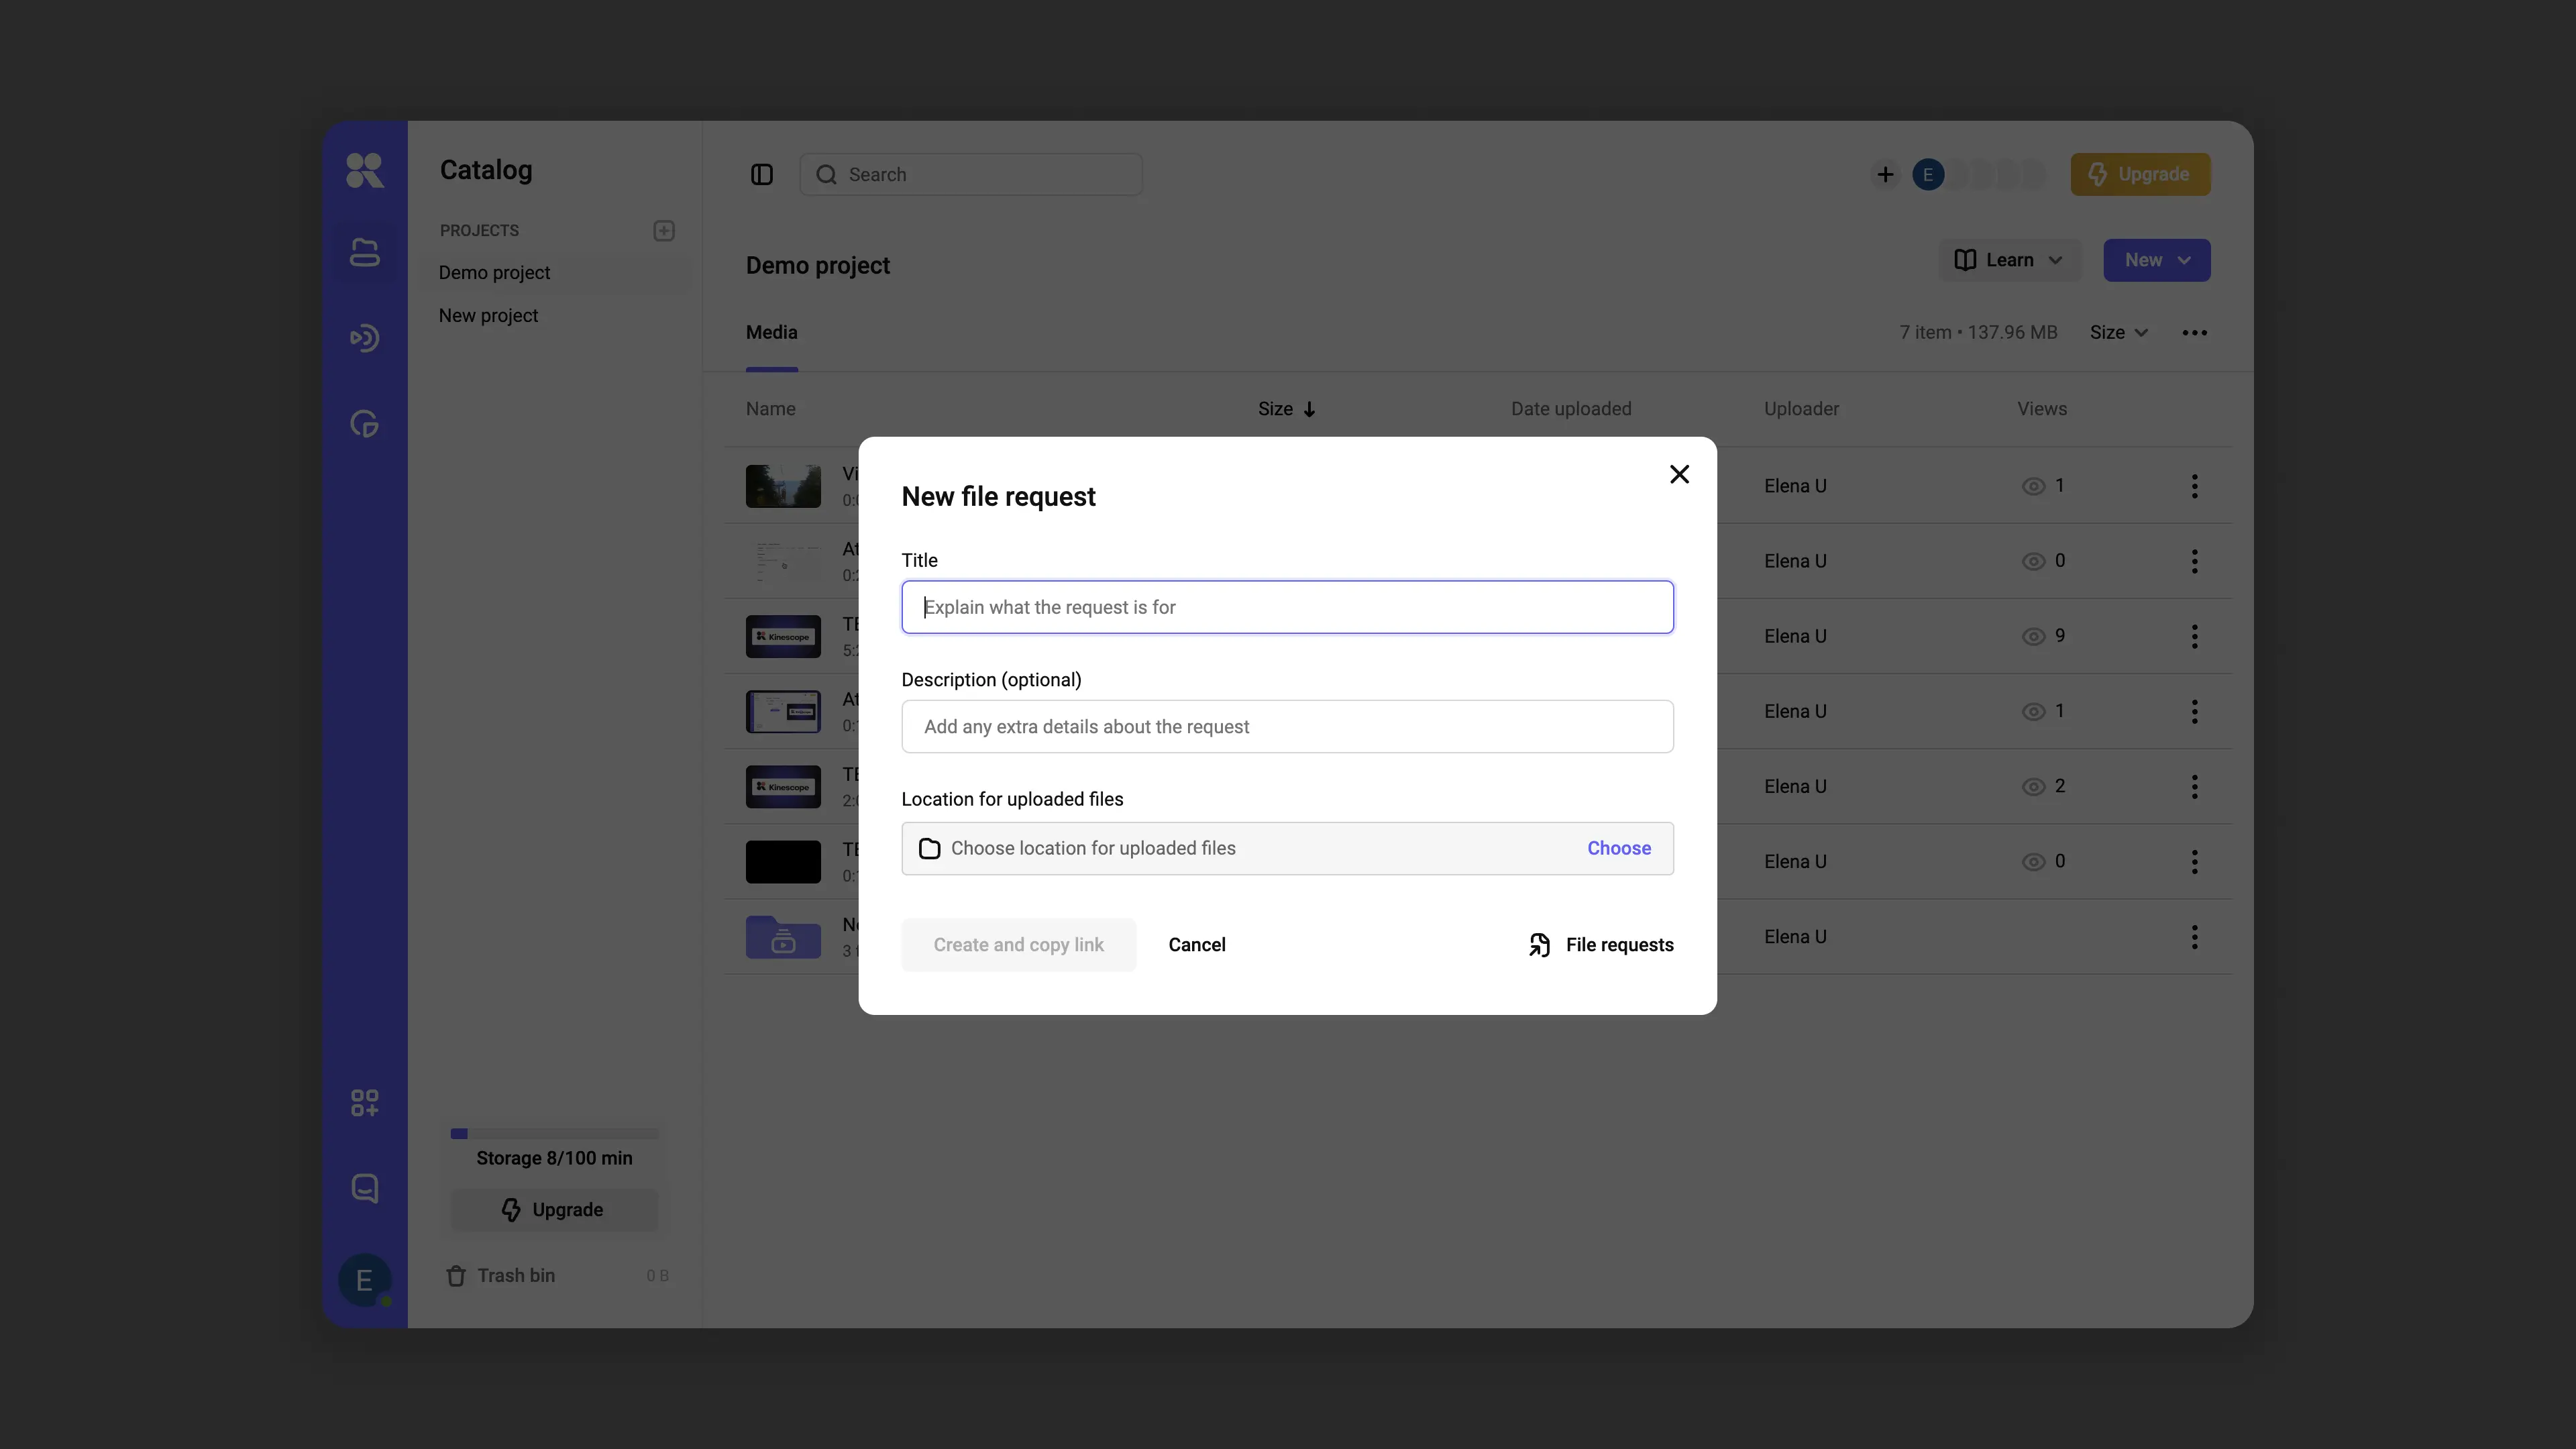
File request
Request files from external users without giving them access to the platform:
- Select “New” → “File request”.
- In the dialog box, set a request name and description, and choose the folder or project where the file will be uploaded.
- Click “Create and copy link” and send it to whoever needs to upload files.
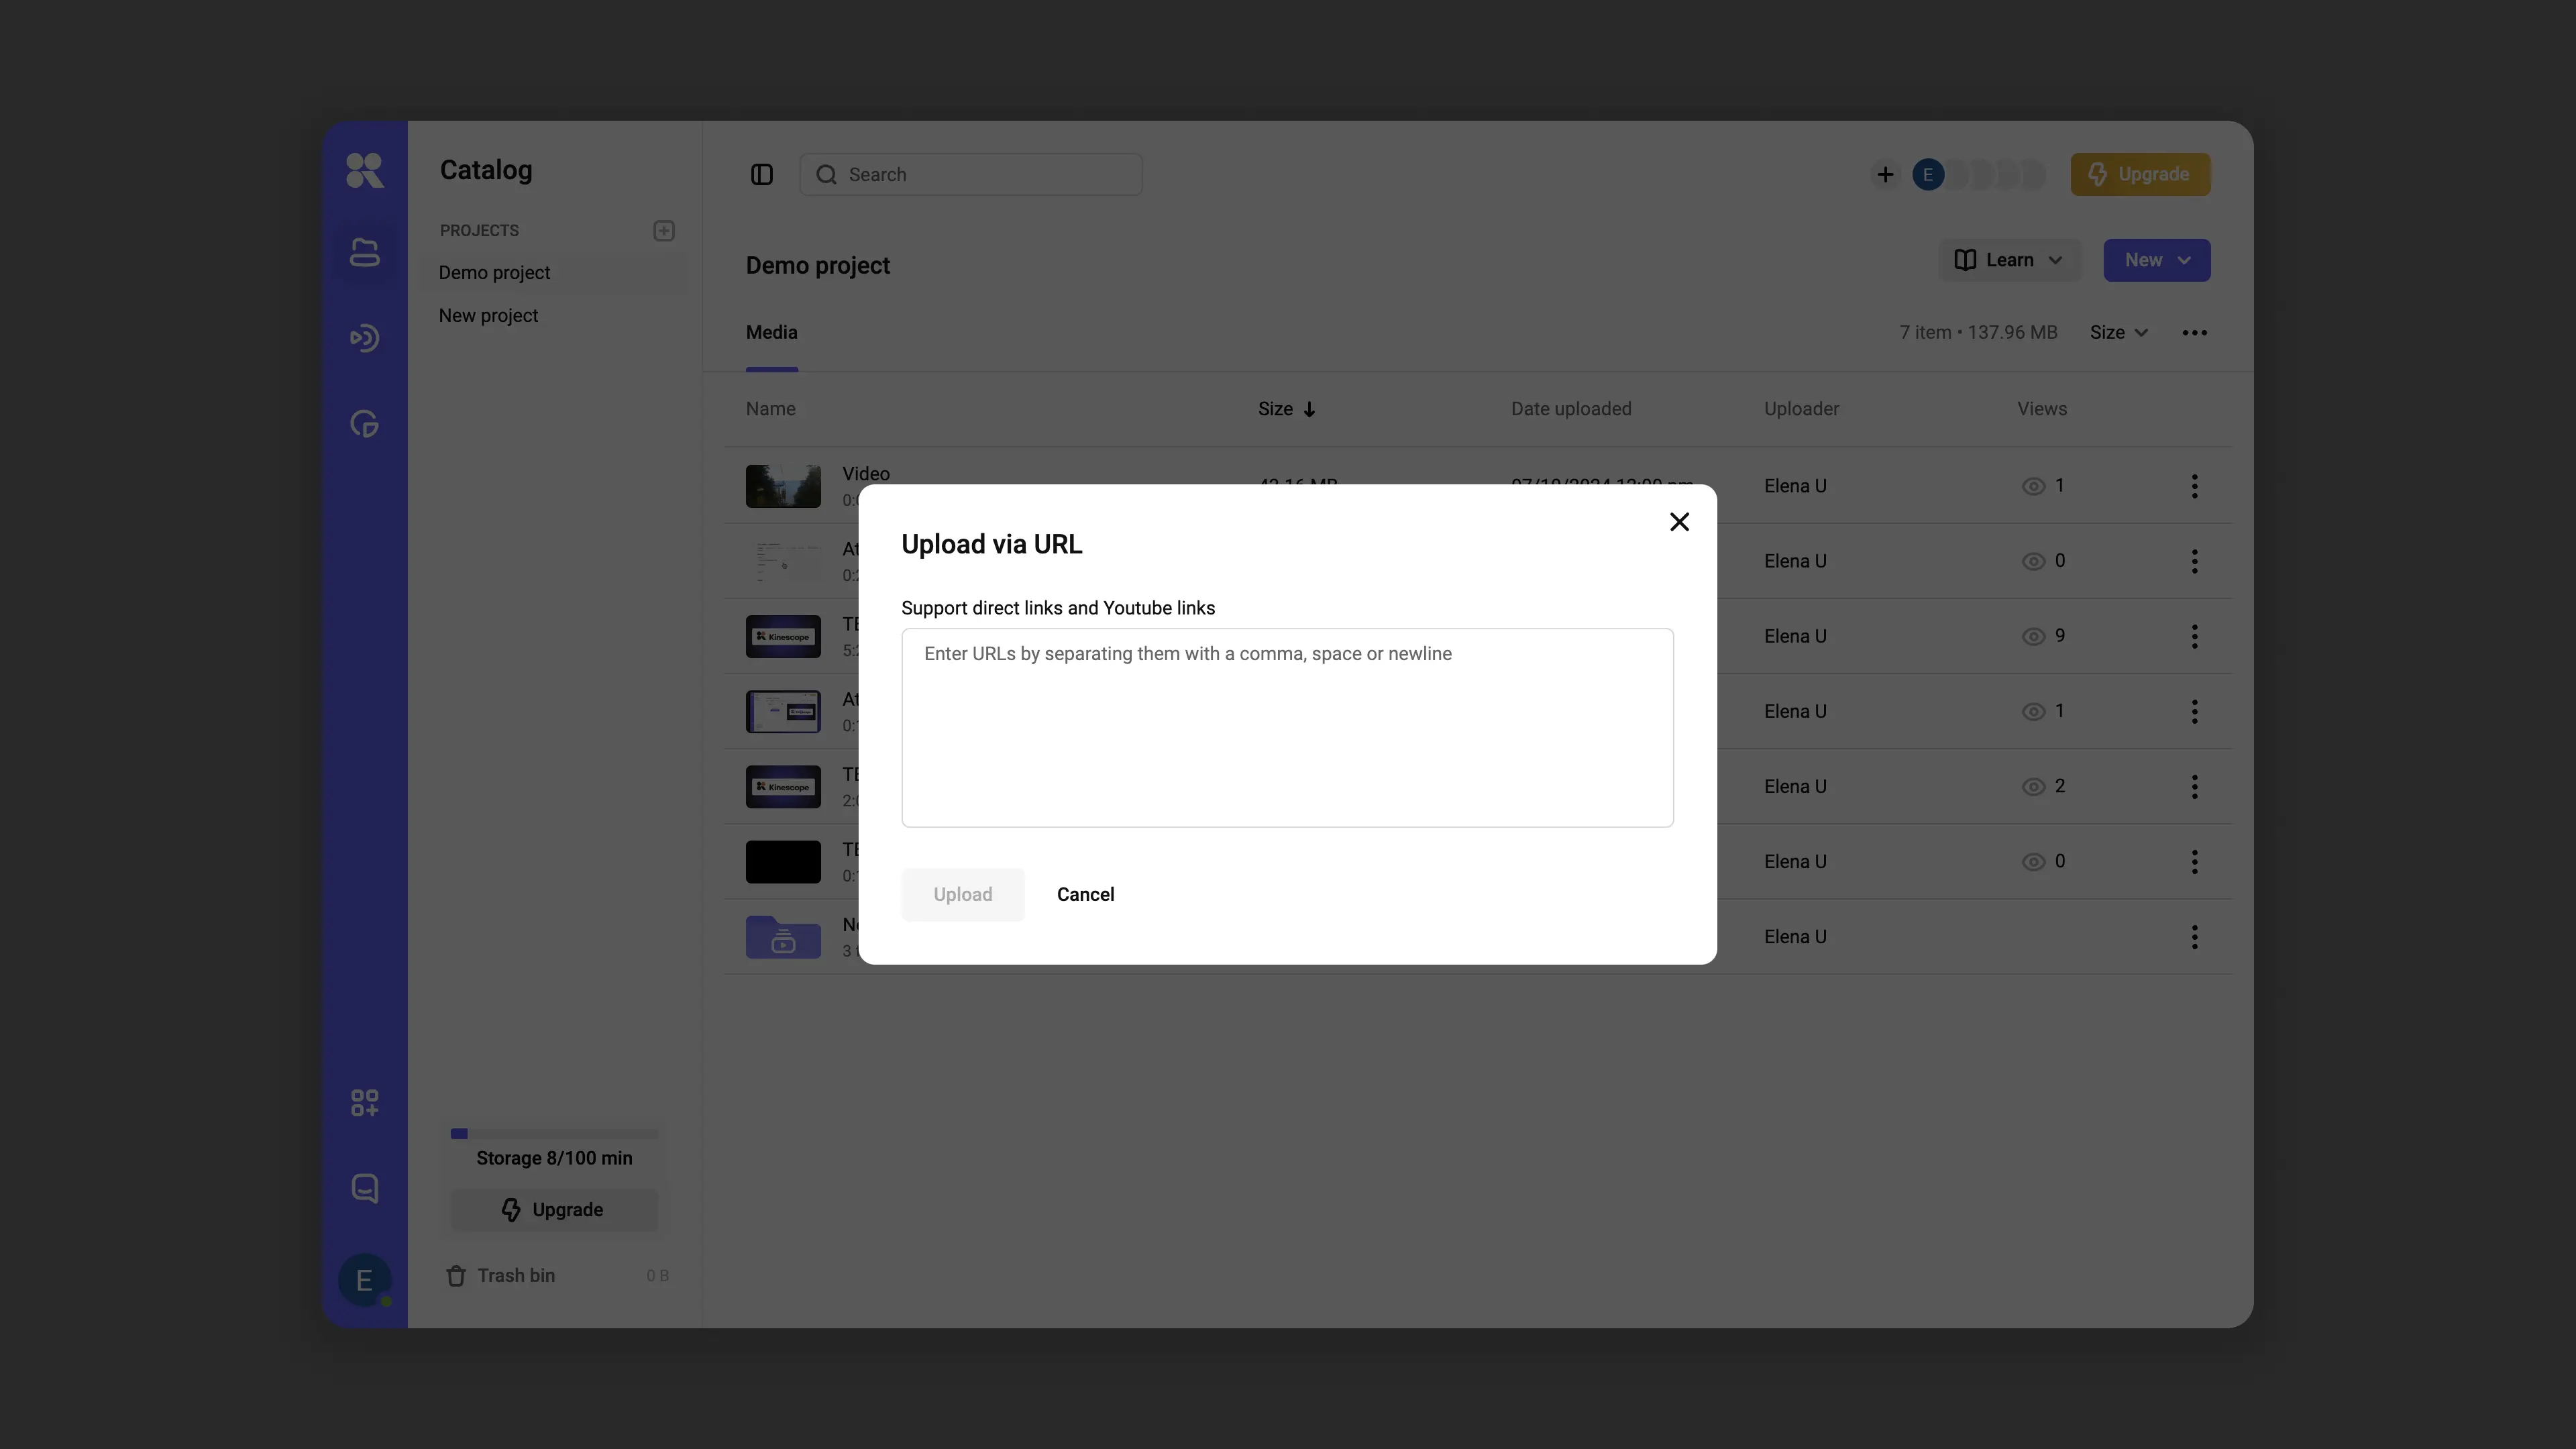
Upload by link
Add video from the internet:
- Select “New” → “Upload by link”.
- Paste the video link (for example, from YouTube) and click “Upload”. Up to 50 links can be uploaded at once, separated by comma, space, or new line. When uploading from YouTube, not only the video in maximum quality with audio is downloaded, but also the poster and chapters , if the video was marked up.
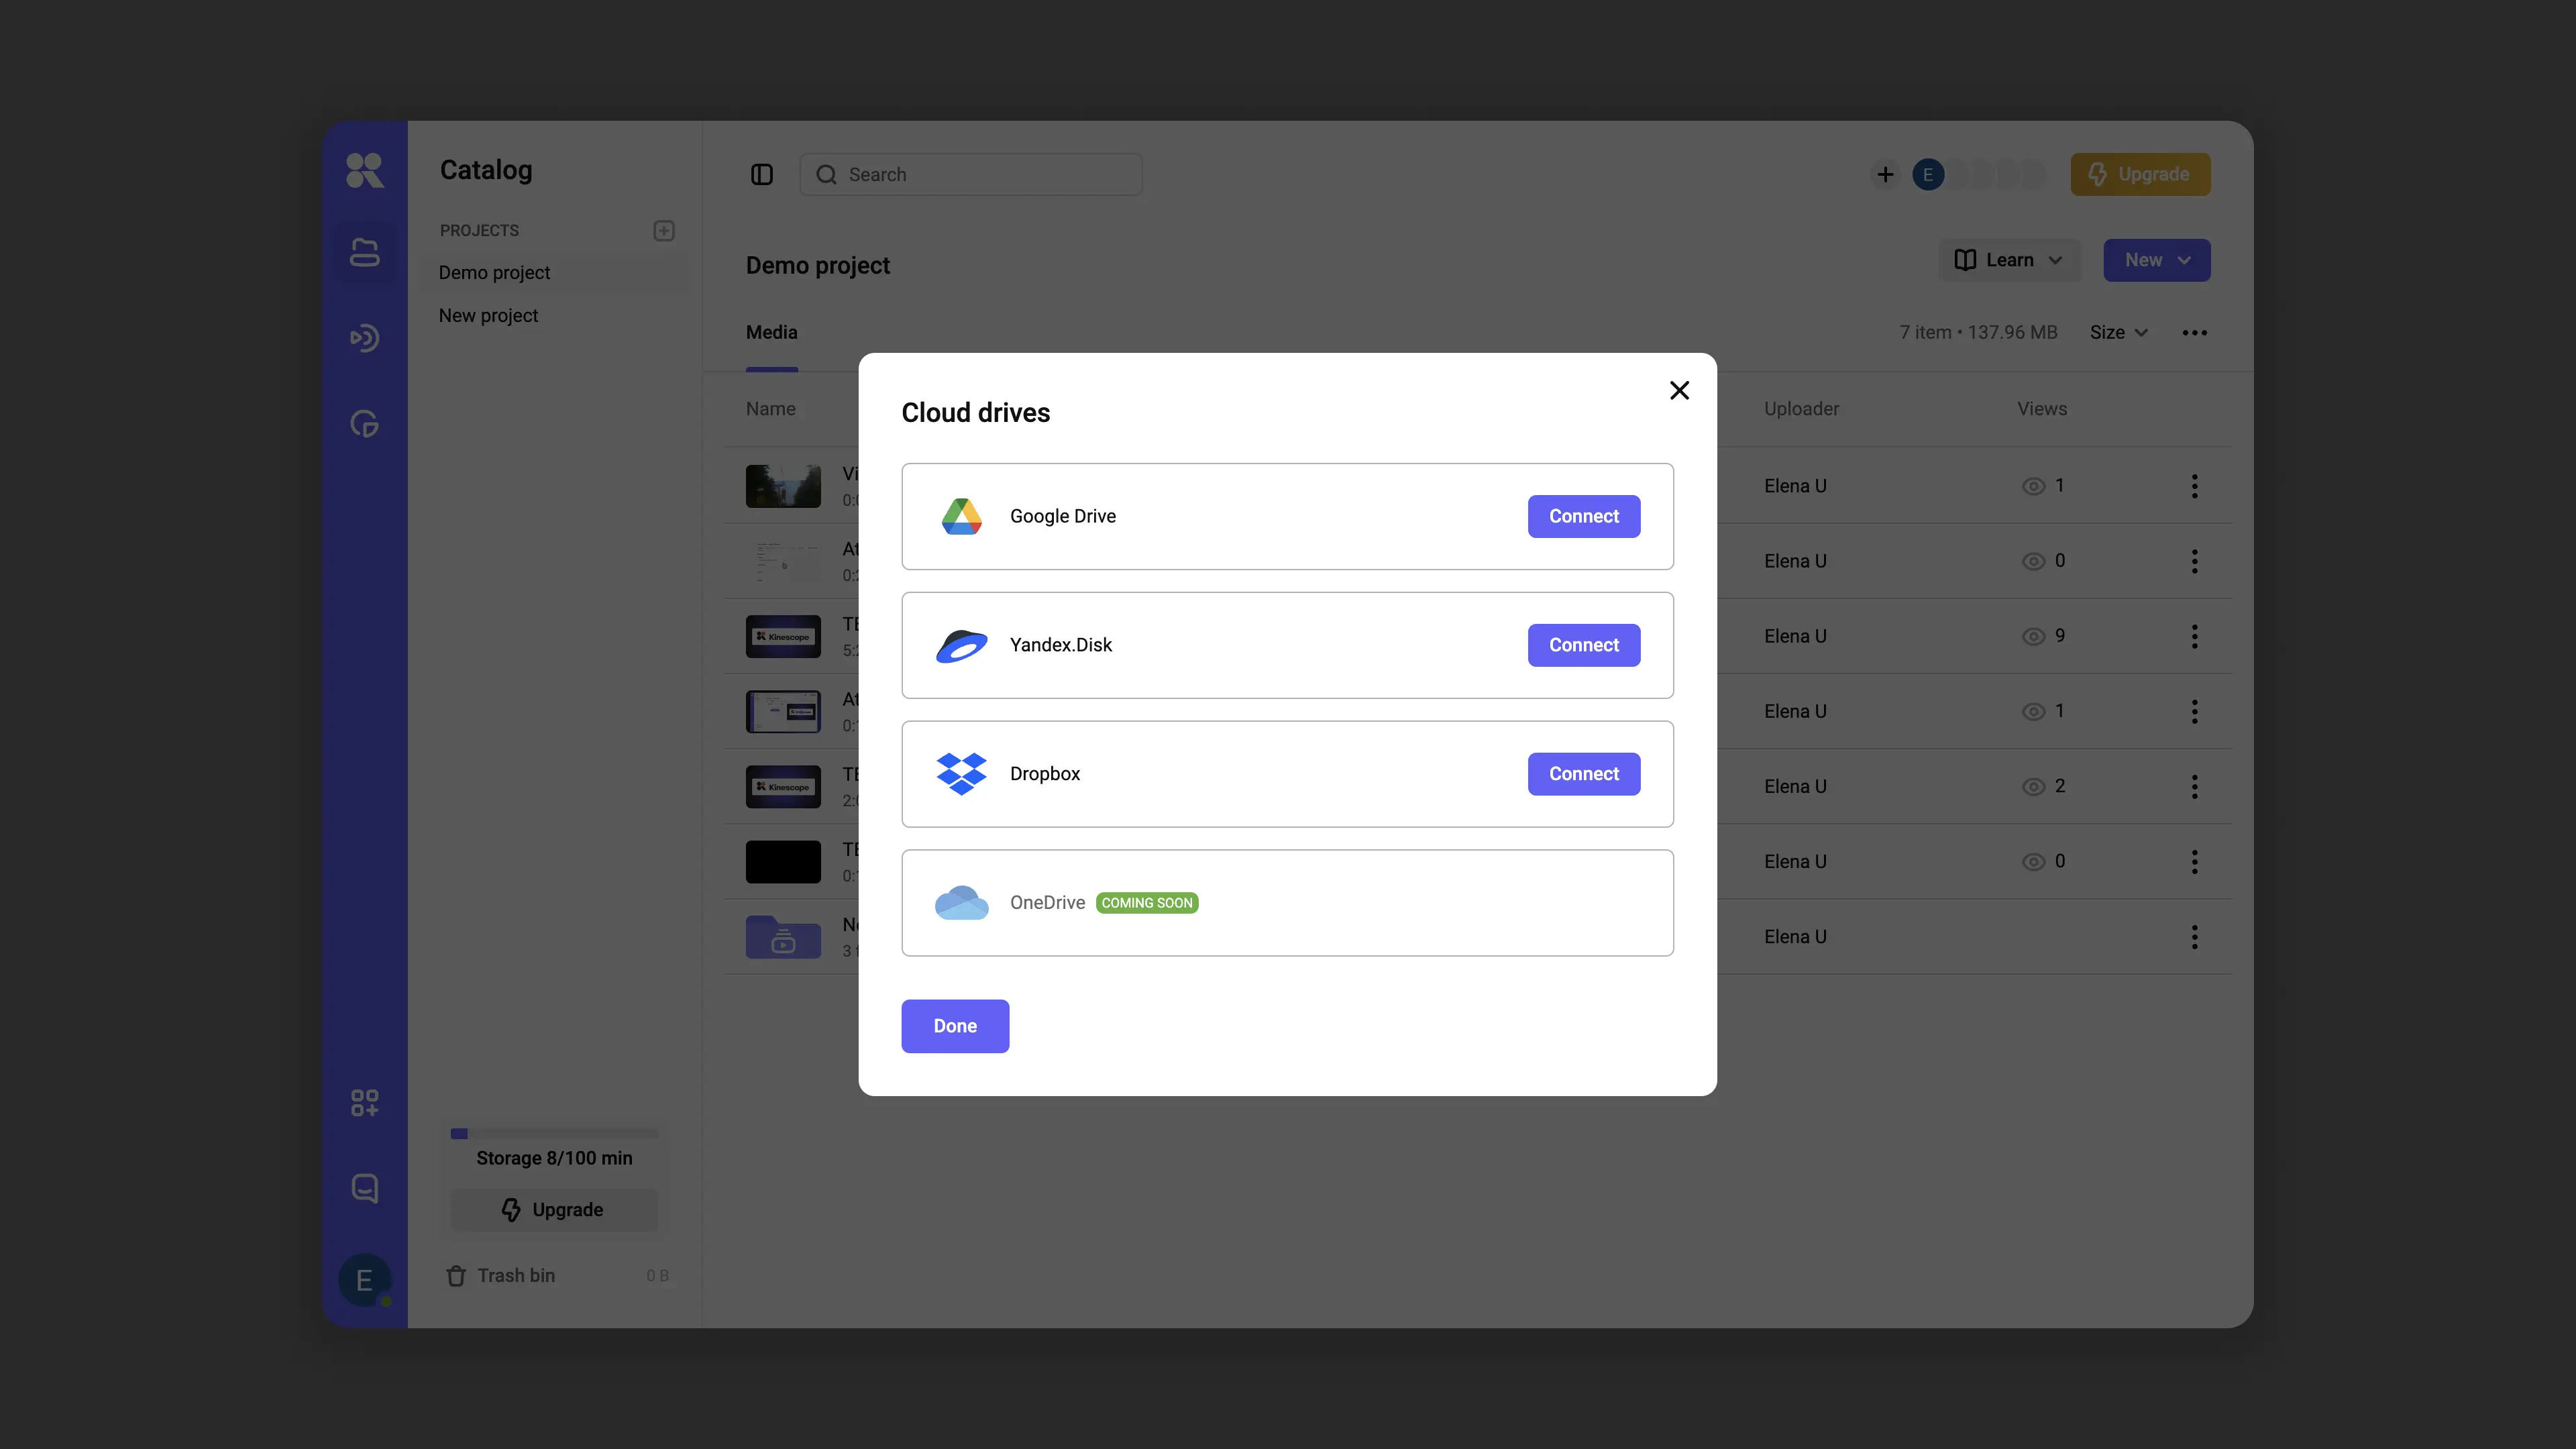
Uploading from cloud storage
Kinescope supports integration with Google Drive and Dropbox. The set of services may vary depending on the user’s geographic location.
- Connect cloud storage via “New” → “Add cloud storage”.
- After authorization, go back to the New menu and select “Upload from” <cloud storage> (e.g., “Upload from Google Drive”).
- In the dialog box, select one or multiple files and click “Upload”. Files will be added to Kinescope directly from cloud storage, not from your computer.
Uploading via API
API methods are available for developers to automate file uploads to Kinescope. Full documentation can be found in the developer guides section .
Supported file formats
Kinescope works with most popular video formats, including MP4, MOV, WMV, AVI, and FLV. Video is displayed with the correct aspect ratio in any format.
Project files such as imovieproject and dvdproj, or other non-video files (such as MP3, JPG, or PNG), are not supported.
Why using a constant frame rate matters
All videos uploaded to Kinescope are automatically converted to constant frame rate (CFR) format. This ensures videos play stably on any device and in the player without issues.
If the source file has a variable frame rate (VFR), problems may occur:
- The video may not process correctly on upload;
- After conversion, audio and video desync sometimes occurs.
To avoid these errors, we recommend setting a constant frame rate in your editing software in advance.
Recommended bitrate settings
The values below are recommendations for videos uploaded to Kinescope. Note that audio bitrate is not related to video resolution.
Recommended bitrate for SDR videos
| Type | Video bitrate, standard frame rate (24, 25, 30) | Video bitrate, high frame rate (60) |
|---|---|---|
| 2160p (4K) | 10–14 Mbps | 20–28 Mbps |
| 1440p (2K) | 8–10 Mbps | 16–20 Mbps |
| 1080p | 6–8 Mbps | 12–16 Mbps |
| 720p | 4 Mbps | 7.5 Mbps |
| 480p | 2.5 Mbps | 4 Mbps |
| 360p | 1 Mbps | 1.5 Mbps |
Recommended audio bitrate
| Type | Audio bitrate |
|---|---|
| Mono | 128 kbps |
| Stereo | 384 kbps |
| 5.1 | 512 kbps |
What’s next?
After uploading files, we recommend:
- Organize your media library — create projects and folders to structure your content
- Media file settings — add a name, description, poster, and tags
- Upload subtitles and chapters — improve accessibility and navigation in video
- Set up content protection — restrict video access by domain or password
- File upload via API — automating uploads for developers
Still have questions? Write to the support chat within the Kinescope interface — our specialists will help!